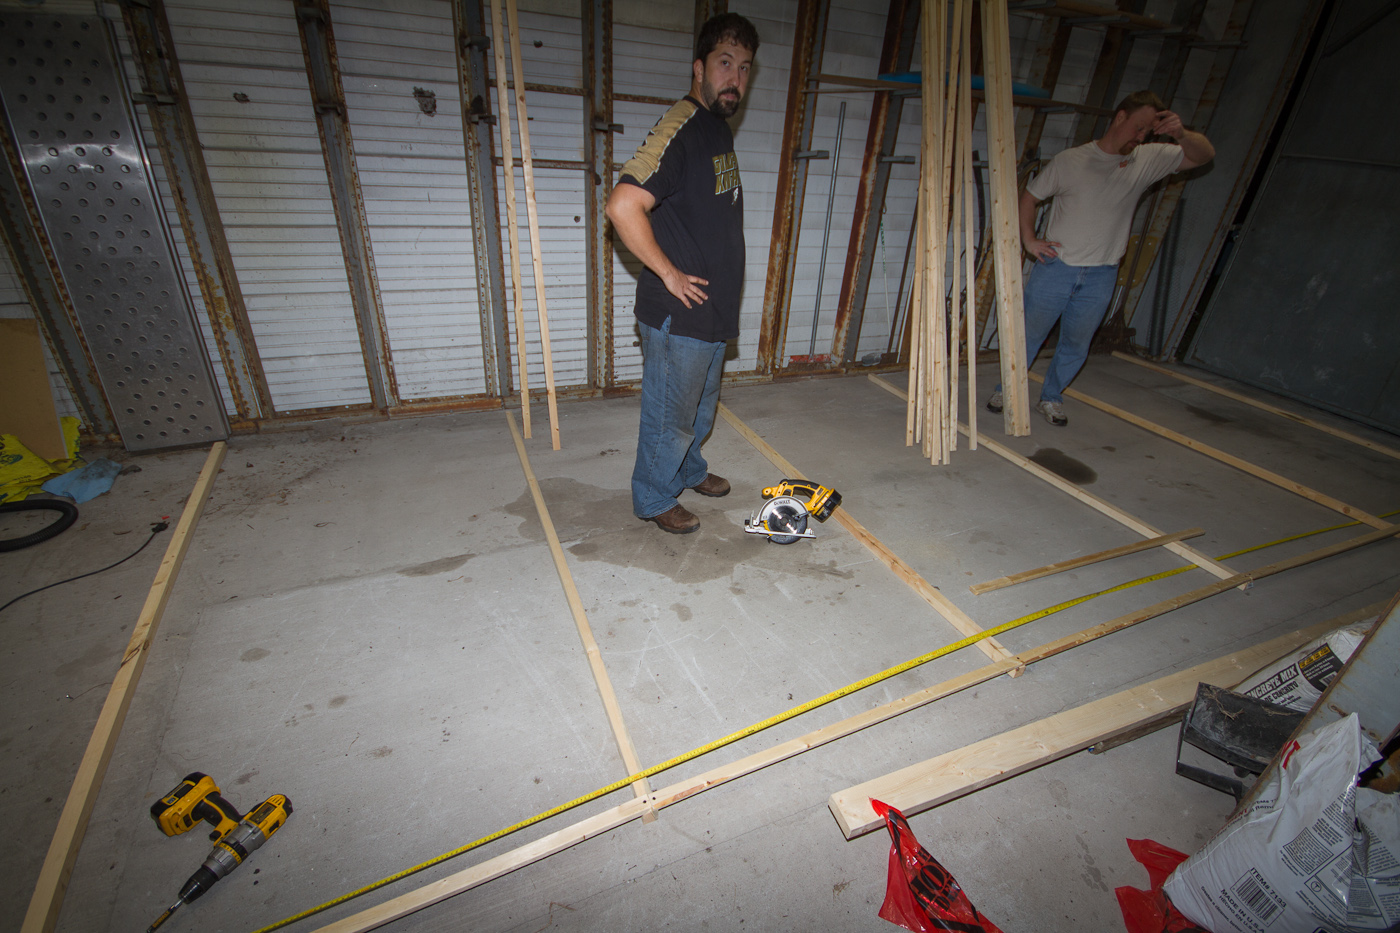
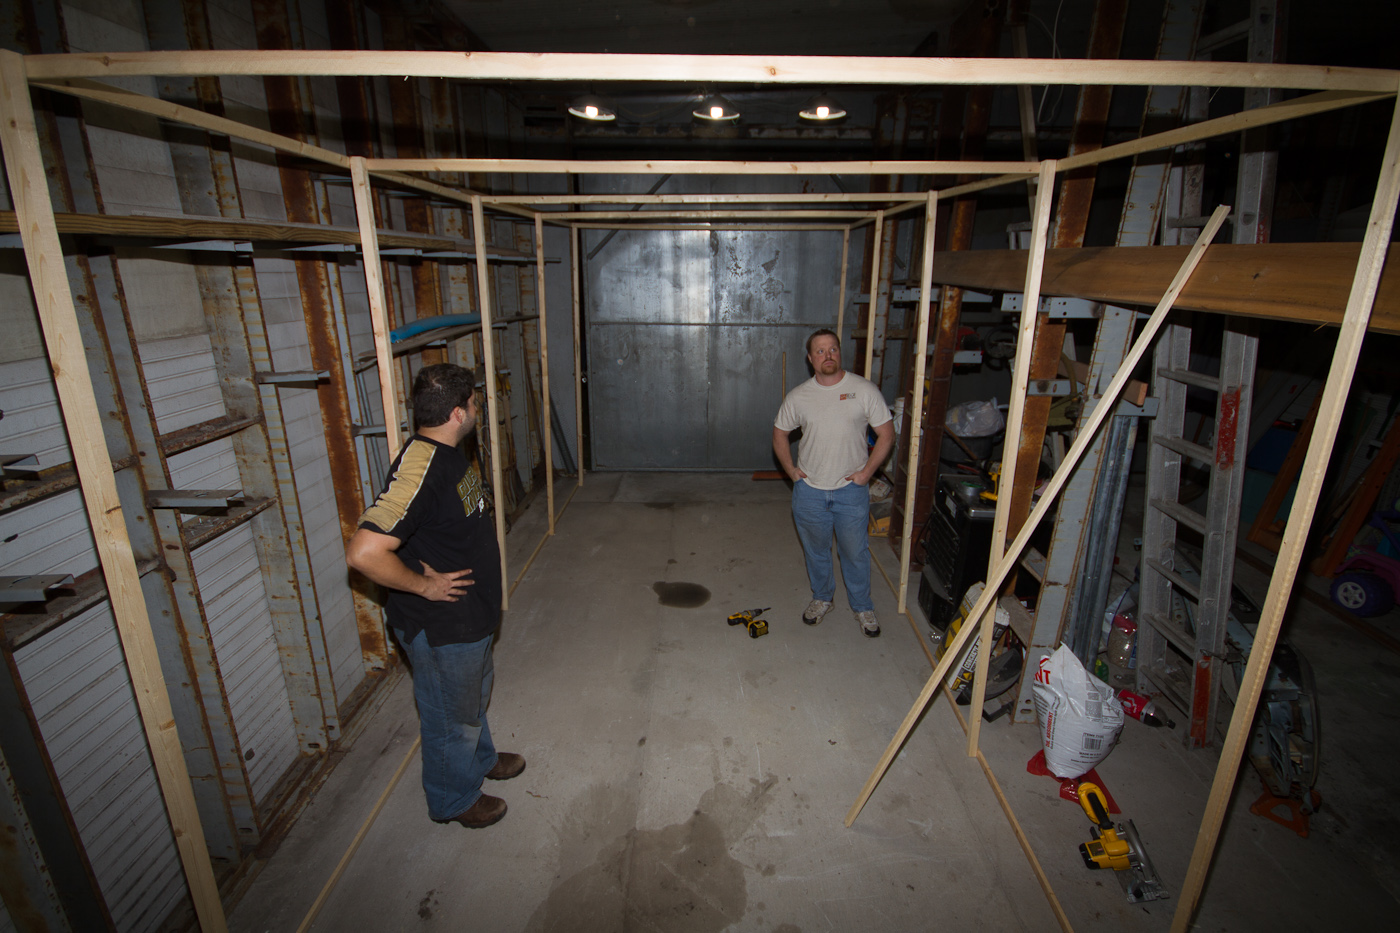
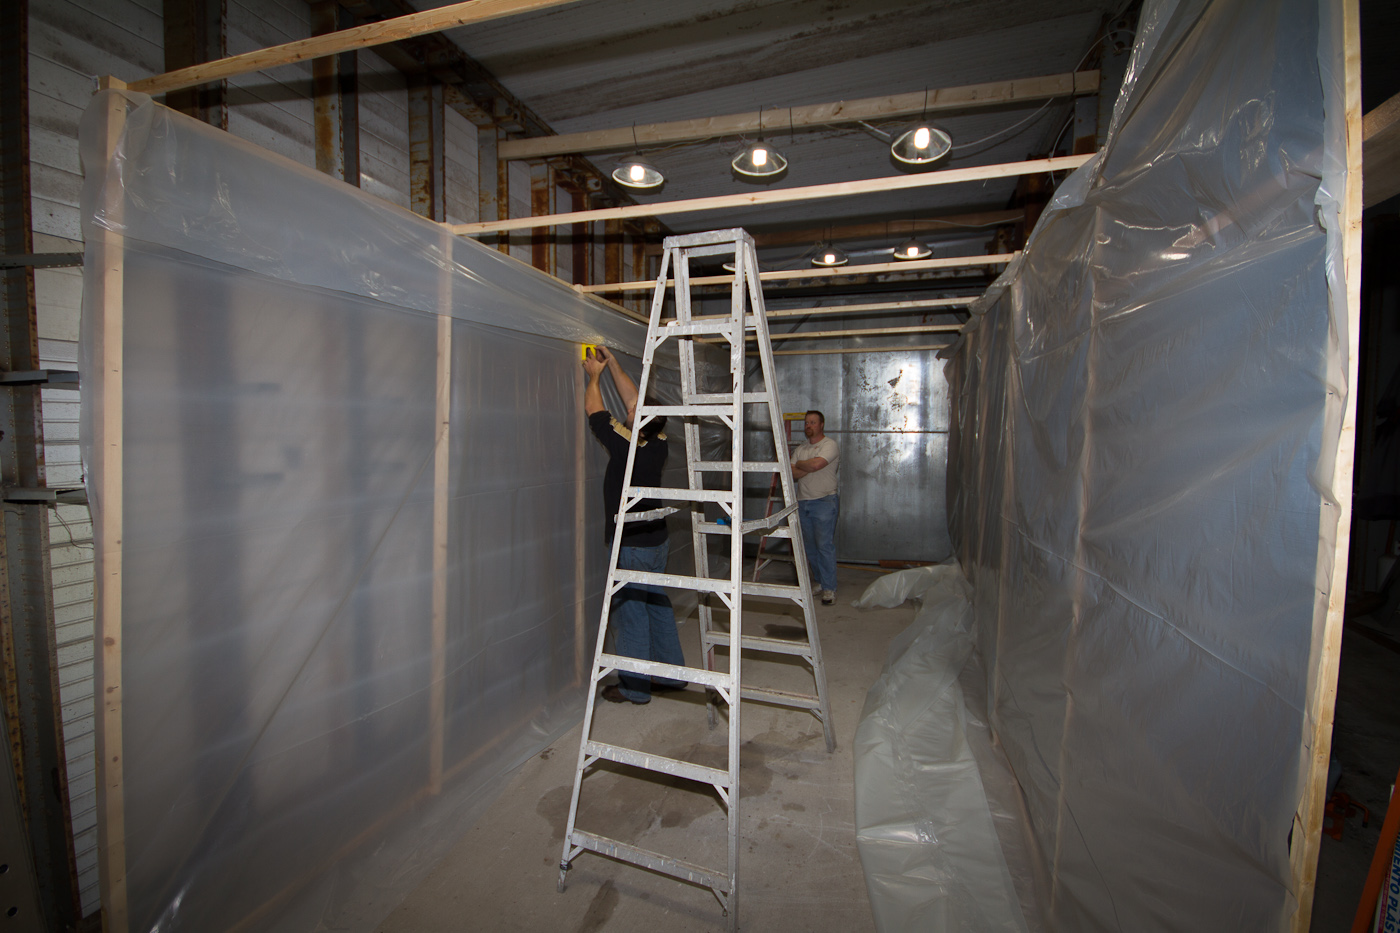
Re: My F150 project

Shitty day (58 and rain from 10am to 8pm, ugh) to even be outside today, but nevertheless I persevered and went to Harbl Freight to pick up the paint gun, sandblaster, new wire brush cups for the angle grinders, and a couple other things.
Gotta make a trip to Tractor Supply tomorrow for some garnet sand to blast the cab rust and a few spots on the frame, since I wasn't going by there today.
Mike finished up the wire-brushing of the frame yesterday and this morning, and when I got there he had the frame up on its side and the front suspension loosened and ready to come off... which is where the today's annotated slide show begins.

http://www.ronman.org/pics/f150/IMG_0158.jpg

http://www.ronman.org/pics/f150/IMG_0160.jpg

http://www.ronman.org/pics/f150/IMG_0162.jpg

The springs are now the rustiest things on the entire truck. Hopefully the rust converter and paint will have them ship-shape and Bristol-fashion in a couple days' time.
http://www.ronman.org/pics/f150/IMG_0166.jpg

http://www.ronman.org/pics/f150/IMG_0167.jpg

http://www.ronman.org/pics/f150/IMG_0168.jpg

Radius arm (I believe that's what that piece is anyway) bushings were shot to hell. The nut has been loosened here and is only finger-tight.
http://www.ronman.org/pics/f150/IMG_0171.jpg

Underside of the engine crossmember
http://www.ronman.org/pics/f150/IMG_0173.jpg

I'd say the carrier bearing was pretty much shot.
http://www.ronman.org/pics/f150/IMG_0175.jpg

http://www.ronman.org/pics/f150/IMG_0176.jpg

Pinion seal is leaking like a sieve. I've got the replacement seal, which has to be installed before we paint the rear end. We pulled the driveshaft shortly after this pic
http://www.ronman.org/pics/f150/IMG_0177.jpg

Shock bushings were pretty much shot, too (noticing a trend here??)
http://www.ronman.org/pics/f150/IMG_0178.jpg

Can I disassemble the spring pack to clean and paint it, and correct the alignment of the overload?
http://www.ronman.org/pics/f150/IMG_0179.jpg

Front suspension removed.
http://www.ronman.org/pics/f150/IMG_0182.jpg

We'll complete the disassembly of these next week, probably.
http://www.ronman.org/pics/f150/IMG_0183.jpg

As it sits right now:
http://www.ronman.org/pics/f150/IMG_0186.jpg

http://www.ronman.org/pics/f150/IMG_0188.jpg

The old exhaust, removed. Muffler will be replaced, and we found the entire front pipe (the one with both cats in it) on Summit for $35. We can't get a replacement pipe bent up for that little, and shipping is free.
http://www.ronman.org/pics/f150/IMG_0191.jpg

Other stuff from today:
Mike ordered the master poly bushing kit and the front exhaust pipe. Body mounts, front suspension, leaf springs are all in the kit, which should be here early next week. He also picked up a new distributor (vacuum advance, since we're simplifying the electronics)
I got the seal for the rear end, a new carrier bearing and ordered seal kit for the steering gearbox. It's leaking pretty badly at the output shaft, and hopefully the seal will take care of it.
We'll finish stripping the brake lines and the couple clips that still exist on the frame tomorrow and get it moved into the garage for application of the Rustoleum Rust Reformer. Hopefully the case of 6 cans I bought will be enough.
I'm amazed at how light the frame is. We'll move it over to the impromptu paint bay with the tractor, but once we get it in front of there we'll just carry it in and use straps to suspend it off the floor so we can shoot it. Our project plan has the frame painted by Sunday, and we're on track to meet that goal.

Official photographer/Team Police Brutality|Speedycop & the Gang
Lackey-mechanic-whatever/NSF Racing
Sycophant/Judge Phil, Jay Lamm, Kim Harmon
Galaxie Driver/not Parnelli Jones

Re: My F150 project

Felis Concolor wrote:

Wow, that truck's in great shape considering its vintage, which takes nothing away from your efforts. Looking good thus far.

I was recently made hip to a product called Fluid Film, which appears to be the sort of DIY rustproofing to use for those who miss the old Ziebart stickers. Without a business account at the local Grainger outlet, I can't pick up the stuff yet as it does have an MSDS sheet and that removes it from the shade tree mechanic realm. It's available in spray cans as well as bulk 1, 5 and 55 gallon containers for sprayer use. And it also can be used with those nice omnidirectional spray heads you pull through the frame rails.

<click> <choke> Whoa. No wonder you don't want to use POR-15; that's a lot steeper than I was bracing myself for. Well, the aforementioned FFilm is priced about 70%(!) less and can be found at a lot of industrial supply dealers. The normal price I've seen is ~$50 for a 1 gallon can, going up to $2500 for the big drums of the stuff.

We have a Grainger downtown, and now my interest is piqued. I'll definitely look into this now and ask some of my Texas oil industry friends if they know anything about it.
I really shouldn't go to Grainger, though, because I KNOW I'll wind up spending way too much damn money. big_smile

Official photographer/Team Police Brutality|Speedycop & the Gang
Lackey-mechanic-whatever/NSF Racing
Sycophant/Judge Phil, Jay Lamm, Kim Harmon
Galaxie Driver/not Parnelli Jones

Re: My F150 project

Past couple days have been busy. We've got the motor moved over to a work area and ordered a new master gasket kit for it (which will be here tomorrow) and we started digging all the brackets and bolts we could find out of half-rotten paper bags and 5-gallon buckets. We refinished the flywheel and gave the clutch a good once-over, and it's fine, as expected, since it only had like 7K on it before the truck got parked. This is some of what has gone down in the last week or so:

Trying to determine accessory placement. Haynes proved completely useless for this, because it only had a picture of the V8 FEAD. We did eventually figure it out.

http://www.ronman.org/pics/f150/IMG_0192.jpg

The air pump (which is completely seized) is going bye-bye, but we were trying to figure out what the 10 or so brackets actually support.

http://www.ronman.org/pics/f150/IMG_0202.jpg

http://www.ronman.org/pics/f150/IMG_0203.jpg

Meanwhile, outside, the frame and front suspension was drying after application of Rustoleum Rust Reformer. About the worst thing I can say about the product is that it runs like a Kenyan, as you'll see in the frame pics...

http://www.ronman.org/pics/f150/IMG_0215.jpg

It's not foggy, that's touchup work. The flash really makes it pop...

http://www.ronman.org/pics/f150/IMG_0217.jpg

Like I said, runny...

http://www.ronman.org/pics/f150/IMG_0219.jpg

Especially on the vertical surfaces - and Tim's "I've never spray painted before" technique needed some correction.

http://www.ronman.org/pics/f150/IMG_0220.jpg

All the brackets sorted out and wire-brushed; alternator and water pump are being replaced, air pump is being deleted (along with EGR) and the AC compressor is being rebuilt (one of the big advantages of having a Ford master tech as a next-door neighbor)

http://www.ronman.org/pics/f150/IMG_0229.jpg

Me after spending an hour and a half sand-blasting all the parts, hosing them down to remove any leftover sand in preparation for paint.

http://www.ronman.org/pics/f150/IMG_0257.jpg

Beautiful plumage.

http://www.ronman.org/pics/f150/IMG_0258.jpg

I really, really want a blasting cabinet now.

http://www.ronman.org/pics/f150/IMG_0259.jpg

Big hunk of cast iron after a liter of #80 blasting sand and about 10 minutes.

http://www.ronman.org/pics/f150/IMG_0260.jpg

Oooh, satiny black.

http://www.ronman.org/pics/f150/IMG_0263.jpg

Another advantage (?) of having a Ford master tech as a neighbor: he's an enabler. Tom explained that the steering gear was super easy to re-seal, so with his assurance that "a monkey could do it" I ordered the seal kit and we yanked it apart. N.B.: this box was leaking at the output shaft, not the input. This makes it a much easier job, as there are no little ball bearings to go flying...

http://www.ronman.org/pics/f150/IMG_0231.jpg

Before putting it back together. It's actually remarkably simple in this end of the box; all the complicated hydraulic-y bits are in the input side.

http://www.ronman.org/pics/f150/IMG_0233.jpg

Cleaning it up in preparation...

http://www.ronman.org/pics/f150/IMG_0235.jpg

... for shiny. This is also the Rustoleum Rust Reformer. I'll explain why below...

http://www.ronman.org/pics/f150/IMG_0253.jpg

After we got all that done, we decided we should get started on our home-made quasi-downdraft paint booth, since we had an extra set of hands, err, on hand.

http://www.ronman.org/pics/f150/IMG_0237.jpg

Basic frame (1x2 and 2x2 attached to outriggers on the walls)

http://www.ronman.org/pics/f150/IMG_0238.jpg

4mil plastic sheeting going up on the first side...

http://www.ronman.org/pics/f150/IMG_0240.jpg

Second side...

http://www.ronman.org/pics/f150/IMG_0241.jpg

Third side (aka the top...)

http://www.ronman.org/pics/f150/IMG_0242.jpg

http://www.ronman.org/pics/f150/IMG_0244.jpg

Tim demonstrating his T. Rex arms...

http://www.ronman.org/pics/f150/IMG_0245.jpg

The wall plastic gets overlapped by the ceiling plastic, and everything will be taped up once we get a roll of duct tape that actually sticks to something (besides itself)

http://www.ronman.org/pics/f150/IMG_0248.jpg

Floor will be done just before we're ready to paint, so we don't track dust in and out; ends will be done at the same time for ease of access.

http://www.ronman.org/pics/f150/IMG_0252.jpg

I'm heading over today to finish-sand and shoot the frame. We had to wait a while for the hardener to get shipped, so we couldn't do it this weekend like we planned, which puts us now something like 4 days behind schedule. We've made some progress elsewhere though, so we're ahead on one or two other items. Which is good.

Anyway, this Rustoleum Rust Reformer stuff. I should send them a letter and a plea for some free product, because I really love the shit. You have to be pretty careful when spraying it because it does like to run, but once it has a day or so to dry in the sun, it's a seriously durable finish. Take the front suspension arms, for example. We used two MAPP gas torches to heat them up to free the lower ball joints, and two sledgehammers to beat the sides senseless to try to get them free while the press held them tight. This went on for the better part of an hour, and the finish still looks pretty good. We'll clean it up and hit it once more anyway, but it *really* doesn't need it. I'm 100% sold on this product. From what I understand it's not UV stable, though, so we're going to do the frame and suspension with enamel just to be safe. Underhood, though, I'm gonna leave the raw finish.

Official photographer/Team Police Brutality|Speedycop & the Gang
Lackey-mechanic-whatever/NSF Racing
Sycophant/Judge Phil, Jay Lamm, Kim Harmon
Galaxie Driver/not Parnelli Jones

Re: My F150 project

Yay updates!  Are you going to put any sort of ventilation in the paint booth?  I am interested in doing the same thing in my garage some day and want to contemplate the fresh air angle.

Quad4 CRX - Wartburg 311 - Civic Wagovan - Parnelli Jones Galaxie - LS400 - Lancia MR2 - Boat - Sentra - 56 Ford Victoria
Known Associate of 3pedal Mafia, Speedycop, and the Russians.  Maybe even NSF.

Re: My F150 project

ronman wrote:

Anyway, this Rustoleum Rust Reformer stuff. I should send them a letter and a plea for some free product, because I really love the shit. You have to be pretty careful when spraying it because it does like to run, but once it has a day or so to dry in the sun, it's a seriously durable finish. Take the front suspension arms, for example. We used two MAPP gas torches to heat them up to free the lower ball joints, and two sledgehammers to beat the sides senseless to try to get them free while the press held them tight. This went on for the better part of an hour, and the finish still looks pretty good. We'll clean it up and hit it once more anyway, but it *really* doesn't need it. I'm 100% sold on this product. From what I understand it's not UV stable, though, so we're going to do the frame and suspension with enamel just to be safe. Underhood, though, I'm gonna leave the raw finish.

Isn't it awesome stuff?!?

It is a little runny now that you mention it, but I just adjusted my spray technique with faster passes for a lighter coat. I cut in the corners and all the annoying details first, then do a final quick pass at a slightly greater distance.

Still get occasional drips but it's fine for something like frames, no worse than the factory would have done.

I wonder if leaving the part raw might eventually show some rust bleed-through in your area. A few spots I never topcoated did start to get some specks on the surface after a few years, but that might come from too thin of a Reformer coat as opposed to actually being exposed. We don't have quite the salt or rust issues here in Ca (except by the ocean) so my long-term results here may skewer yours there. Just a heads up.

The project is lookin' REALLY good! Wanna do mine next?

"Real ZomBees prefer Bacon"
IOE(x2) MGB/SAAB 96, Judge's Choice, Class C Win, & 2011 Hooniverse Car of the Year!
MRolla, Stick Figure/Animal House, Free Range MR2, SAAB Sonett, "The Death Flip"
2008 Exoskeleton Jag Fiasco, Concours d Lemons - Rue Britannia, worse British car.

Re: My F150 project

With regards to poly bushings...

Grease everything liberally with that translucent grease that comes with the bushings, and it won't squeak. My MR2's rear suspension is all poly and it never squeaked; Same with my Camaro's rear leafs, even though the conventional wisdom is that using poly on leaf spring eye mounts is a big no-no and an invitation for weird binds and loud squeaks. Bollocks.

If your kit didn't come with grease, or you don't have enough, order more - IIRC Summit sells energy suspension grease by itself in those little tubes. I'd use it even on body bushings' mating surfaces. Can't ever have too much lube.

K Car Stalker

Re: My F150 project

dculberson wrote:

Yay updates!  Are you going to put any sort of ventilation in the paint booth?  I am interested in doing the same thing in my garage some day and want to contemplate the fresh air angle.

We've got a couple of big 220V squirrel cage fans out of industrial air handlers that we're gonna rig up with some creative ducting to create a forced downdraft. The creative part comes in restricting the flow so we're not moving so much air it affects the paint spray...hopefully it works, because if we're successful we're gonna redo my Ramcharger, then put a new bedside on Mike's Duramax Chevy, and my brother in law wants to repaint the bed on his Dakota.

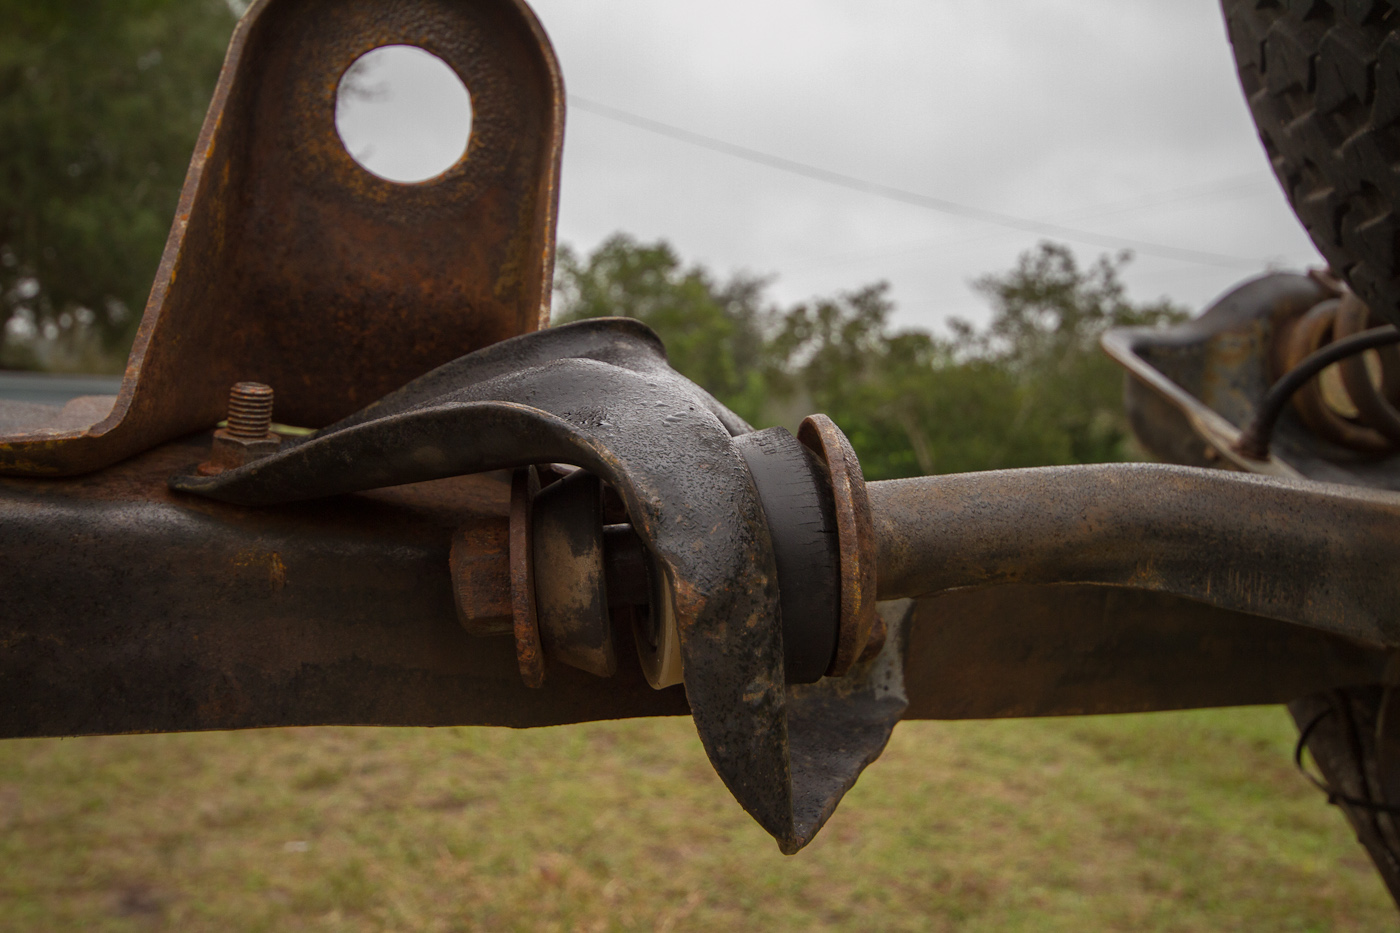
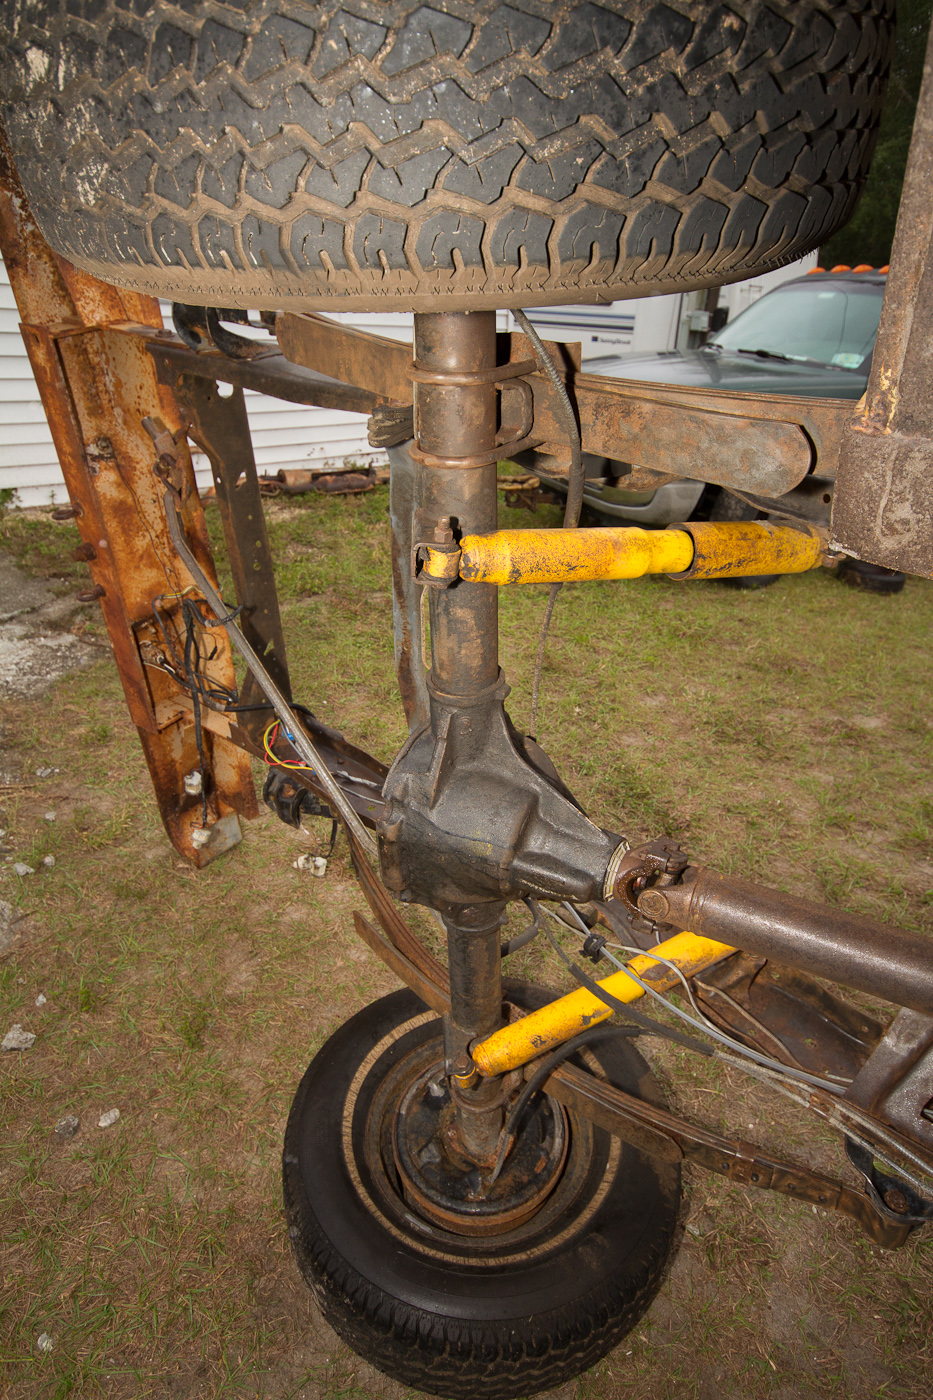
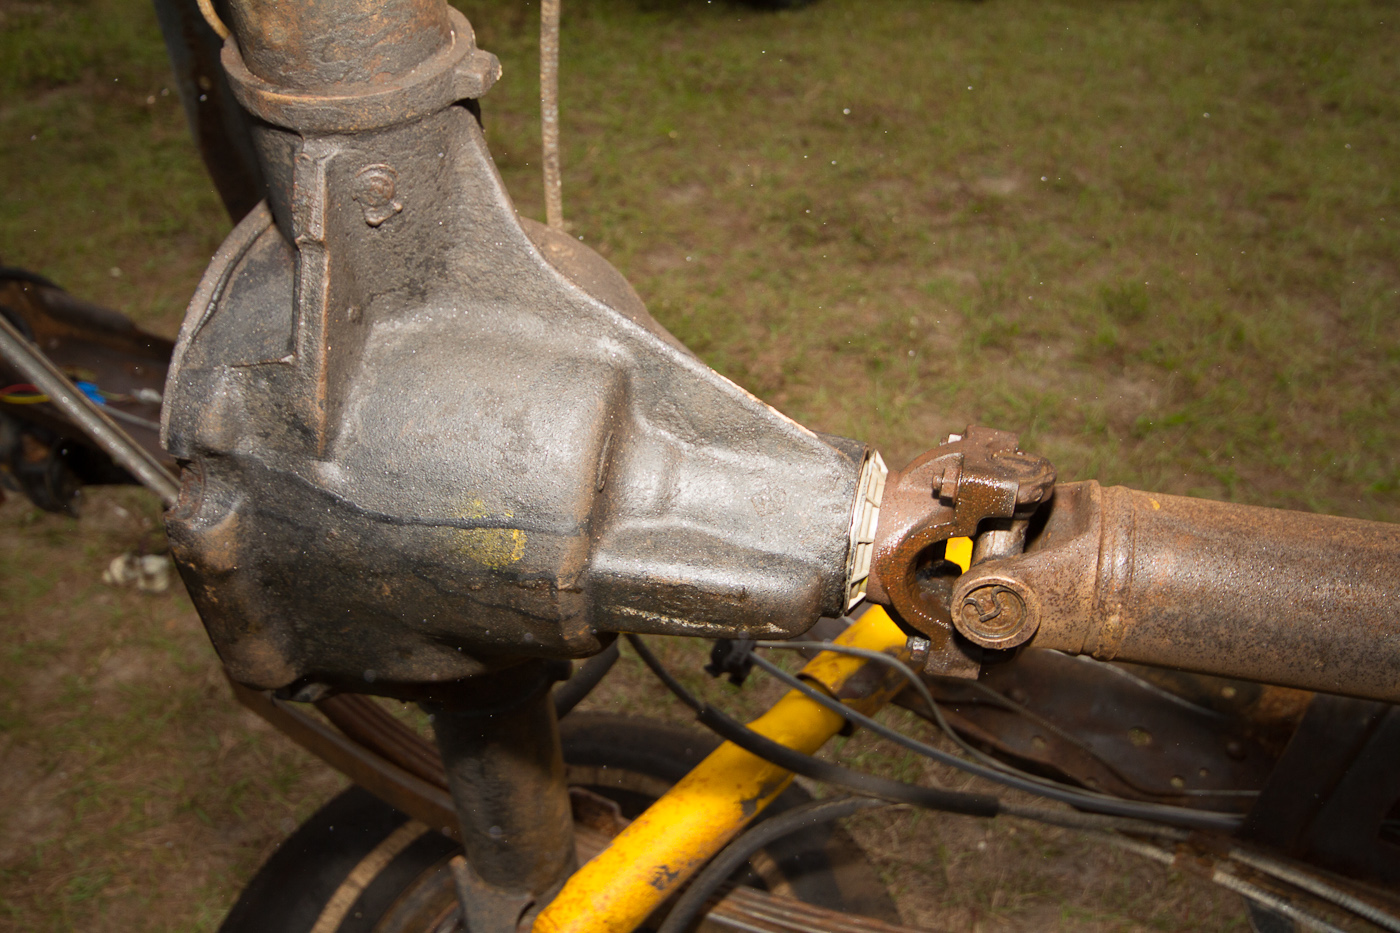
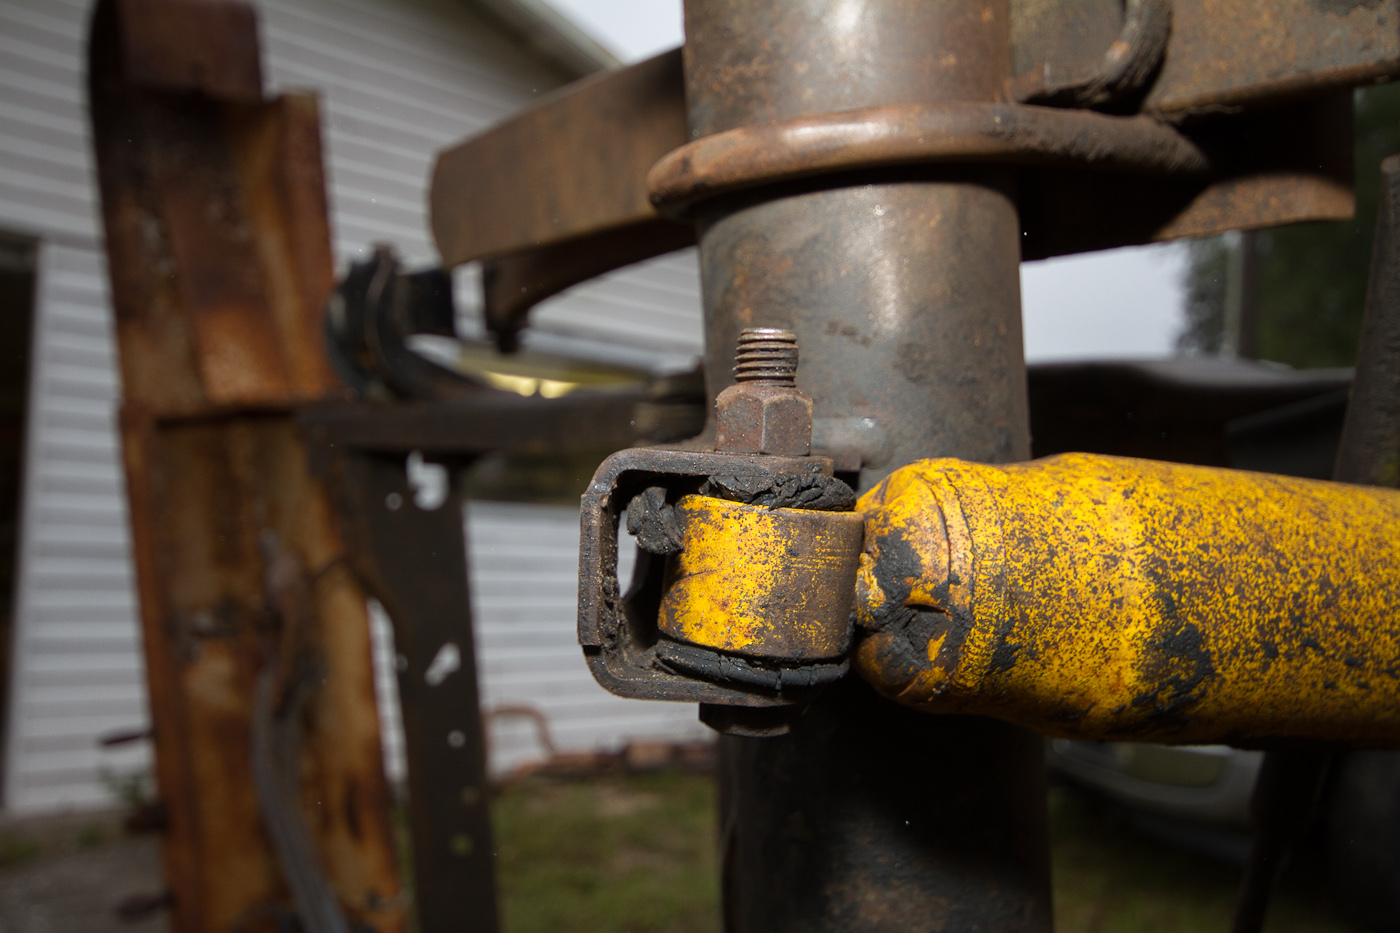
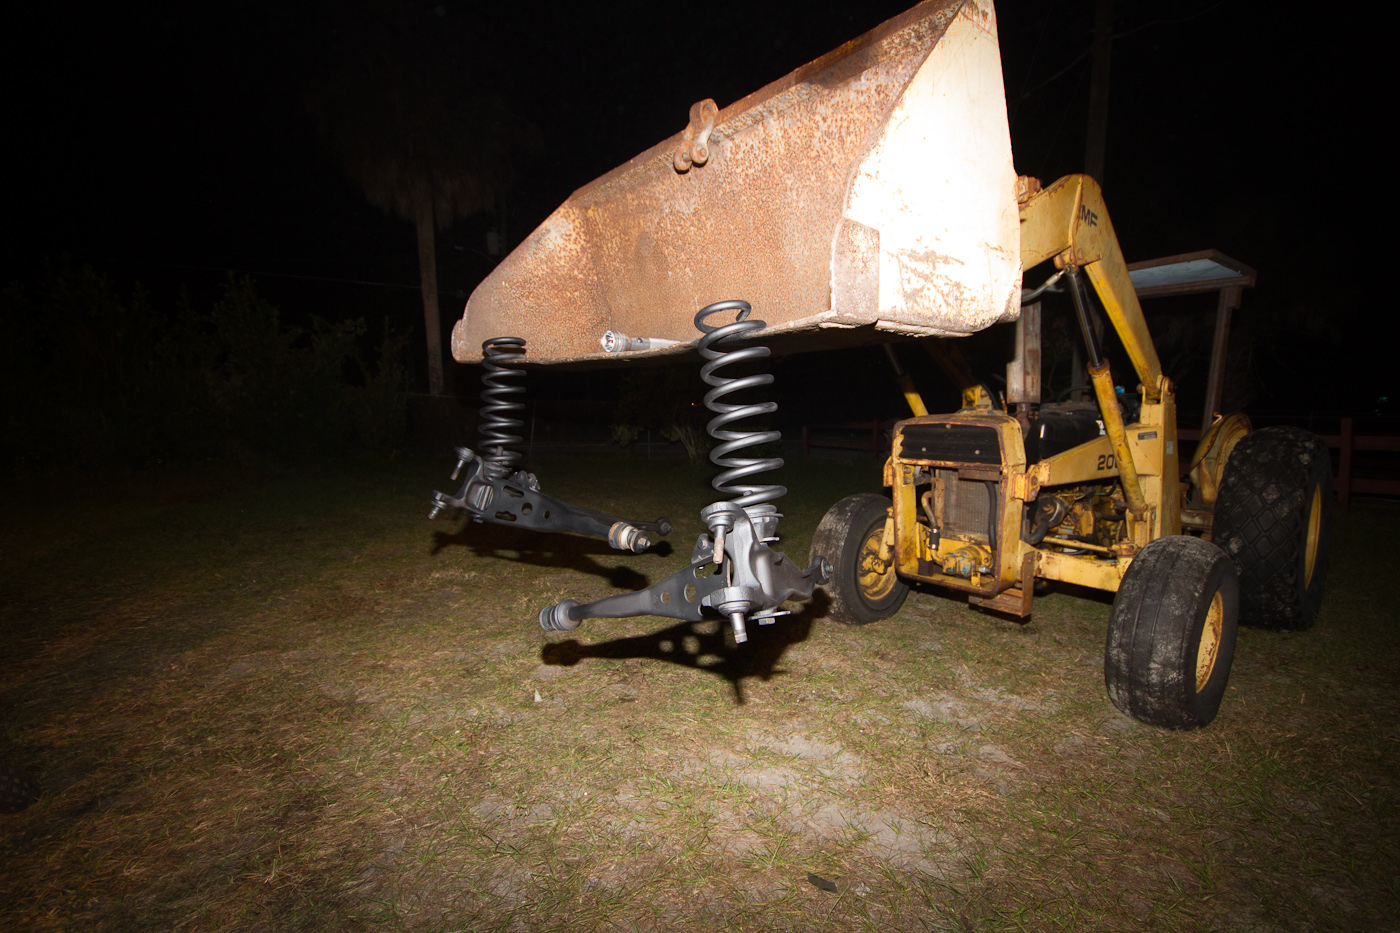
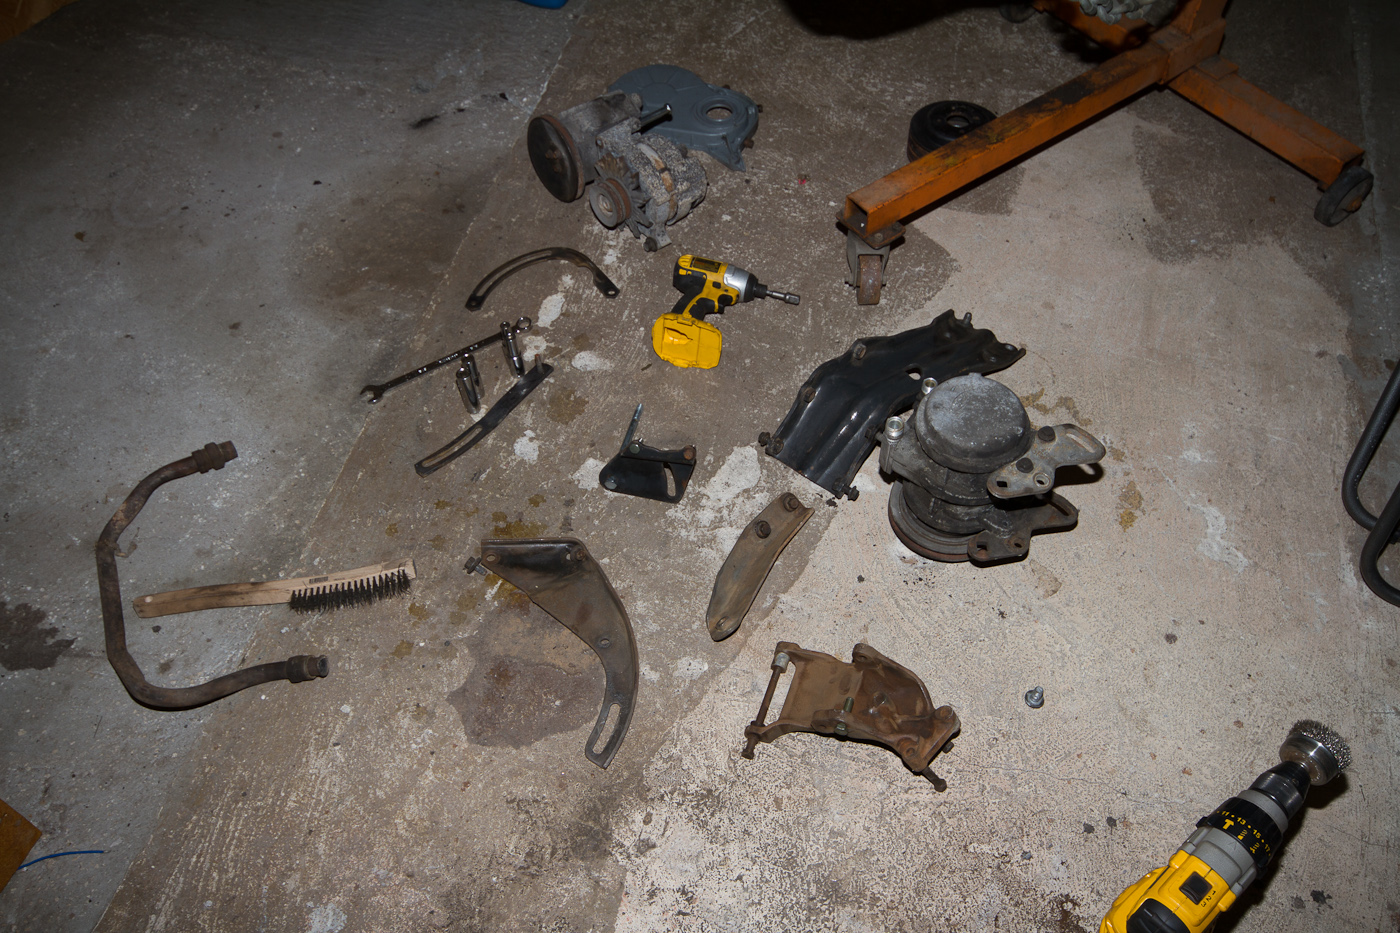
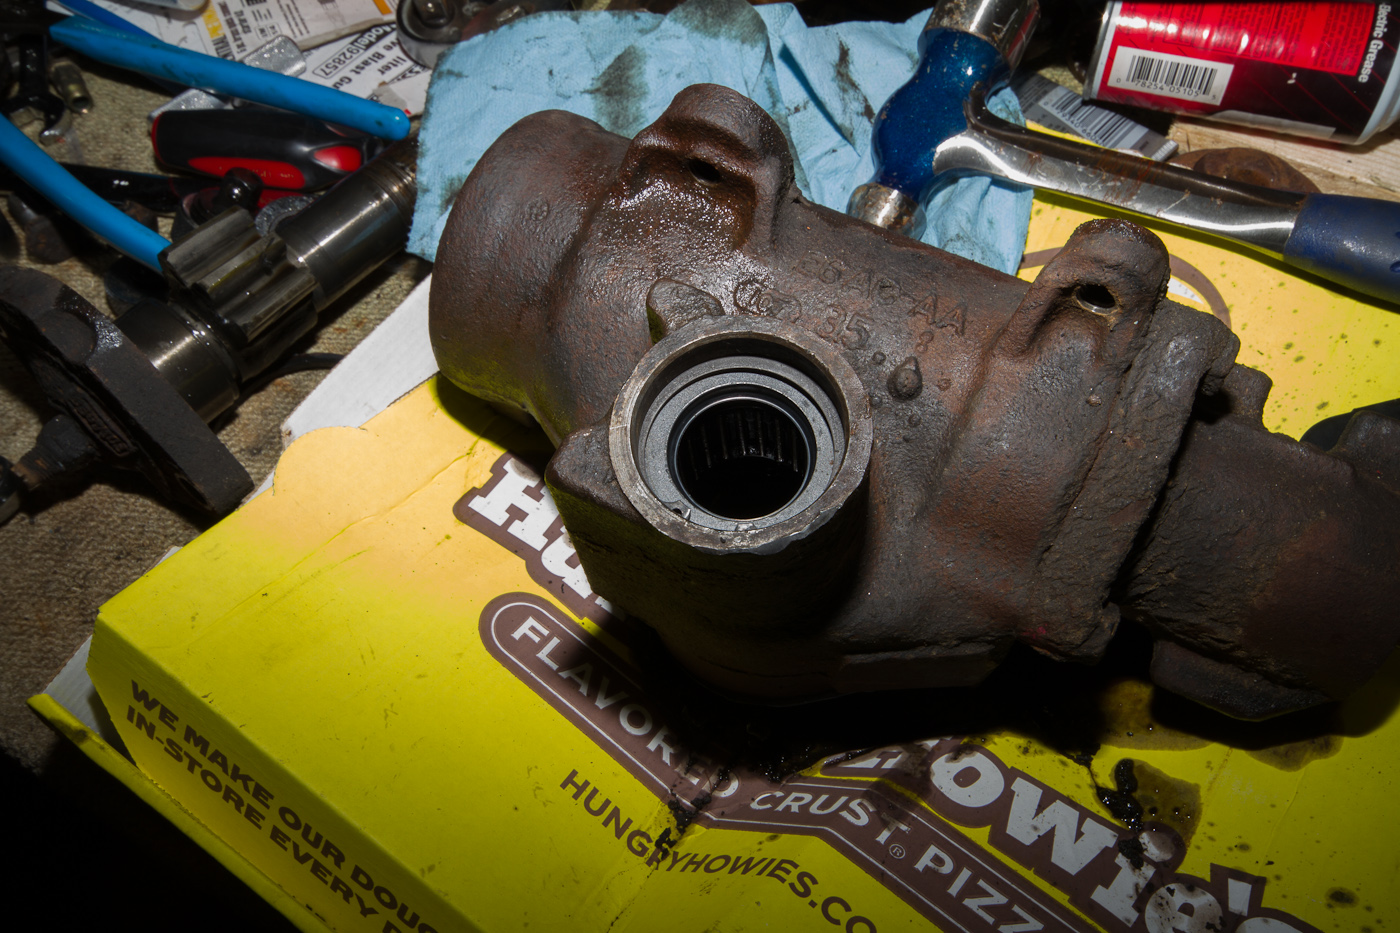
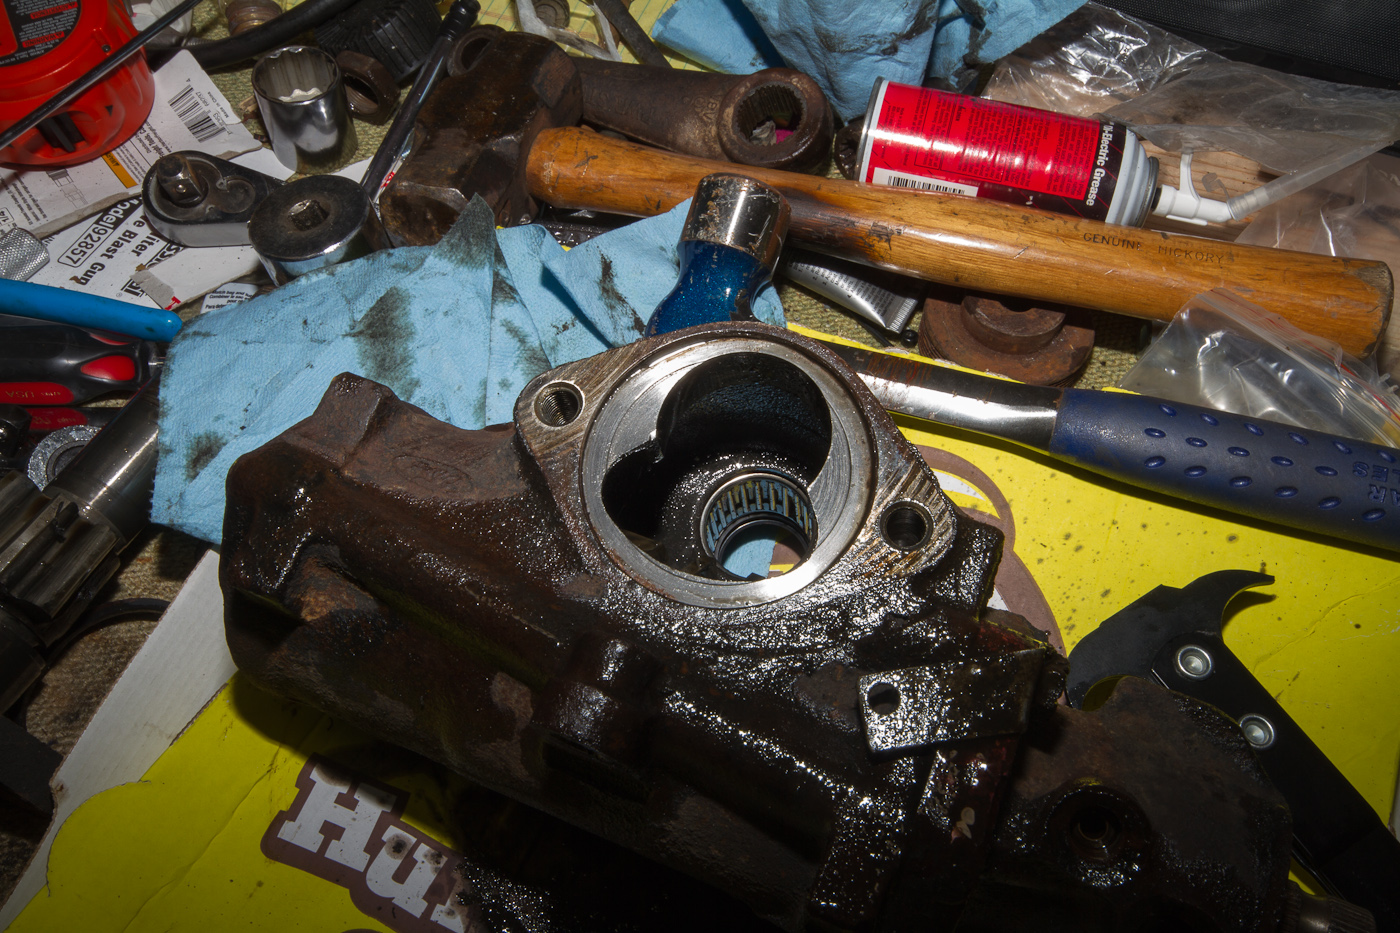
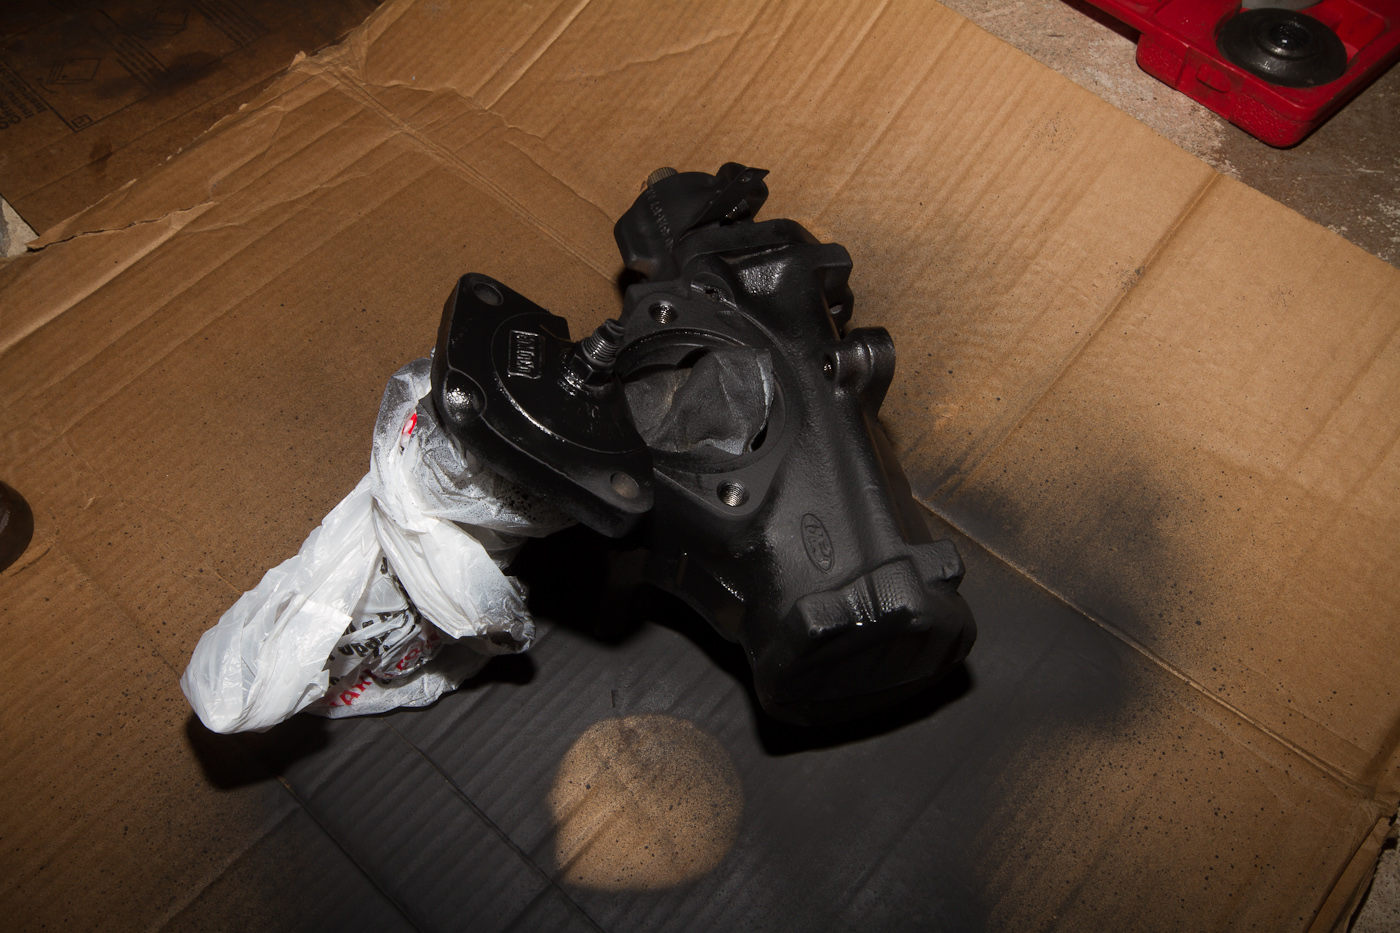
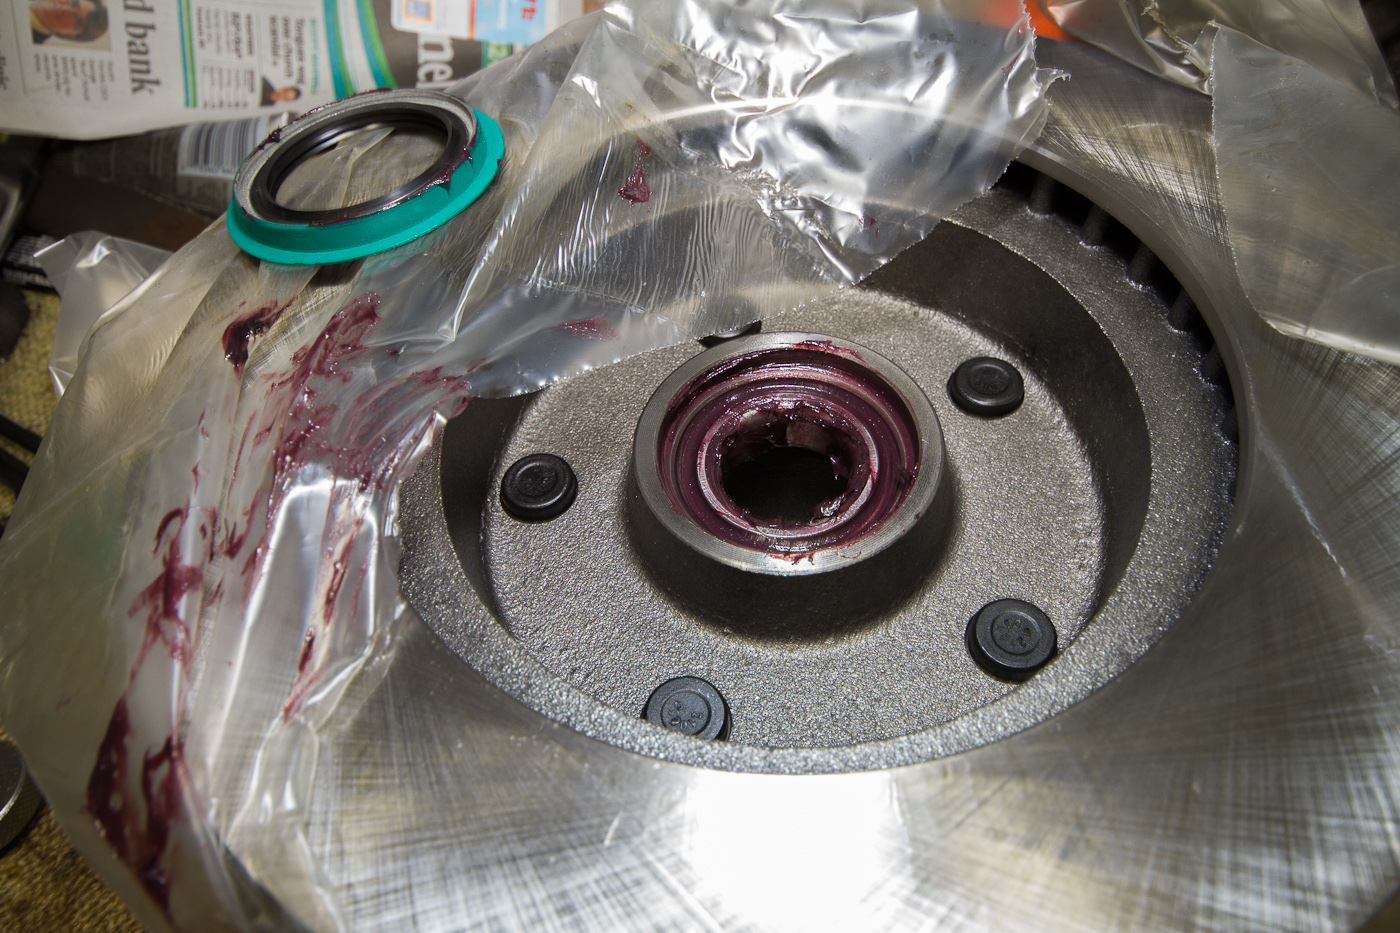
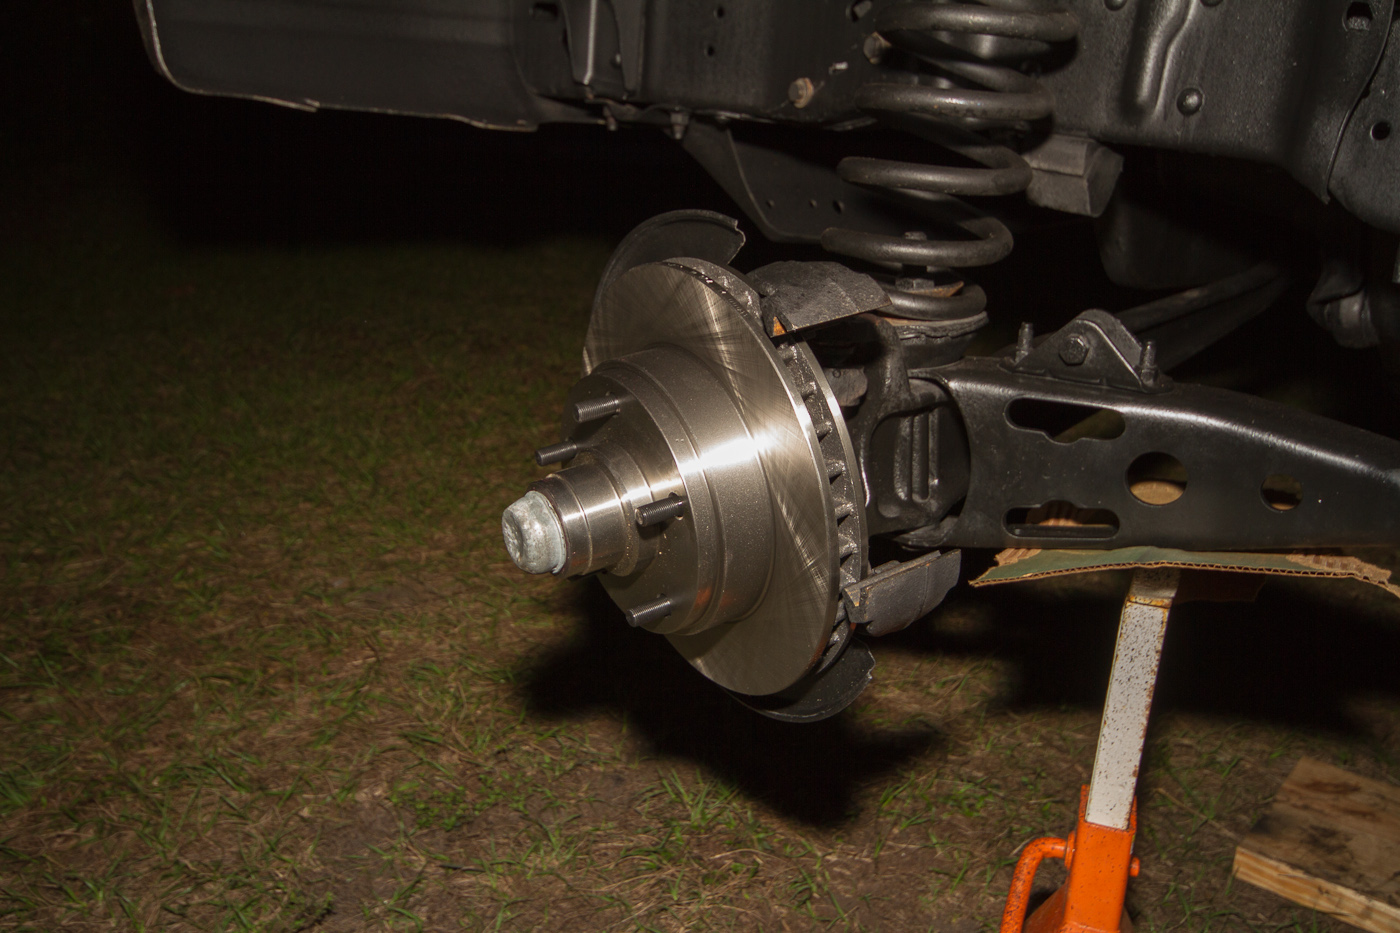
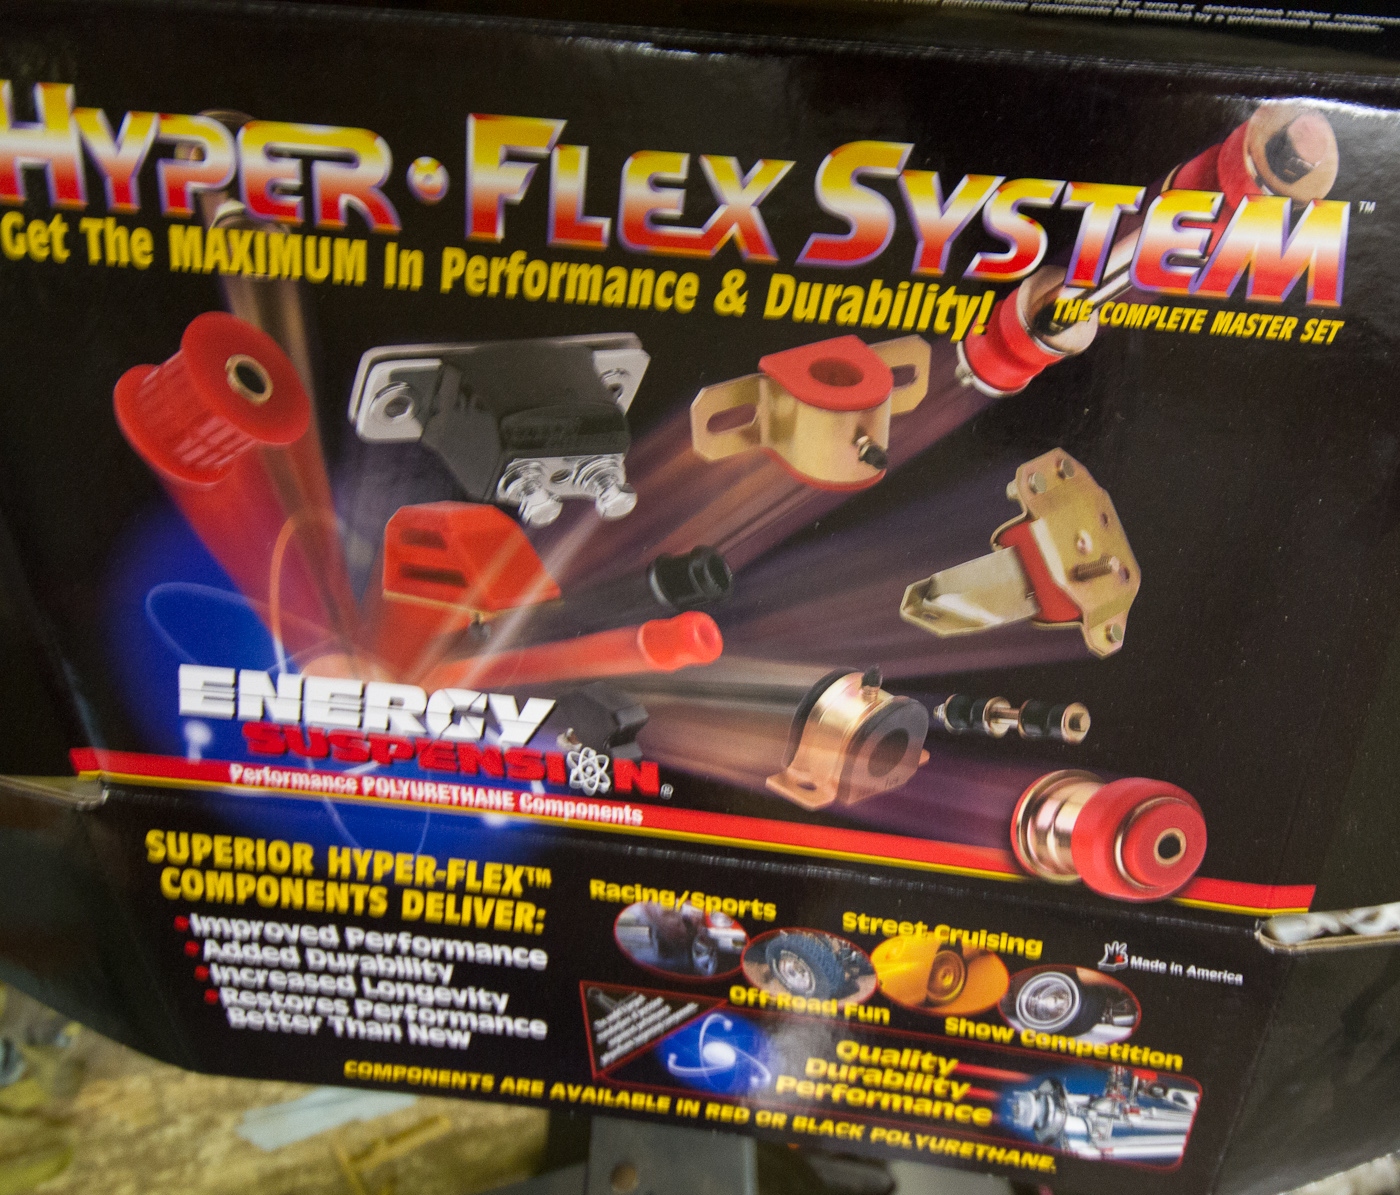
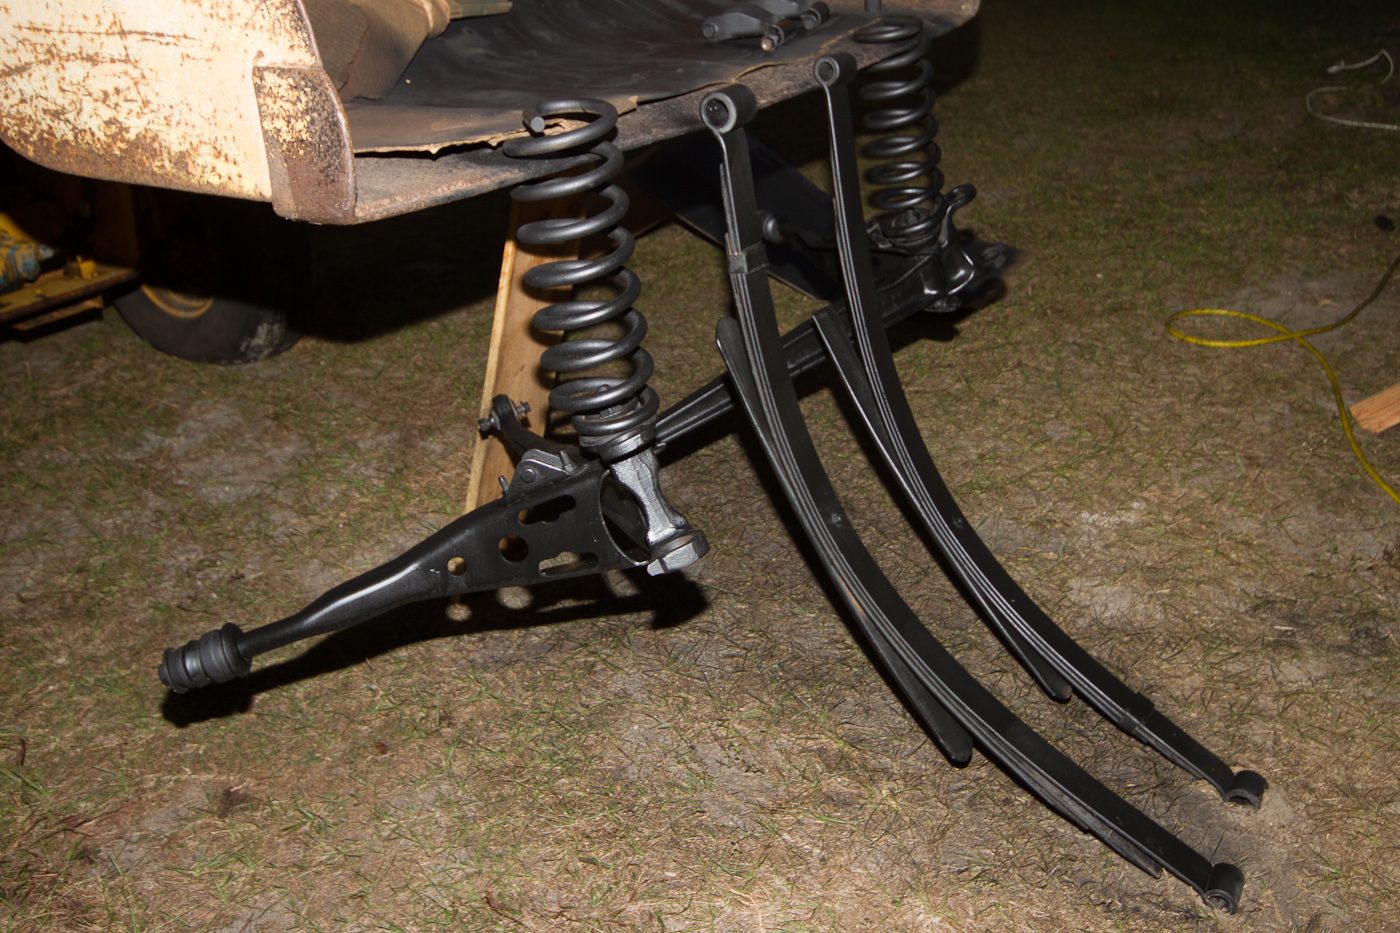
Alex, this Energy Suspension kit didn't come with any grease, but Mike is an Amsoil dealer so we've got multiple tubes of their super heavy duty grease (it's made for lubing the hitch plate on tractor-trailers) and I think it'll work just fine in this application. We're definitely gonna grease the hell out of every single point we can think of. cool

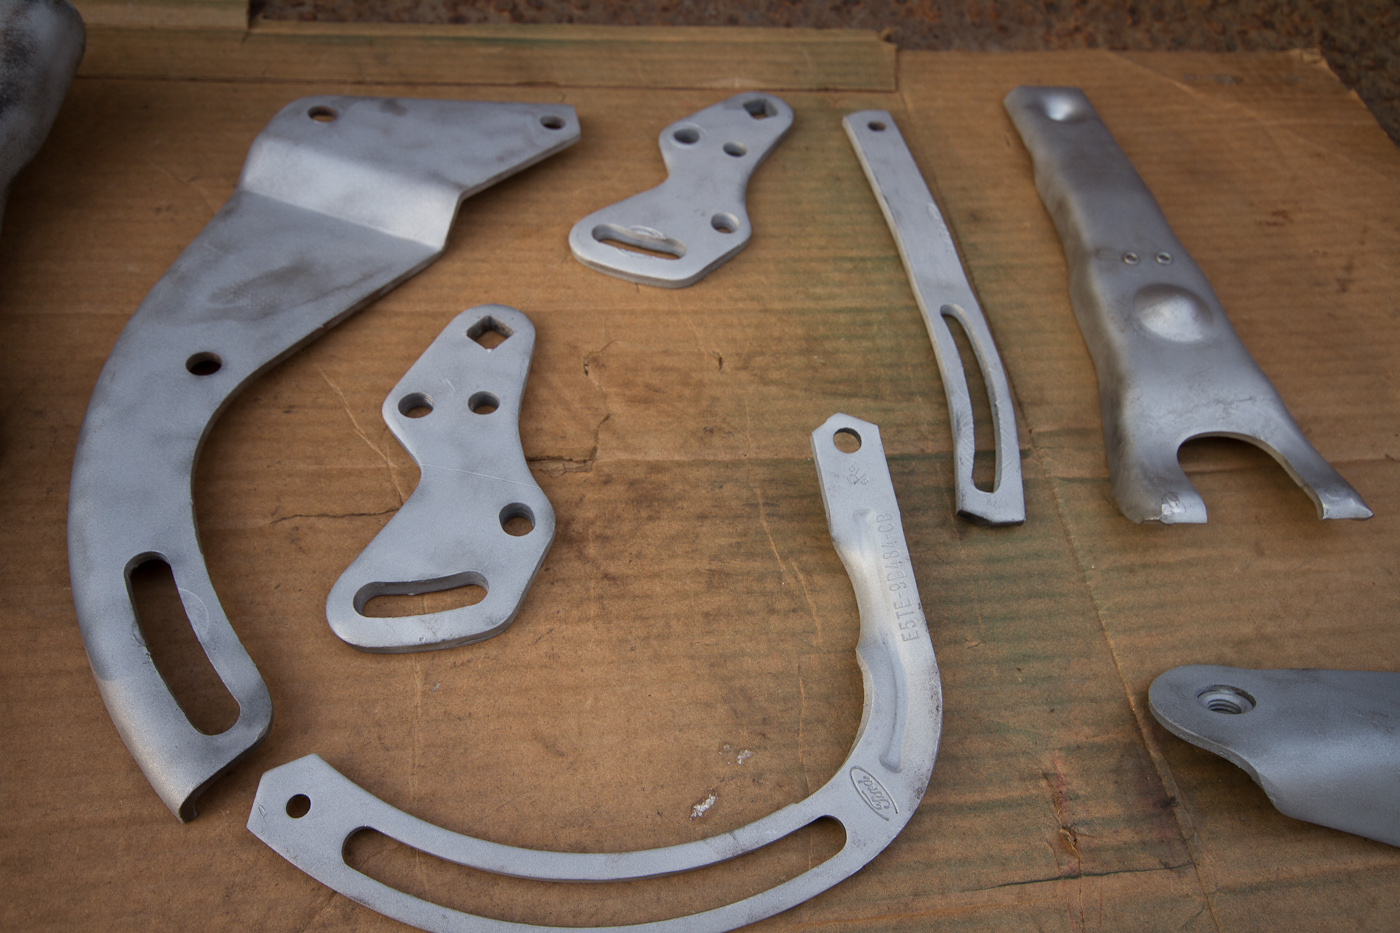
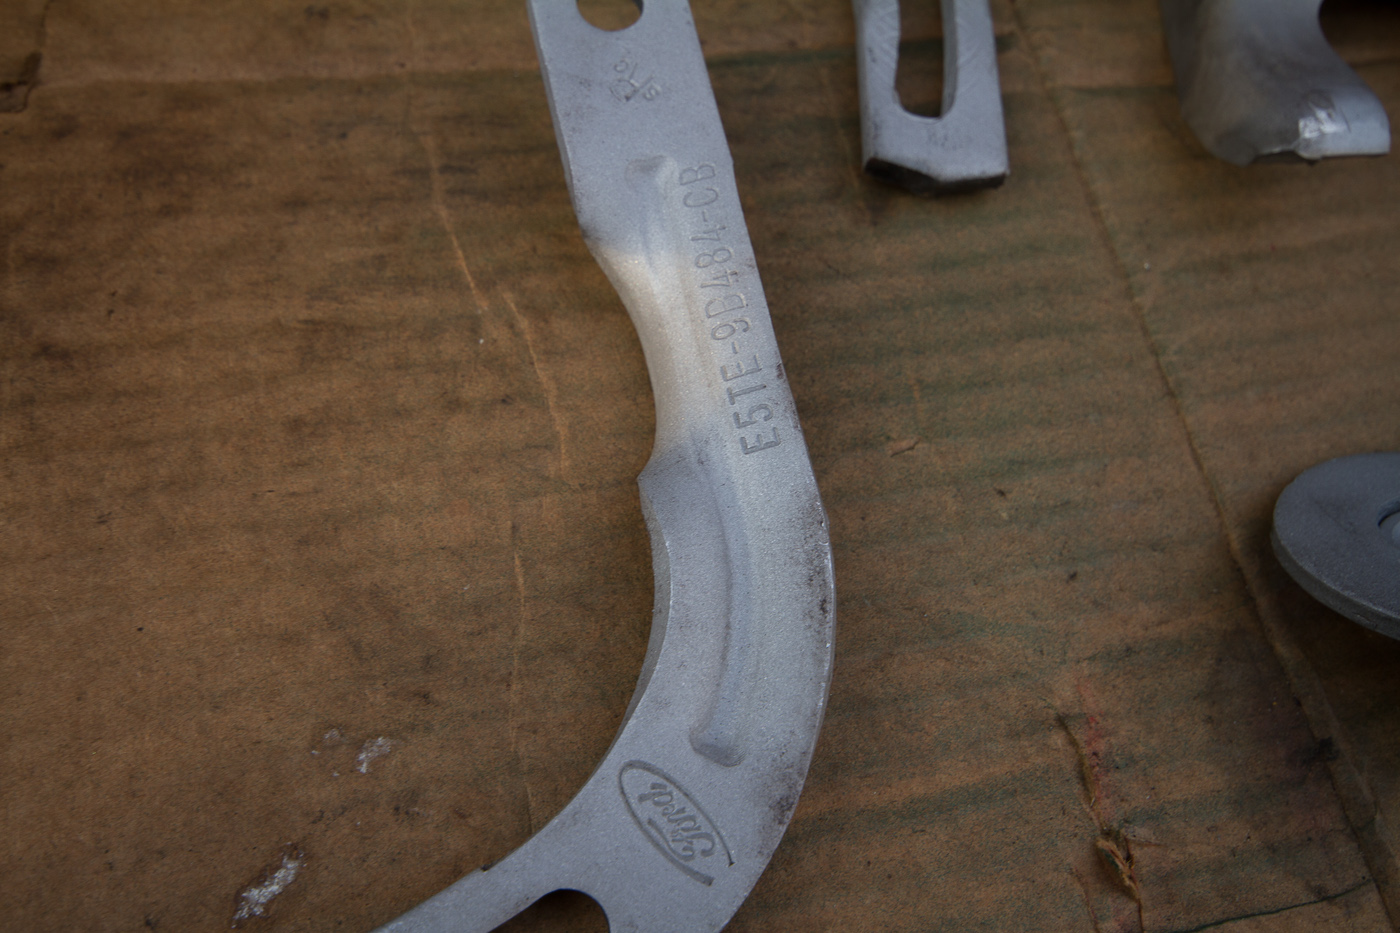
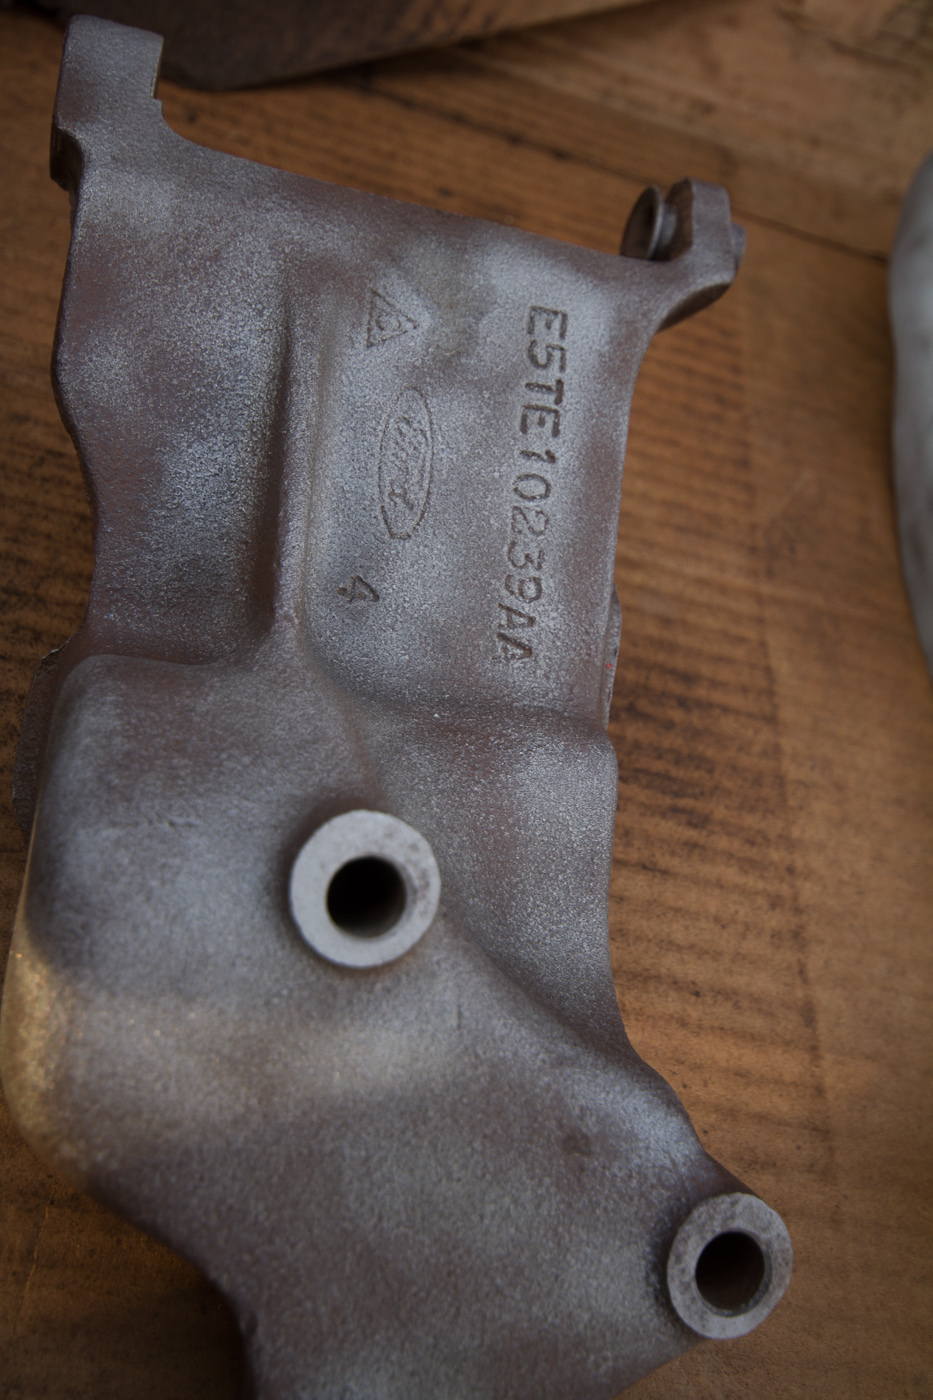
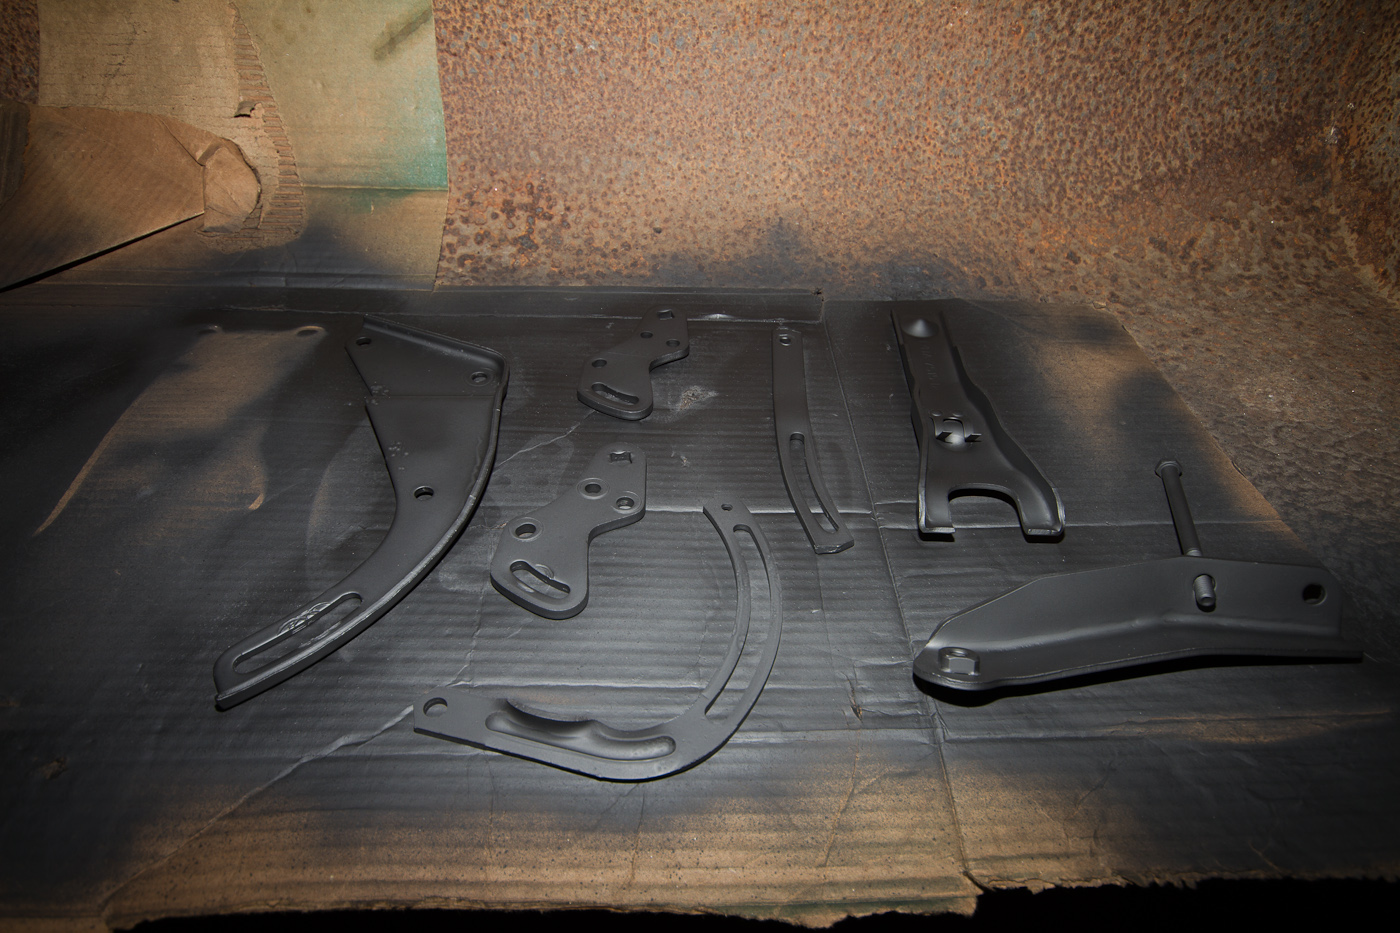
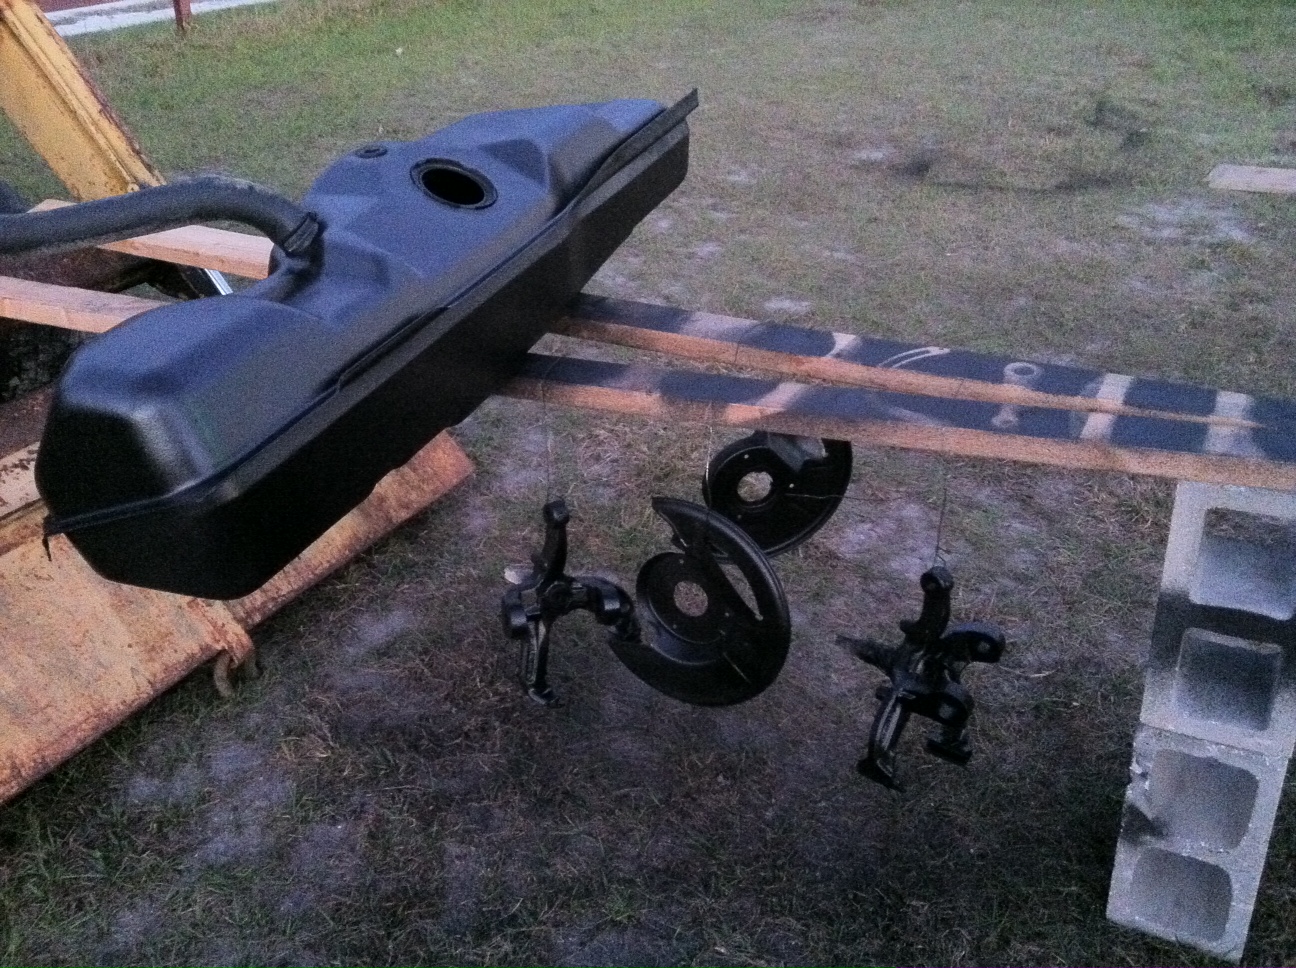
Pete, I'm still torn on the final coating for the brackets and such. If I can figure out a good way to suspend them and access all the sides I may go ahead and shoot them with the same industrial enamel I'm using on the frame.

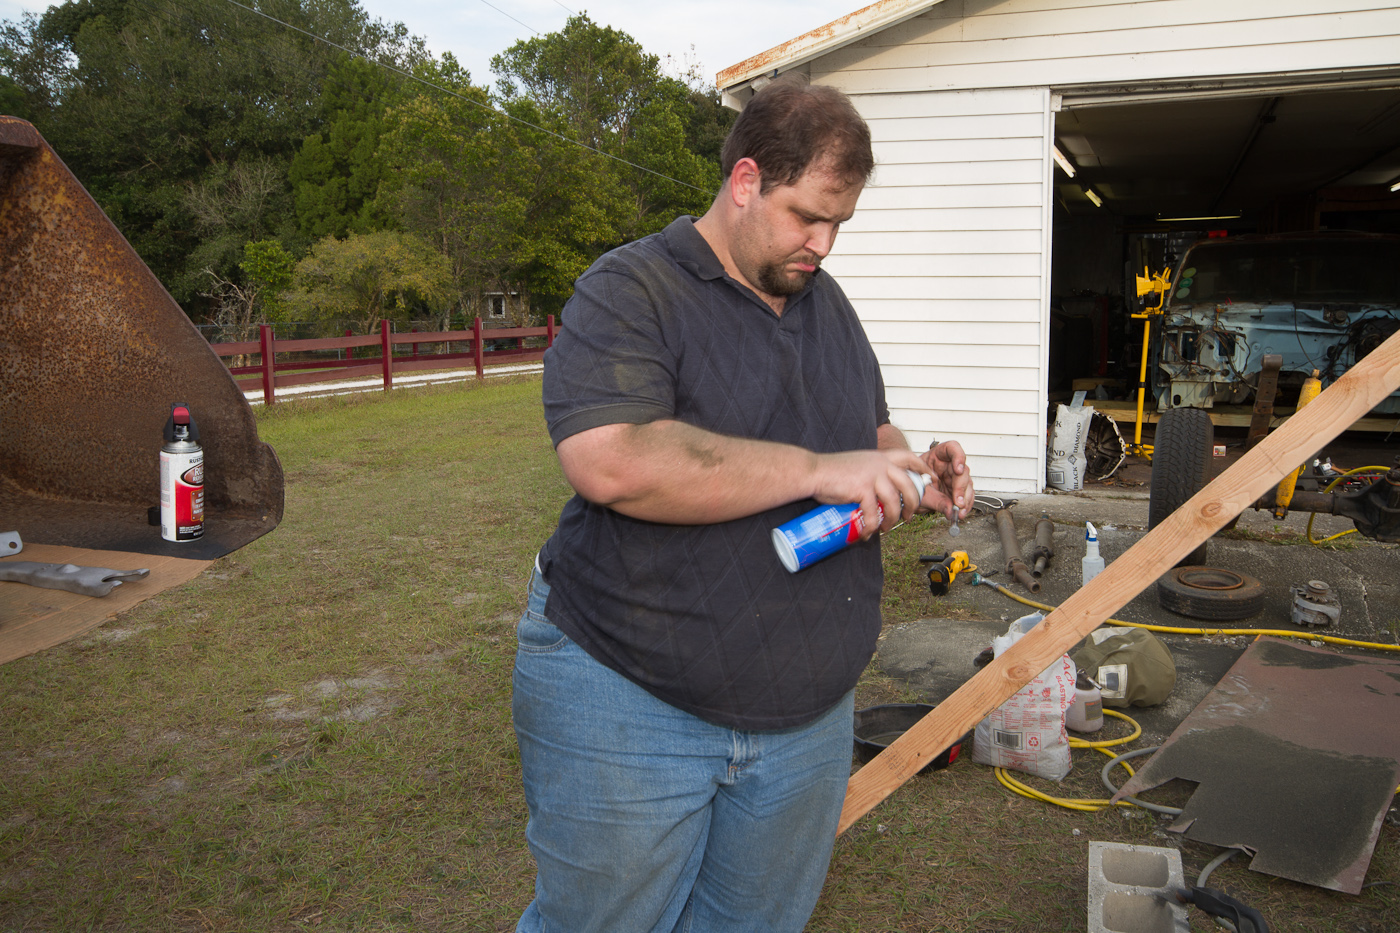
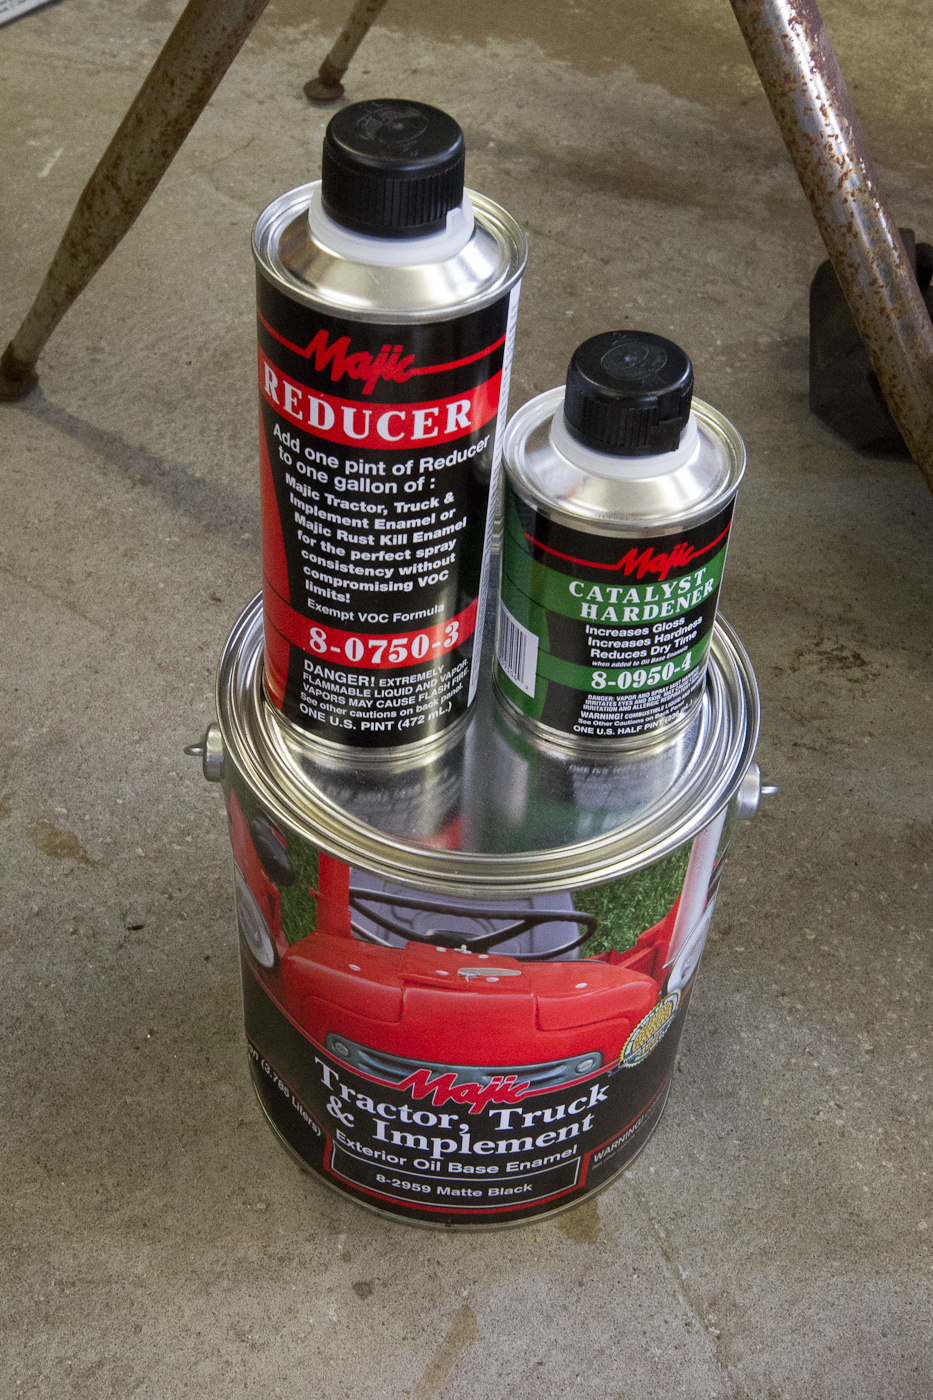
Today we got the paint and set about thoroughly cleaning the HF paint gun. Numerous sites said that a thorough cleaning before use is imperative with this gun, so that's what I did. Once that was taken care of we set about mixing up the paint.
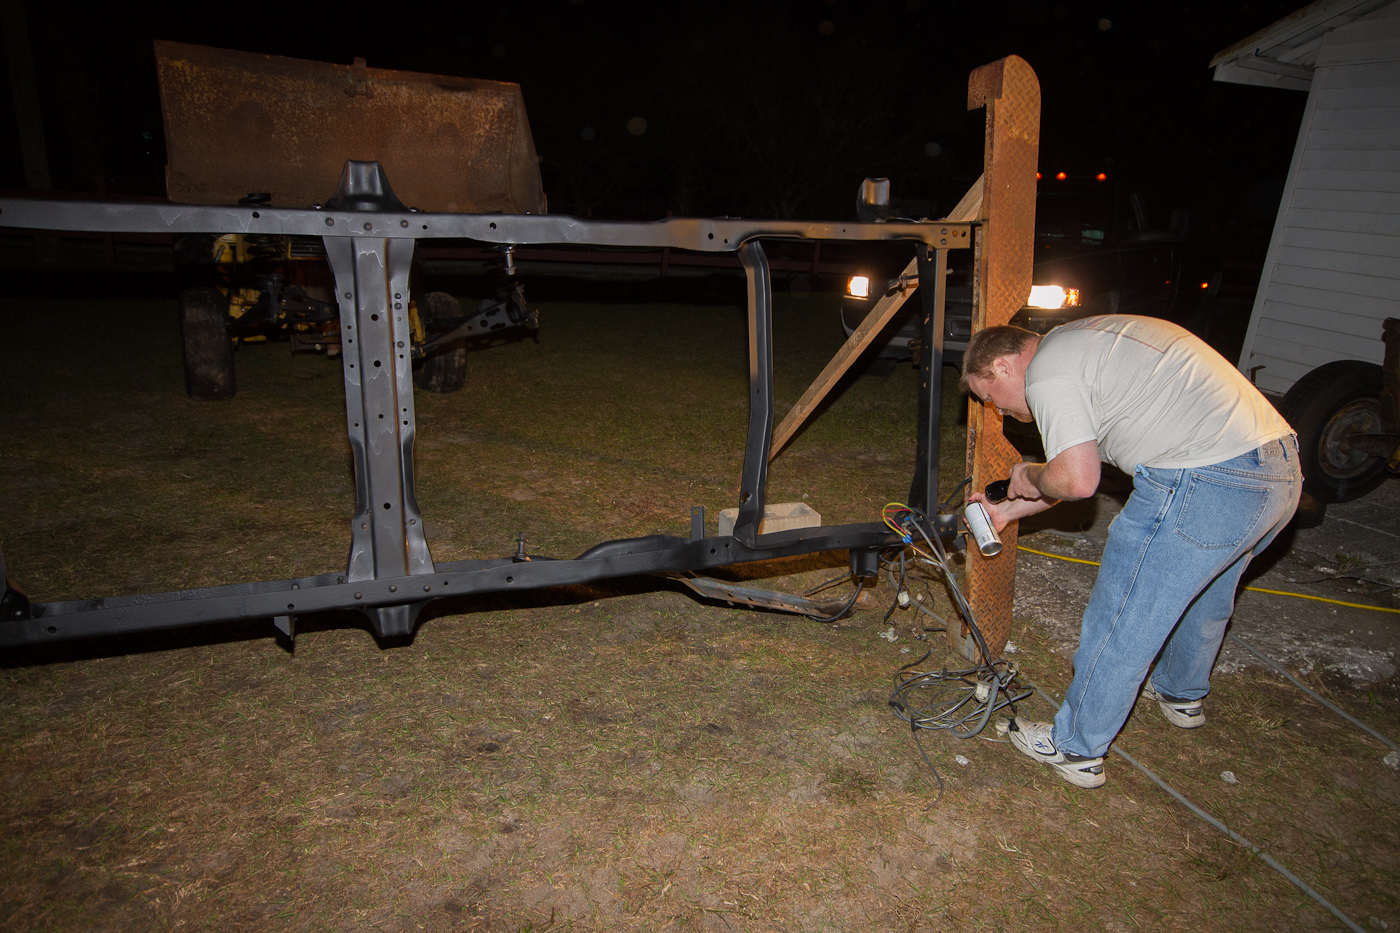
Now, you'd think, based on the first pic here, that pouring this 16oz can into 128oz of paint (or 1:8 or 2:16, since the sprayer hopper is 20oz) would sufficiently reduce it so that it could be pneumatically sprayed - afterall, it says right there on the got-damn can "add one pint to a gallon for the perfect spray." Well, it turns out that this is NOT actually the case. My first attempts were butt turrible to say the least. Ever seen the spray coming out of a ceiling texturing gun? Imagine that, only black, and that's basically what I was laying down. Then Mike has the brilliant idea to cut it some more with some mineral spirits. So we add 4oz to the 19oz we had already (16 paint + 2 reducer + 1 hardener) and that thins it out enough to spray a little better. Getting annoyed at the wind's constantly-shifting direction and increasing chance of blowing the overspray back in my face, I continue spraying, while Mike mixes up the next batch with the rest of the spirits we have on hand, and as I empty the hopper we refill with this new batch, which is thinned about 1:2. This sprays acceptably, since it's just the frame, but I'm still not impressed. At this point, having run out of spirits (also Mike determined somehow that the reducer we bought is actually not the proper stuff for this paint, so we stopped using it) I finished up what I had left and cleaned the gun. Mike ran out to Autozone for another can of spirits so I could properly clean up (it's the closest store that had any in stock, and I started cleanup with the nasty used stuff I had cleaned the gun with initially) and came to the conclusion while reading the back of this can - which is Rustoleum brand and sold right next to the gallon cans of their enamel paint - that we should have been cutting the paint 1:1 all along. When we flip the frame for access to the underside we'll try that and see what happens, but for now, it's good enough. If the other side turns out better I'll take the sander to the rest of the thing and scuff it up and shoot it again.

http://www.ronman.org/pics/f150/IMG_0270.jpg

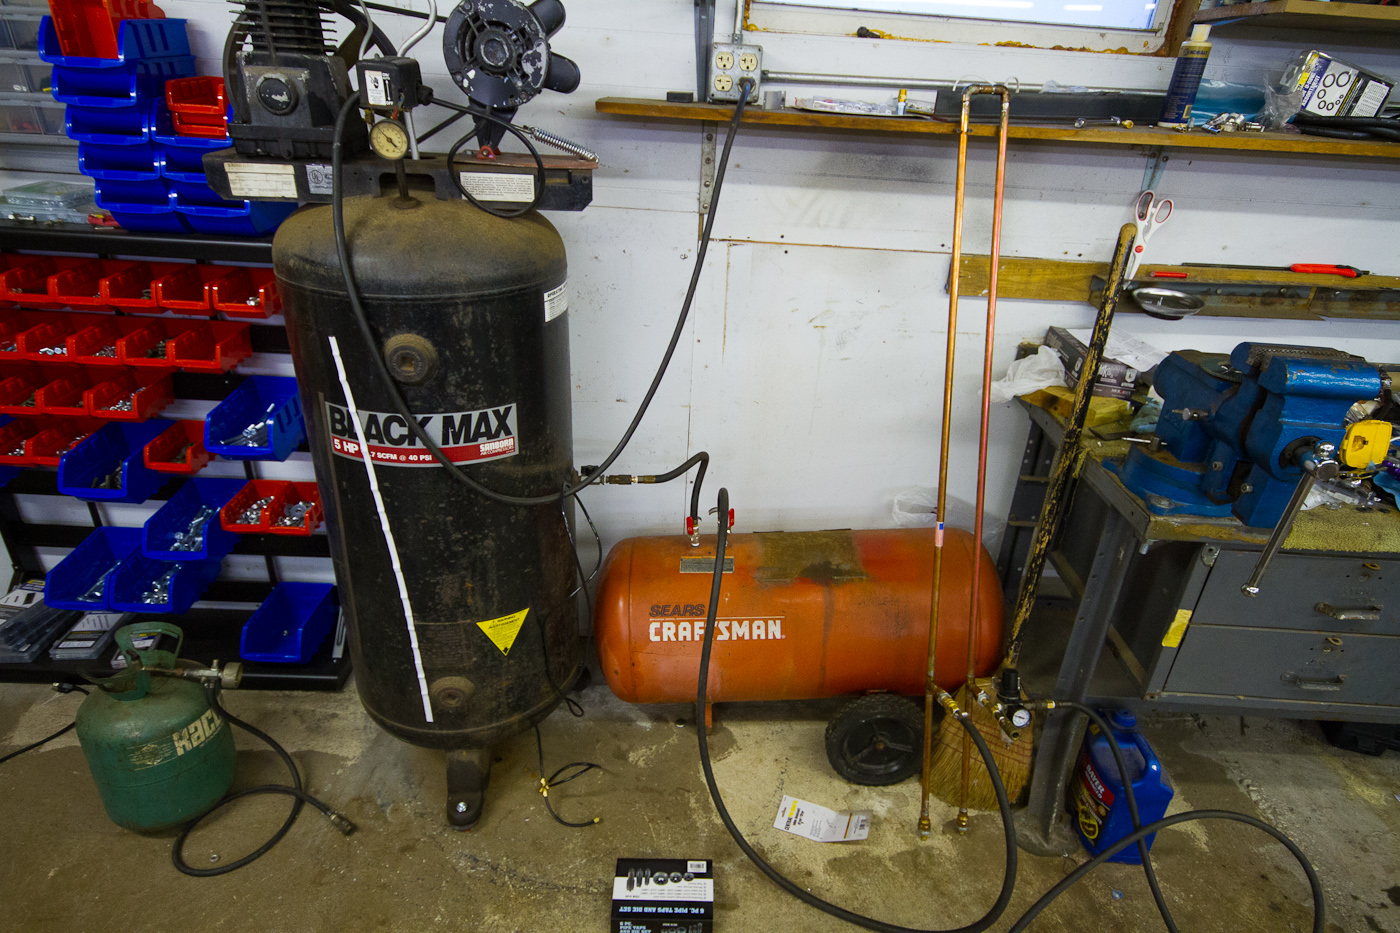
We also got a proper second test of our home-brew moisture separator, which is the big copper apparatus standing up by the air compressor. It's a 10' stick of 1/2" copper, cut into two pieces 4'10" long, and connected together with the remaining 4" of copper and some 90s, and soldered together. There are NPT adapters on the bottom with drain petcocks in both sides, and the air inlets are soldered into a T about a foot off the bottom. The length of copper forces the air to condense and, believe it or not, it actually works PRETTY DAMN WELL. Amazingly, for sure. We've gotta mount it to the wall at some point, but right now, who cares, it's out of the way and it's not going anywhere.

http://www.ronman.org/pics/f150/IMG_0273.jpg

Mr. UPS man delivered our first-round Rockauto clearance haul (thanks Brett85p!!!) consisting of brake hoses, upper and lower ball joints, radiator cap, thermostat, coolant temp sender, and power steering pump rebuild kit - a whopping $30 worth of parts.

http://www.ronman.org/pics/f150/IMG_0276.jpg

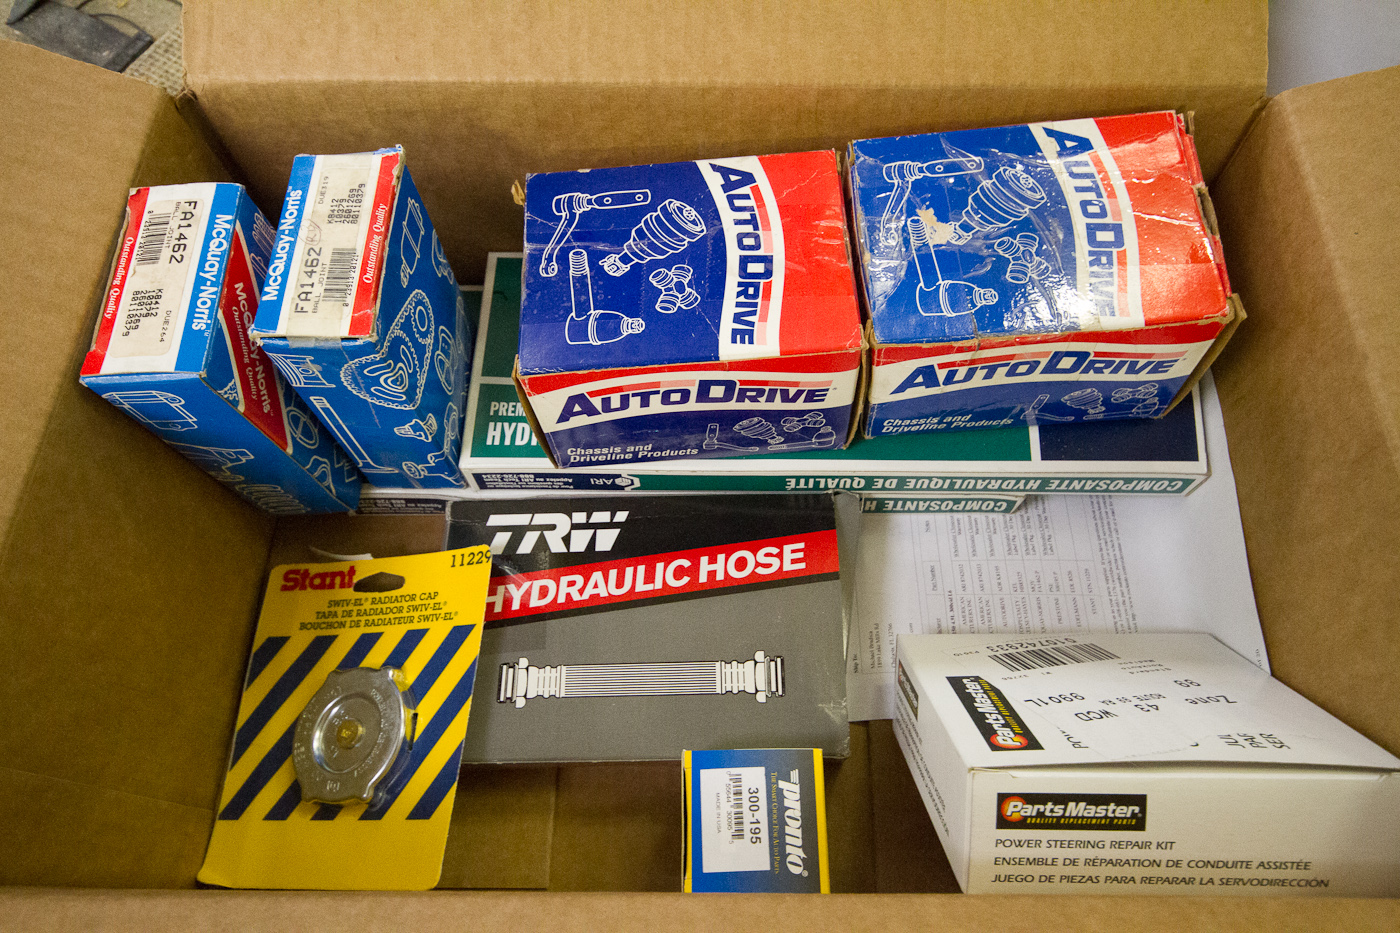
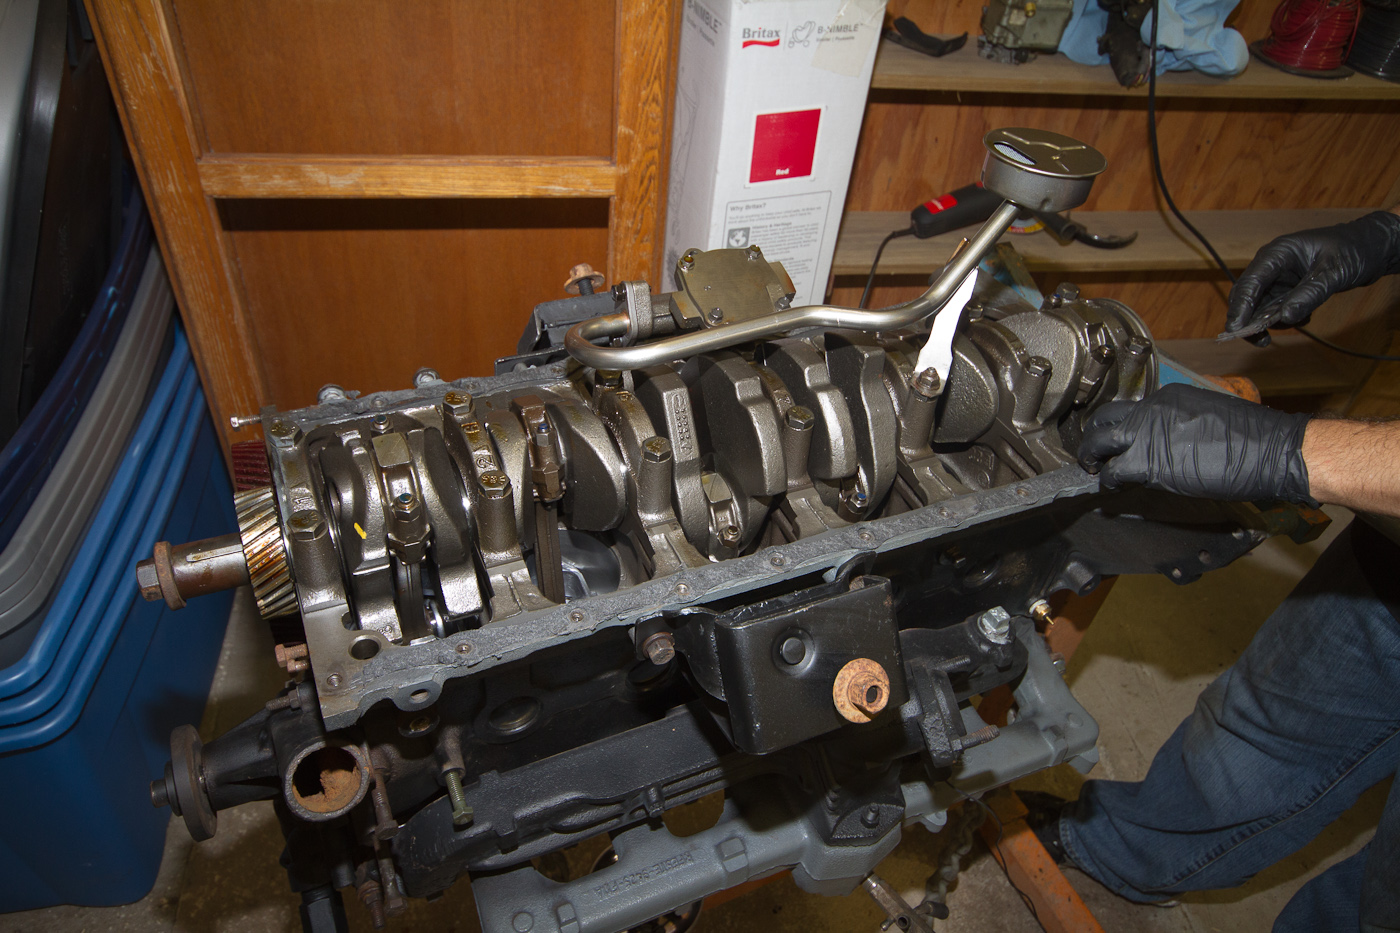
Autozone also managed to get the gasket set in a day early, so that was good. Also the water pump and oil pressure sender.

http://www.ronman.org/pics/f150/IMG_0277.jpg

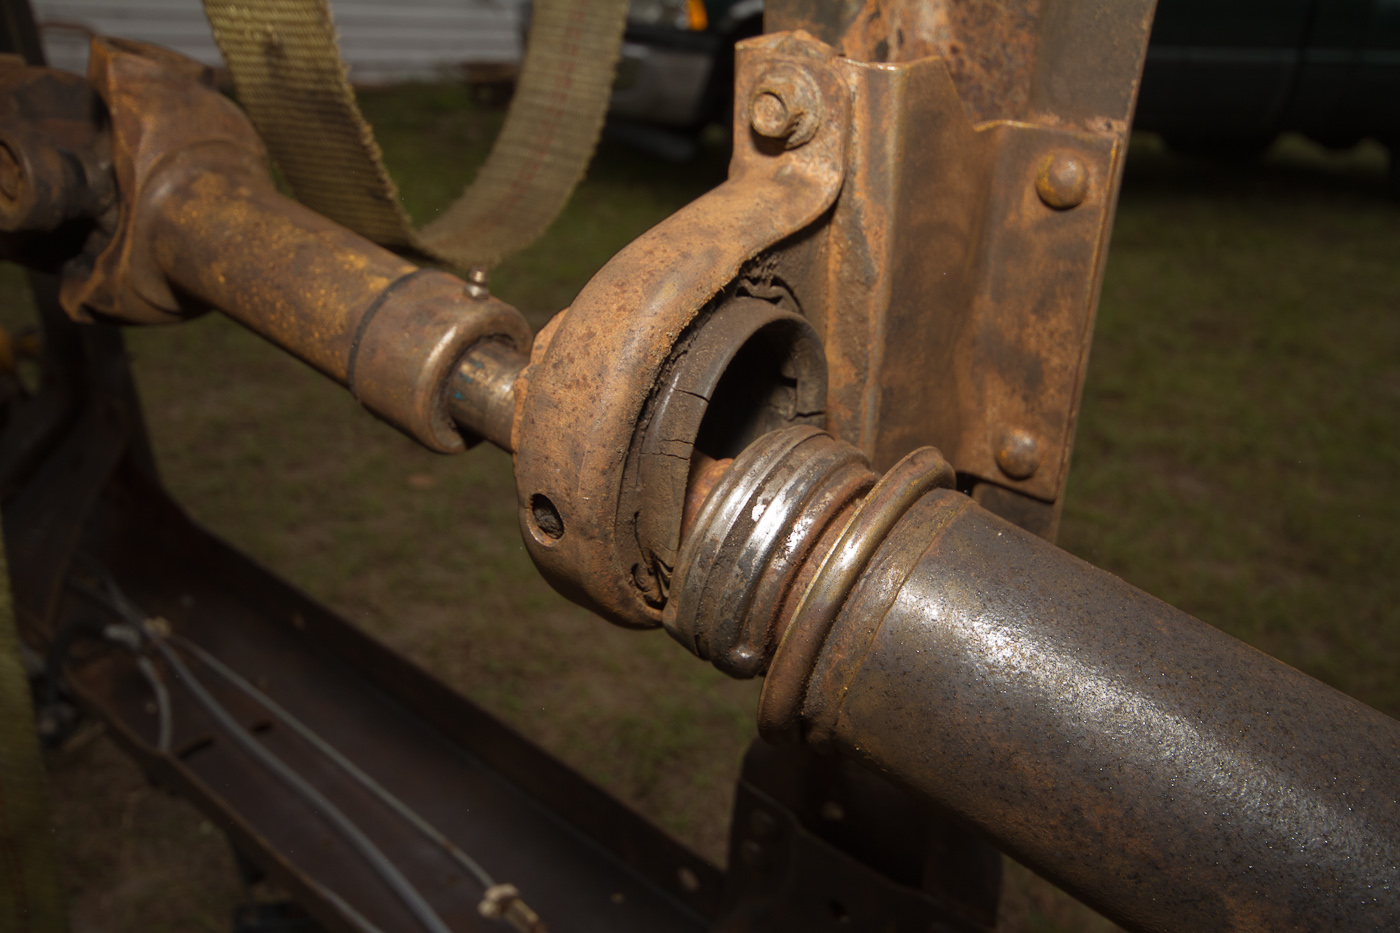
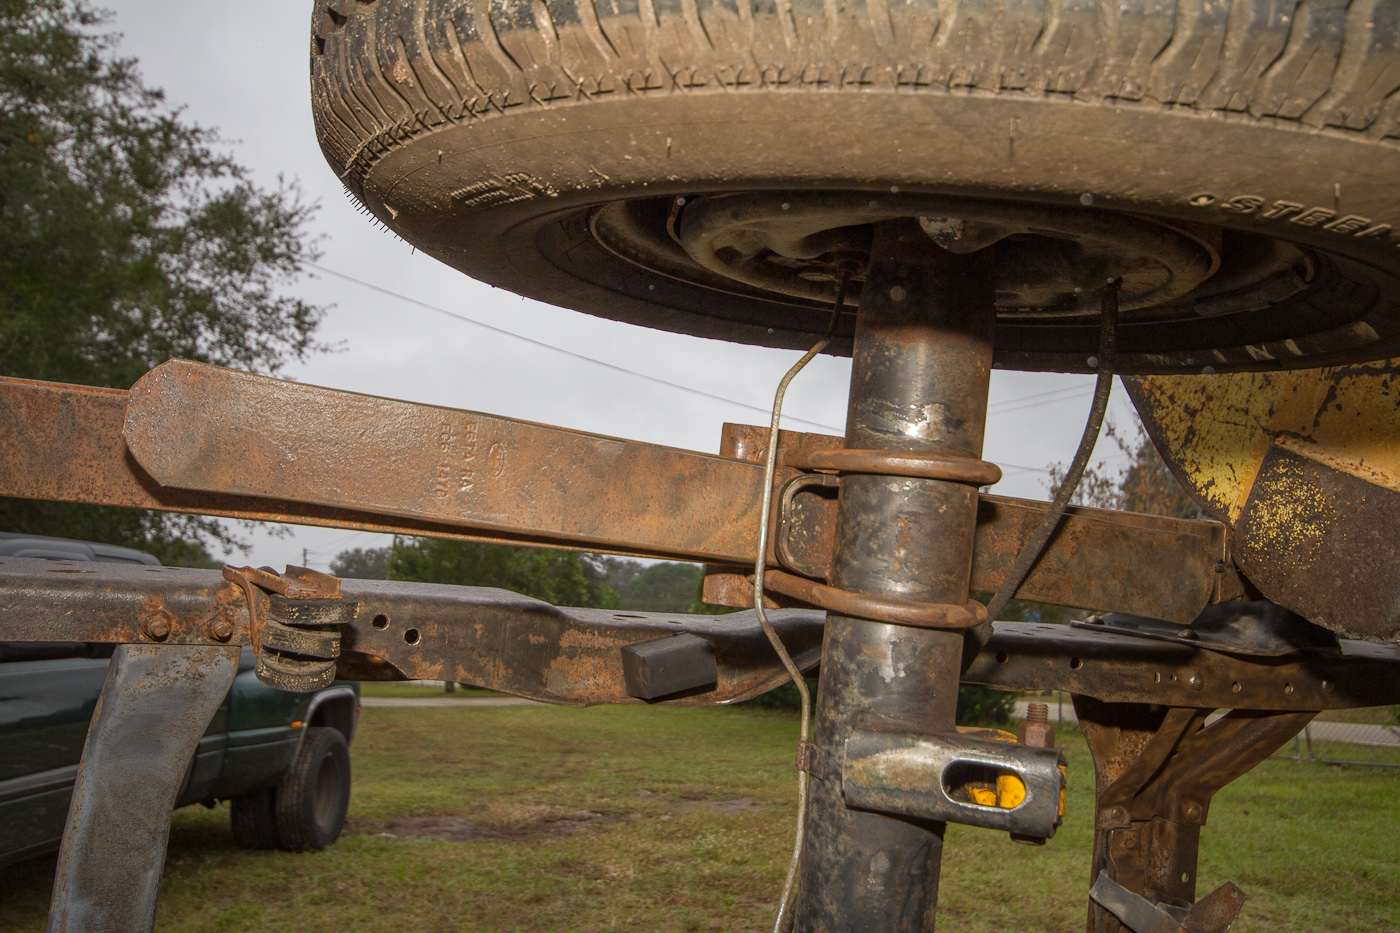
Bushings arrived last week, but I never took a pic of them. Turns out the kit Summit sold us is actually for a 4x4, but pretty much everything will fit anyway, and what doesn't (leaf bushings, which are the right diameter but too long) will with a little persuasion from Mr. Sawzall.

http://www.ronman.org/pics/f150/IMG_0278.jpg

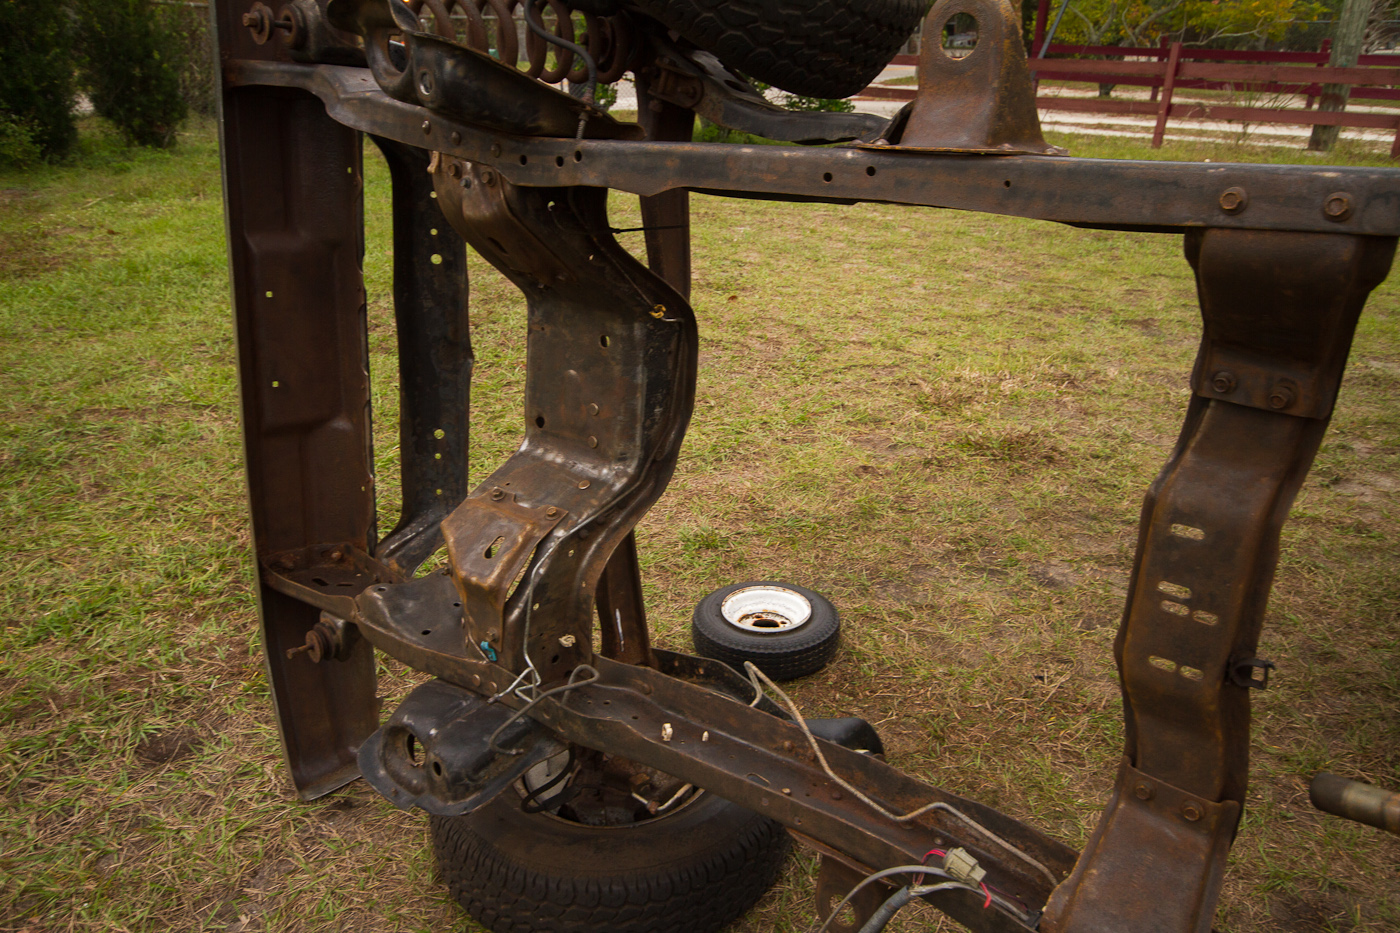
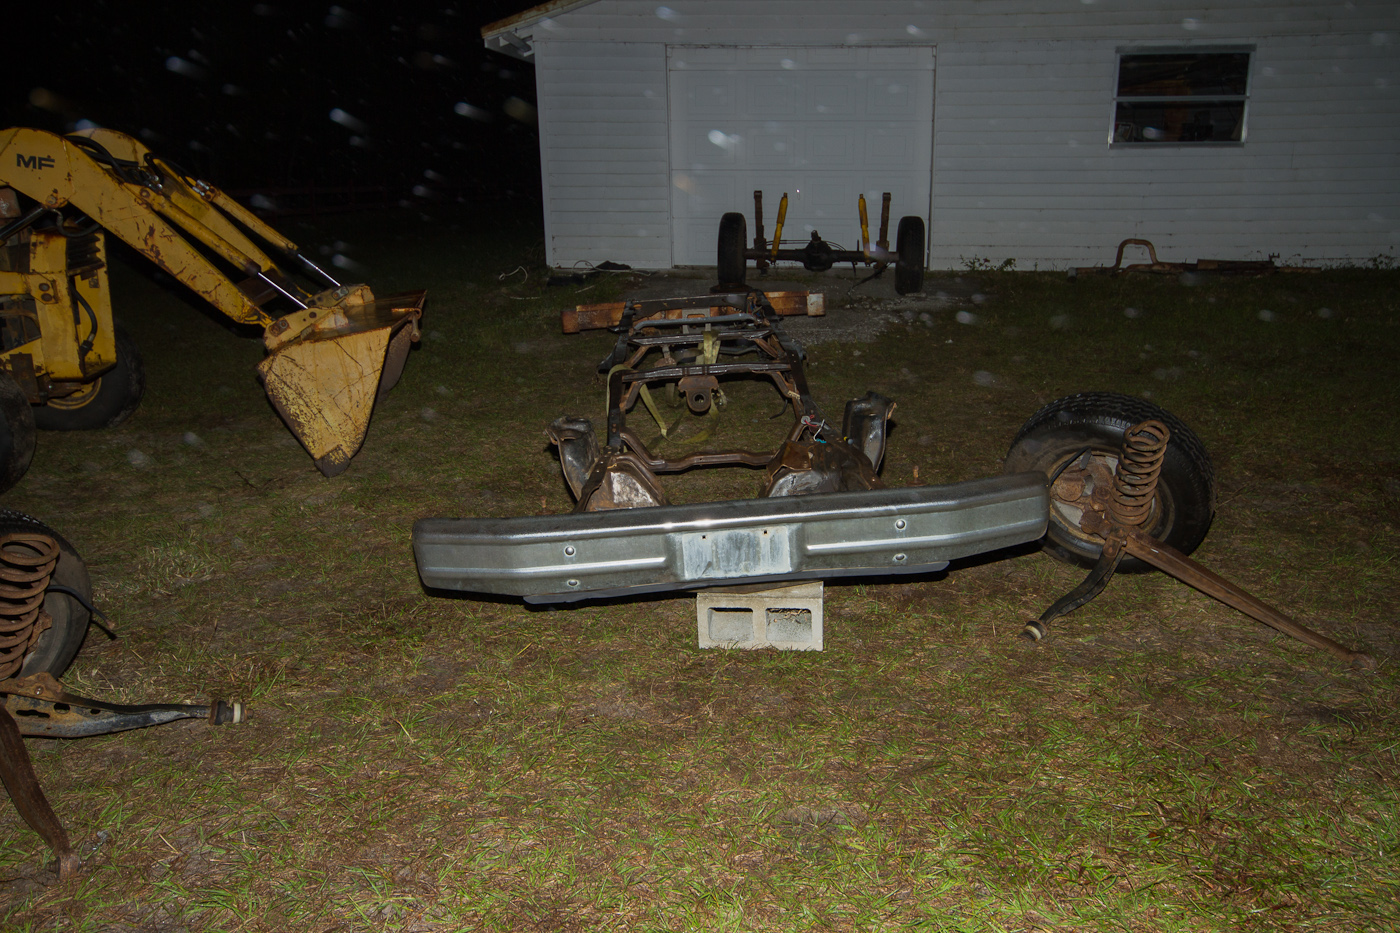
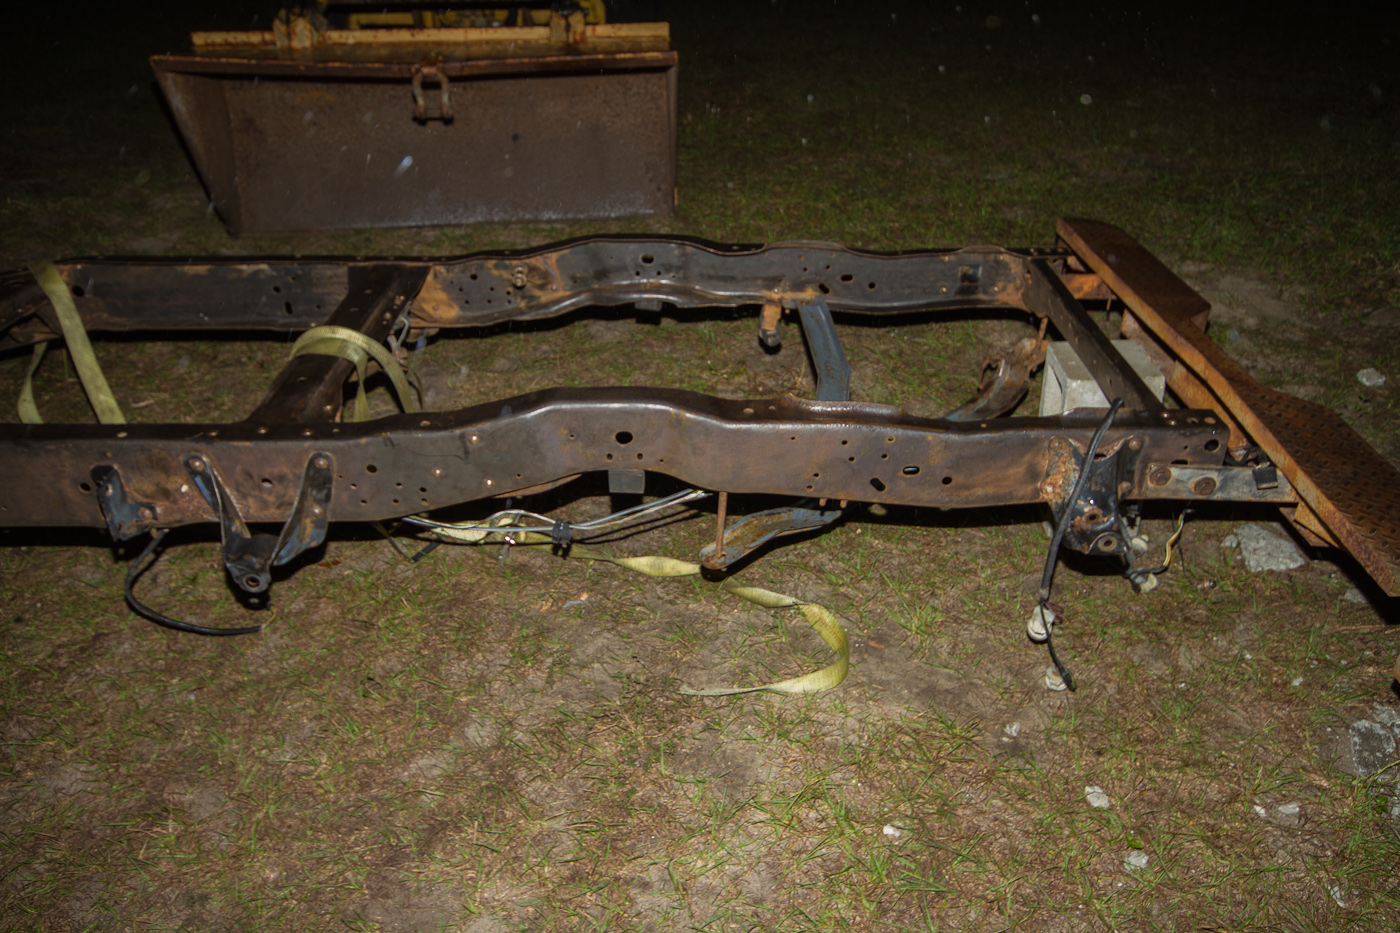
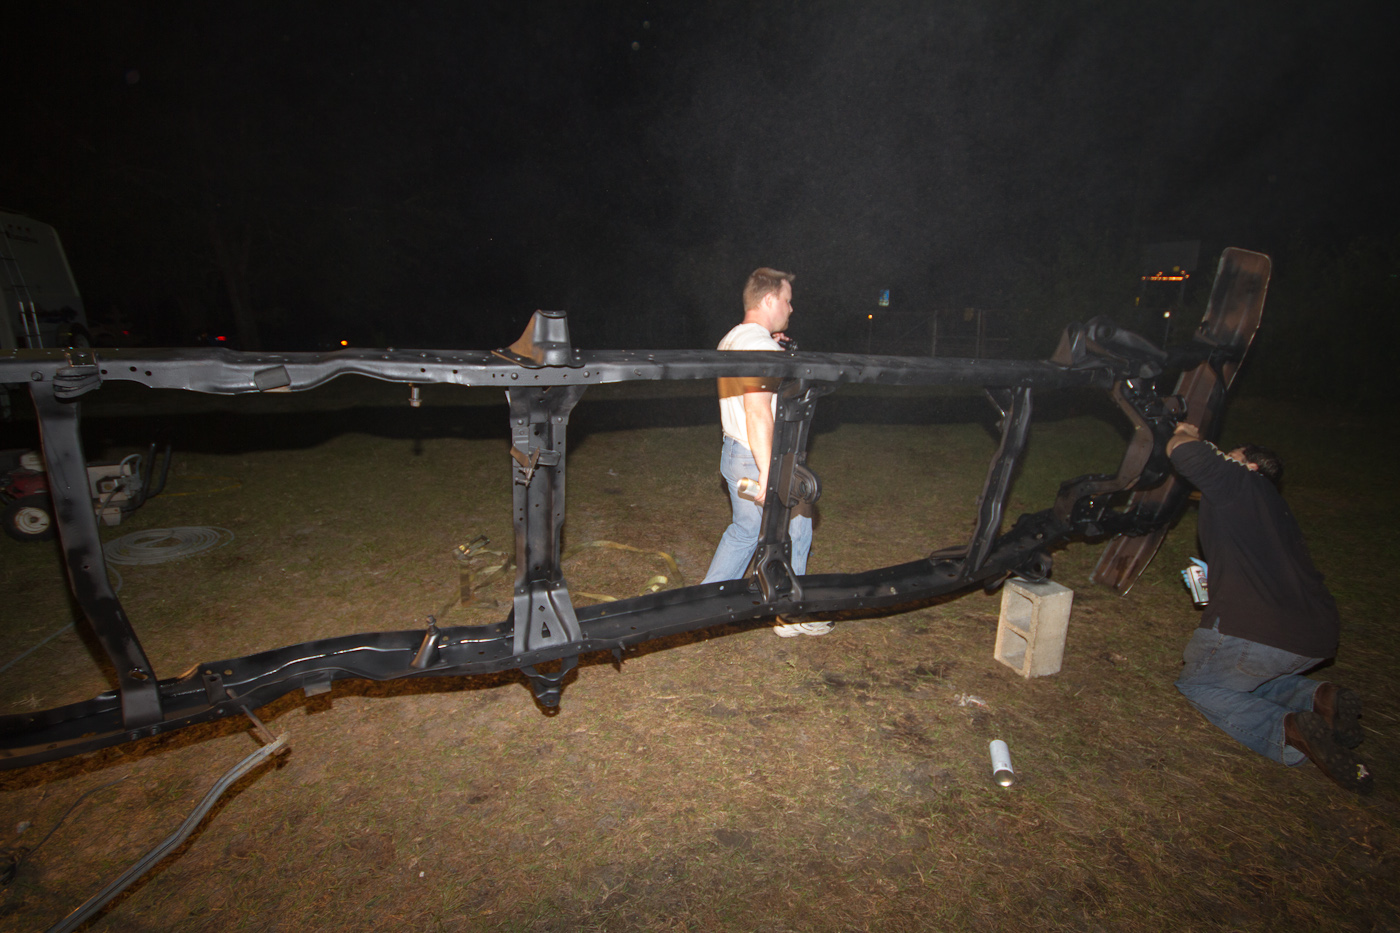
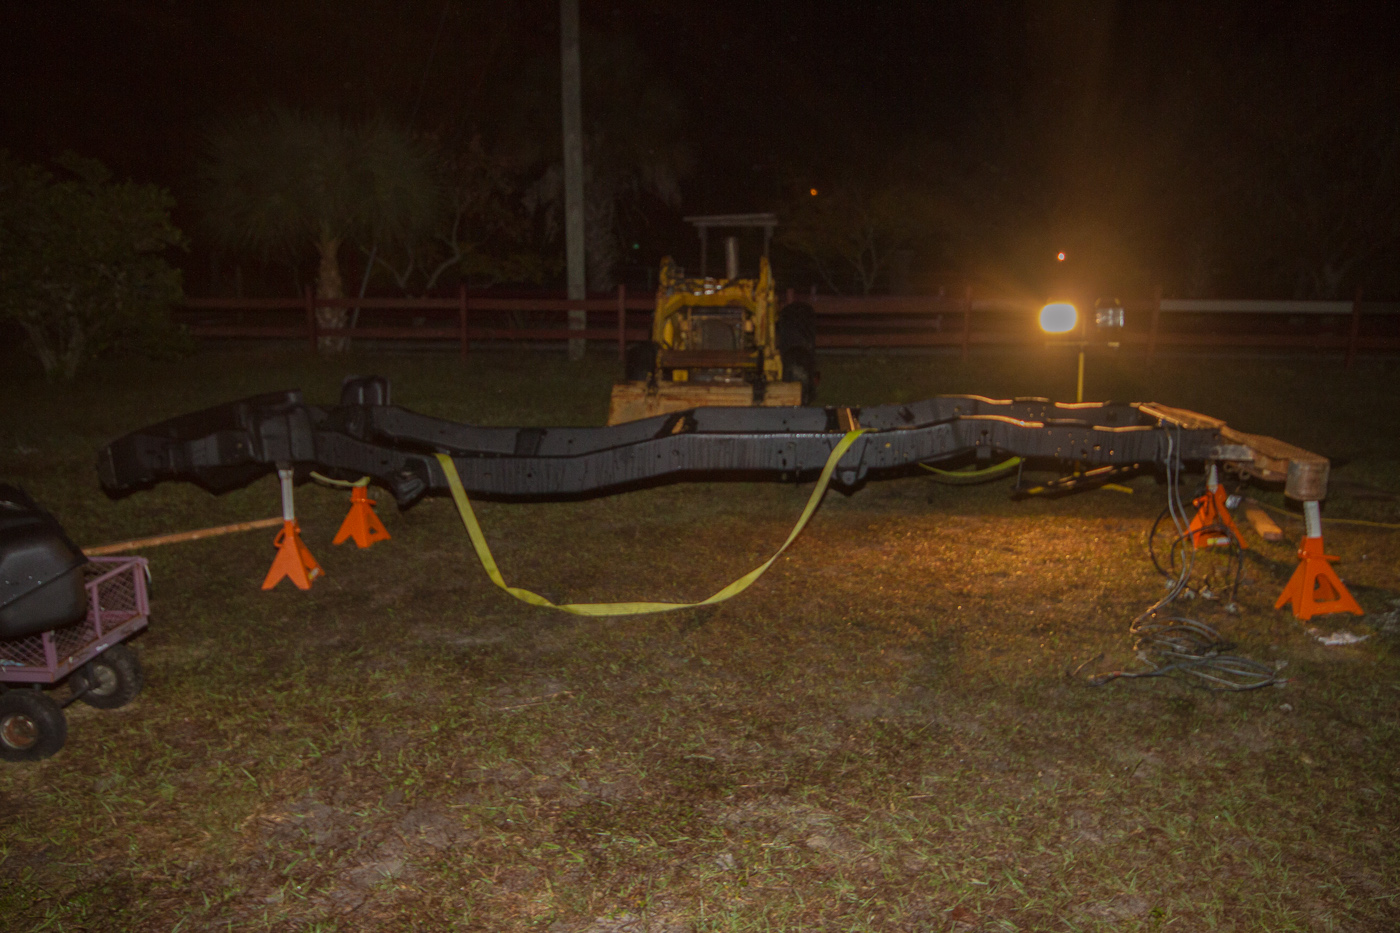
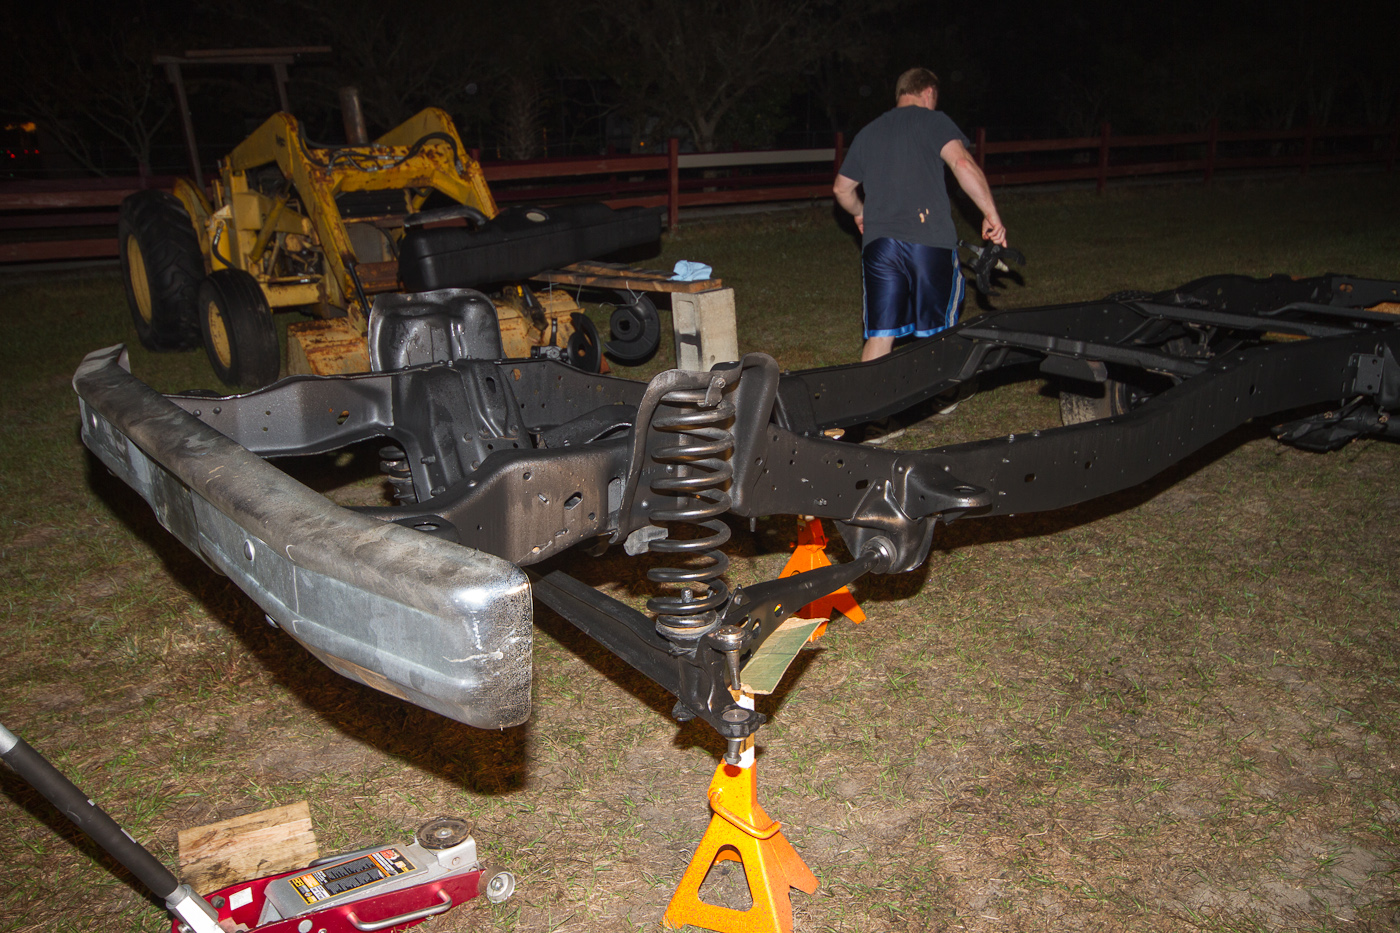
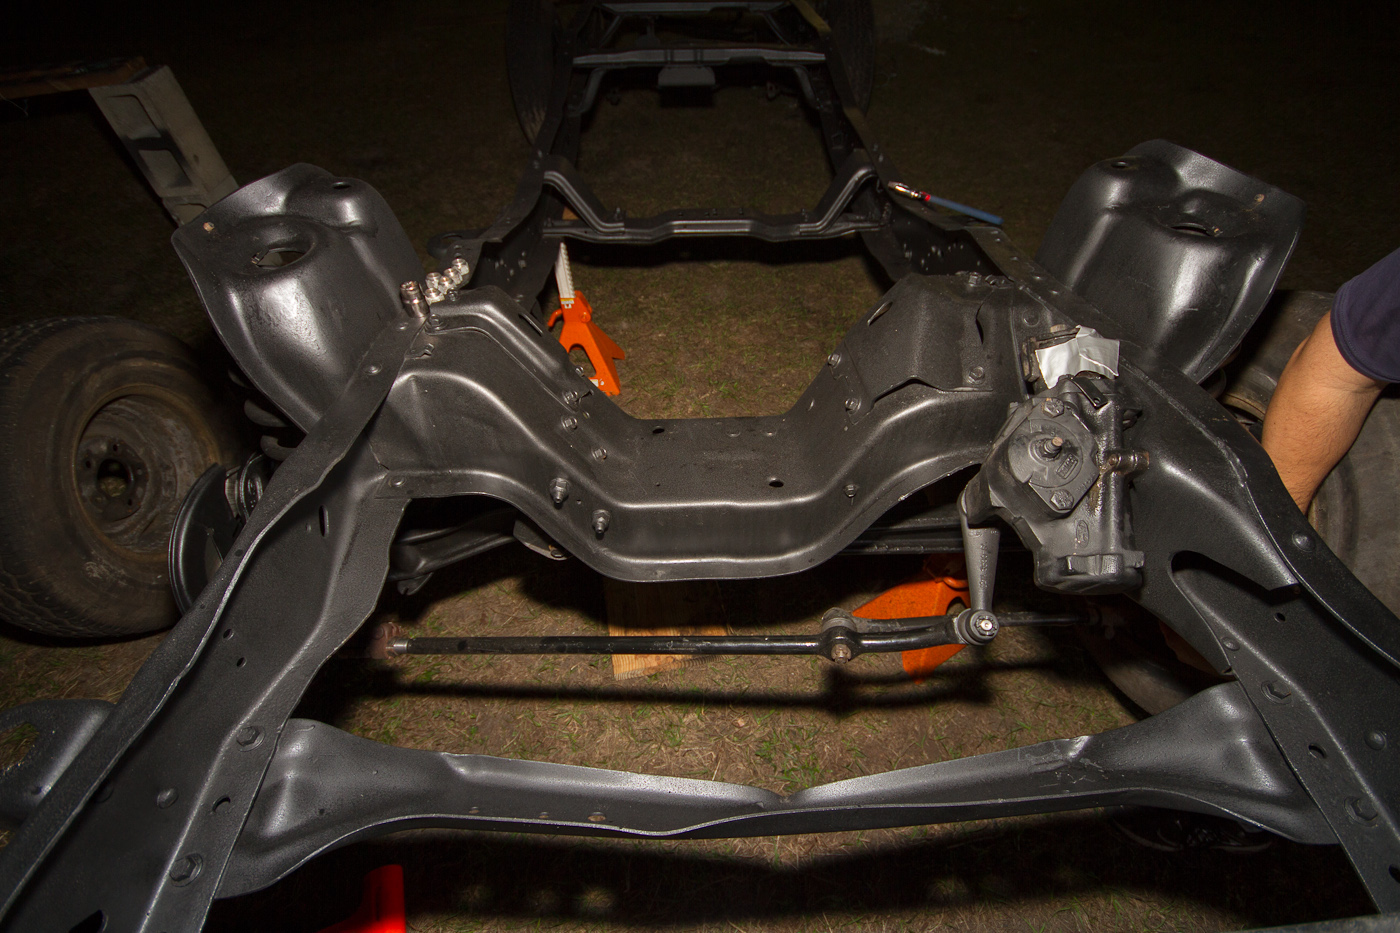
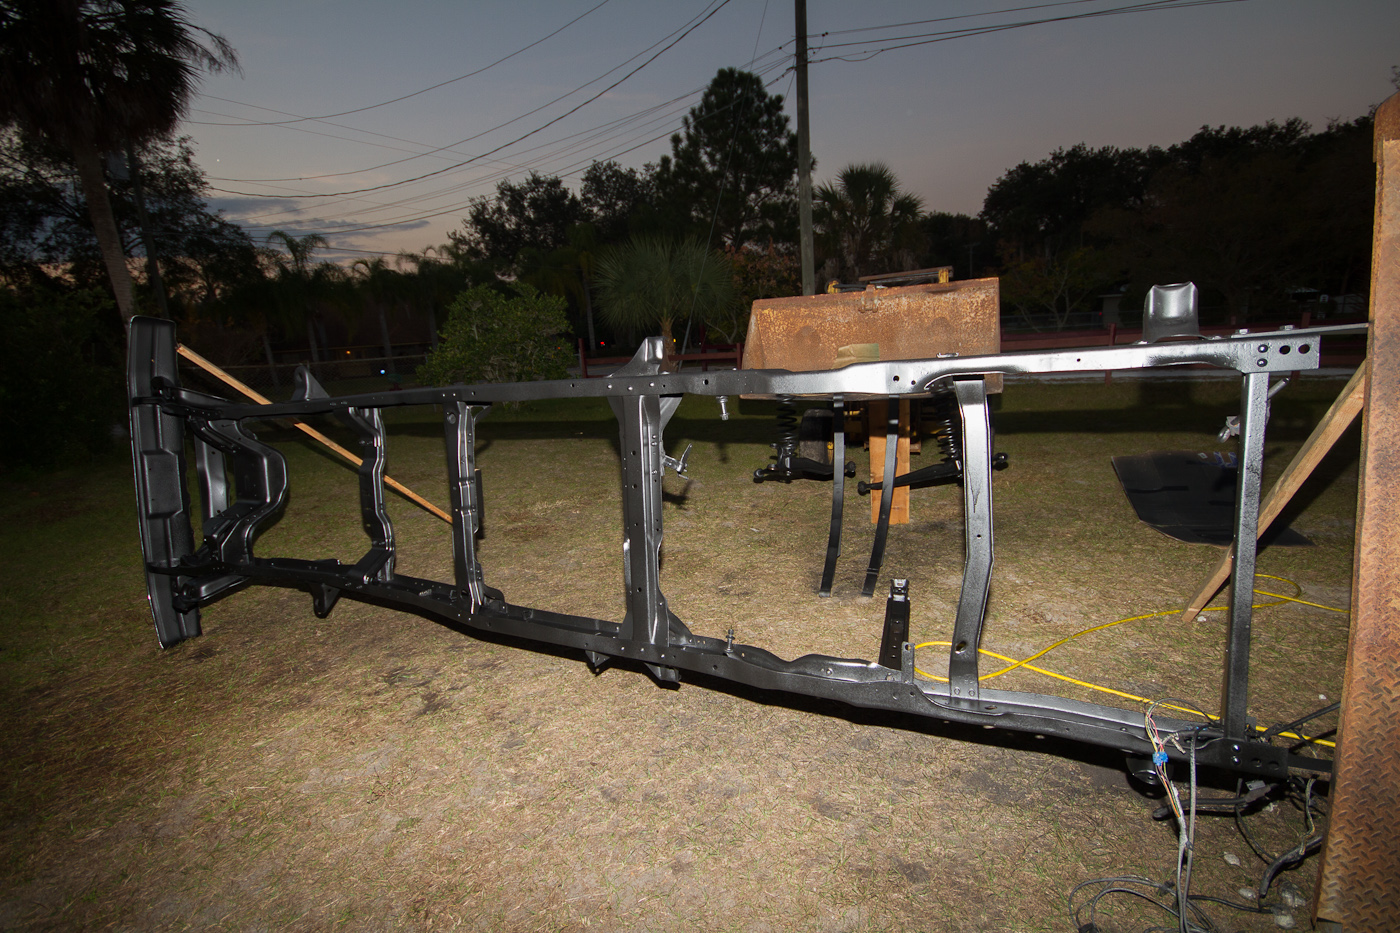
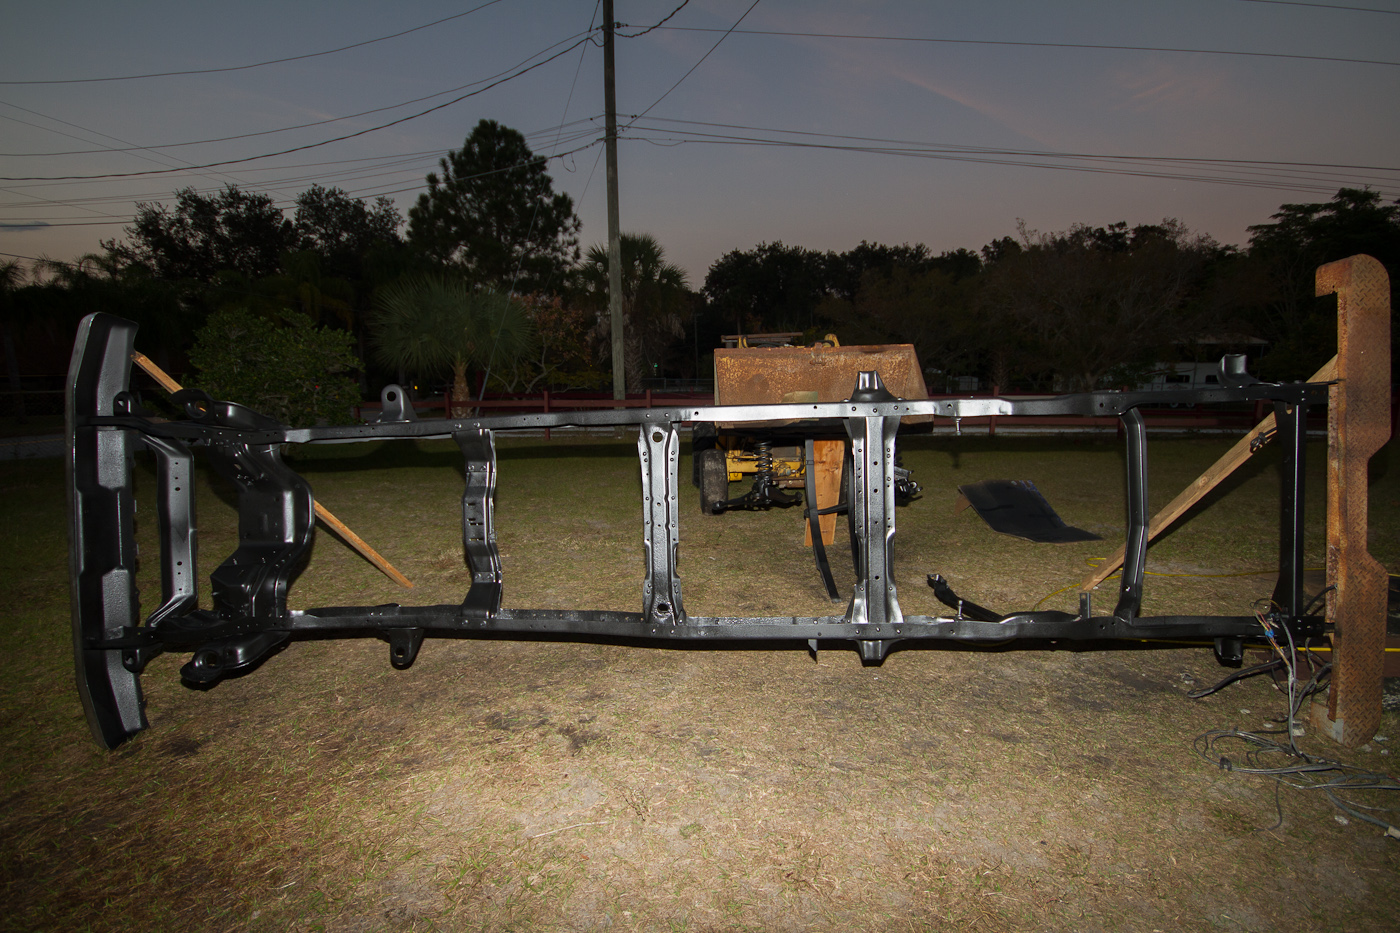
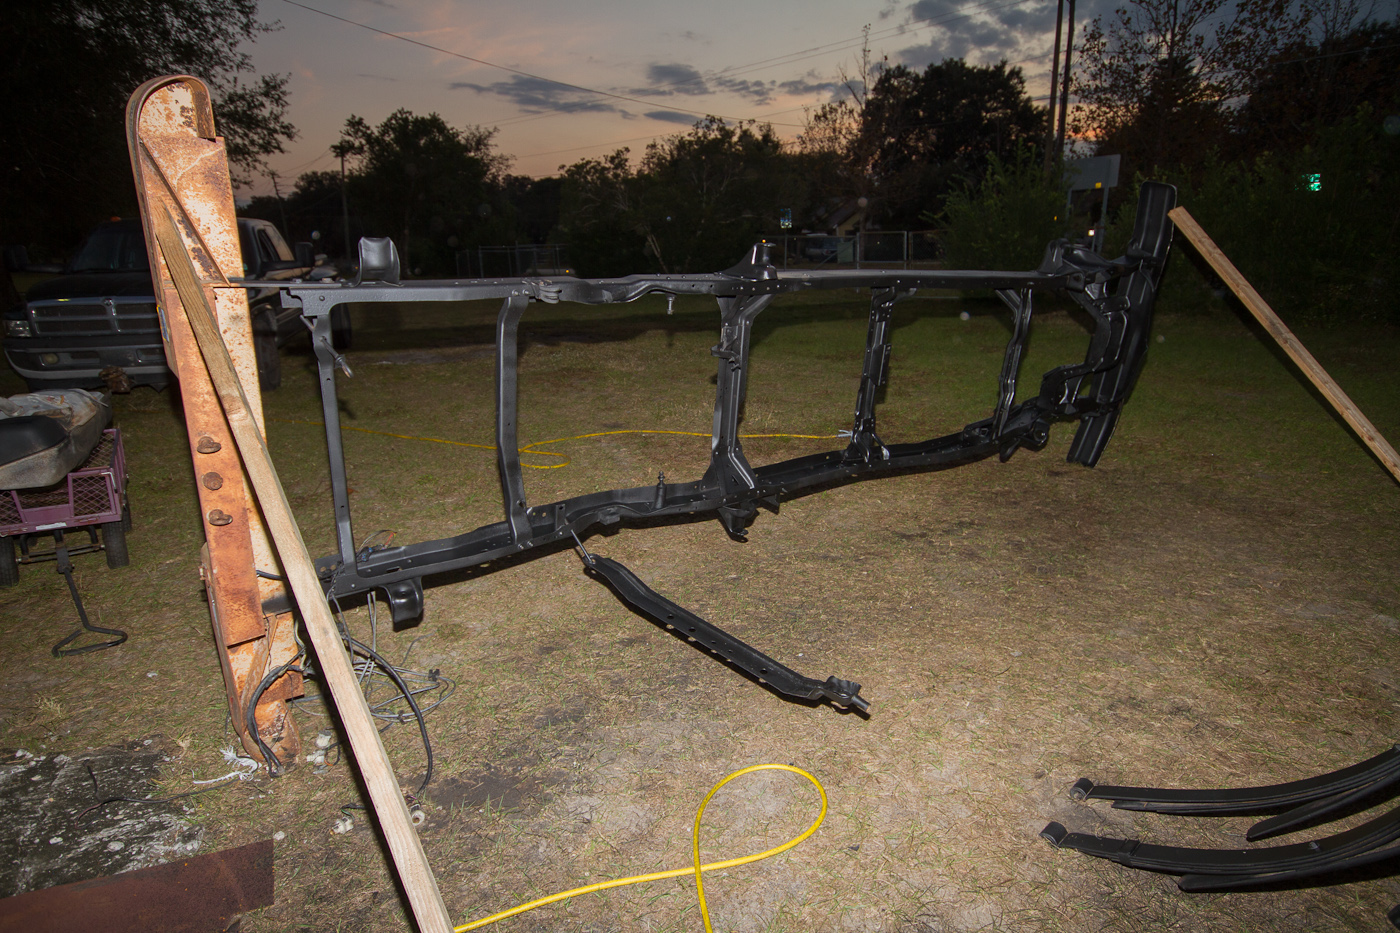
So, yeah, back to the frame. You can see a lovely run in the 2nd rear crossmember, due to poor technique on my part. Fortunately it'll have a bed sitting above it, so this is the only time anybody will actually see it, and hey, extra paint = extra corrosion protection! Right? RIGHT.

http://www.ronman.org/pics/f150/IMG_0279.jpg

http://www.ronman.org/pics/f150/IMG_0280.jpg

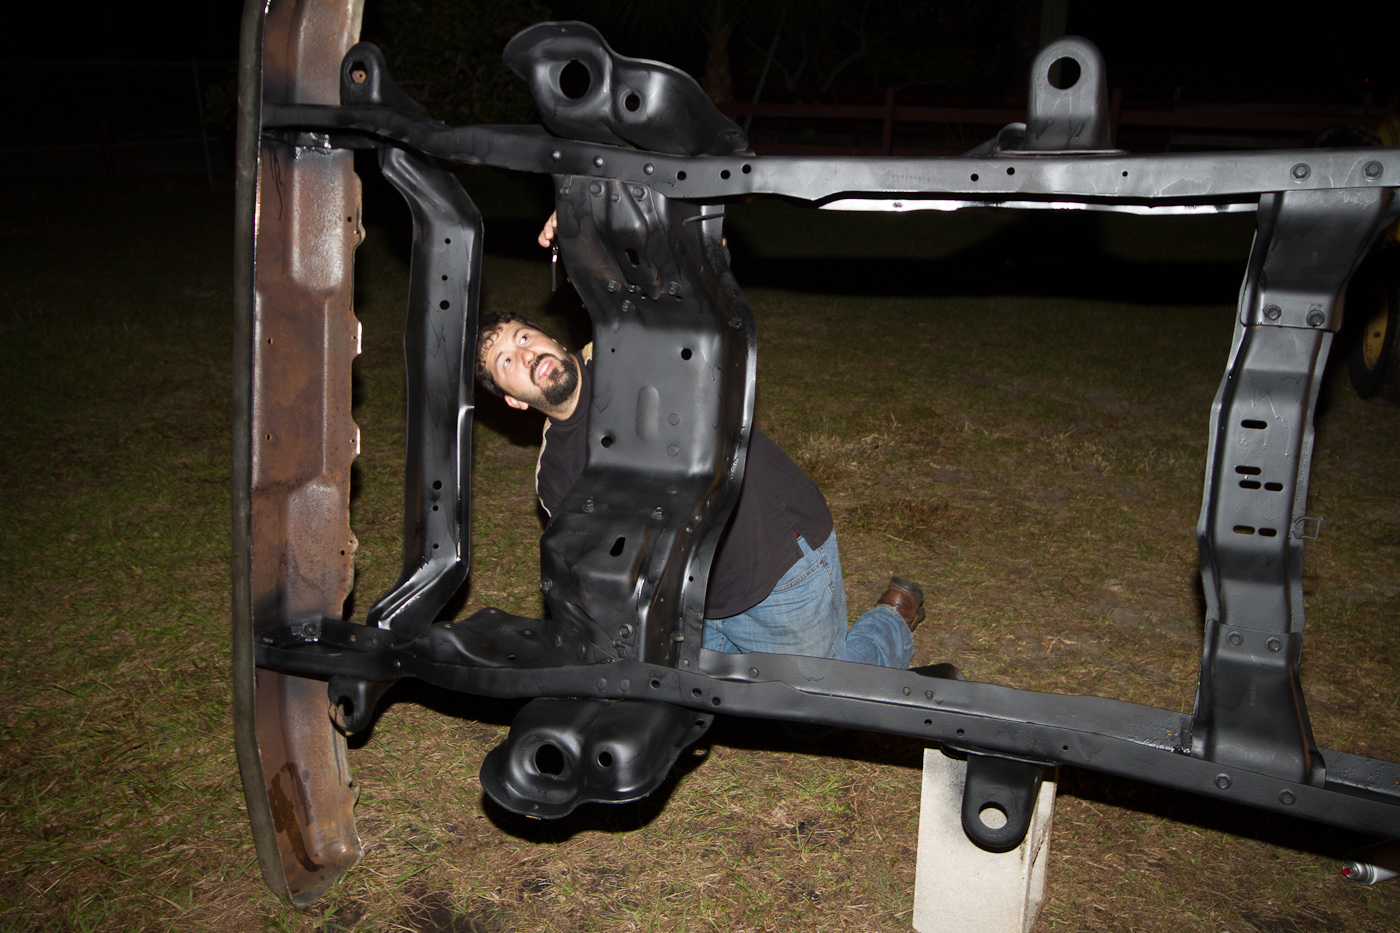
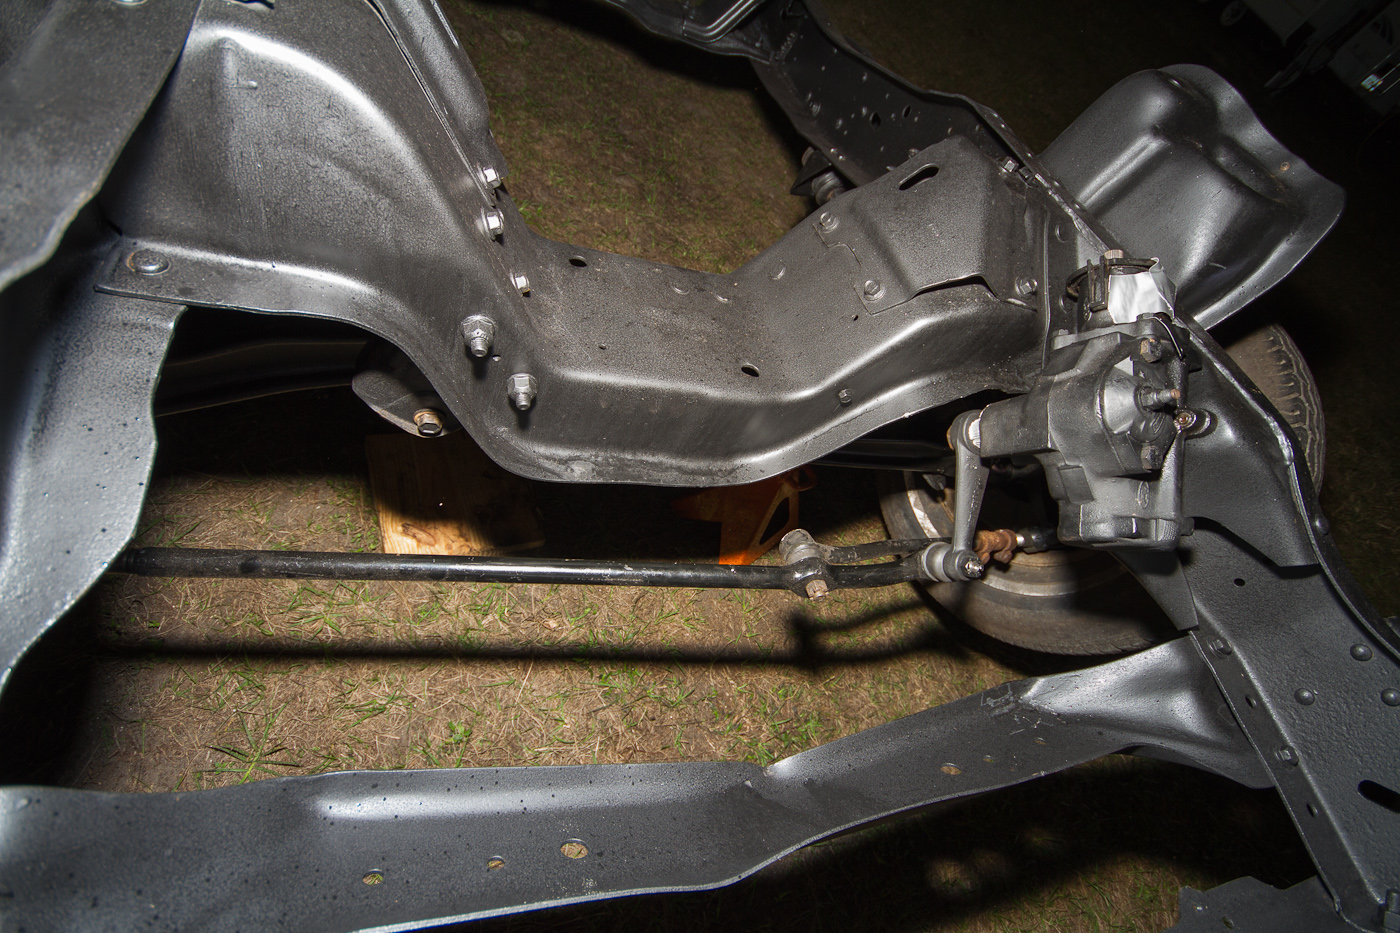
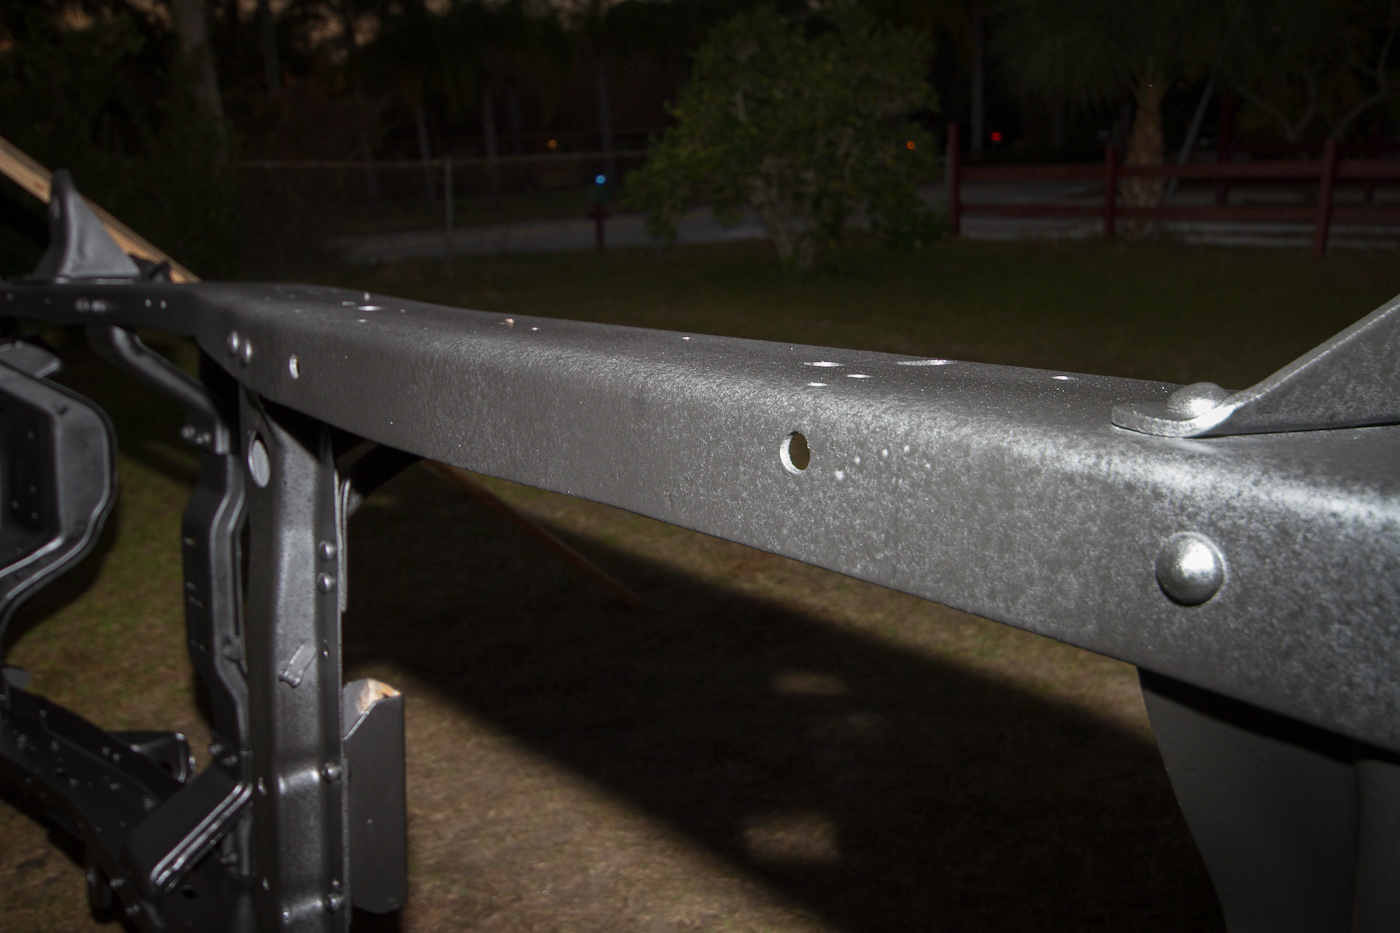
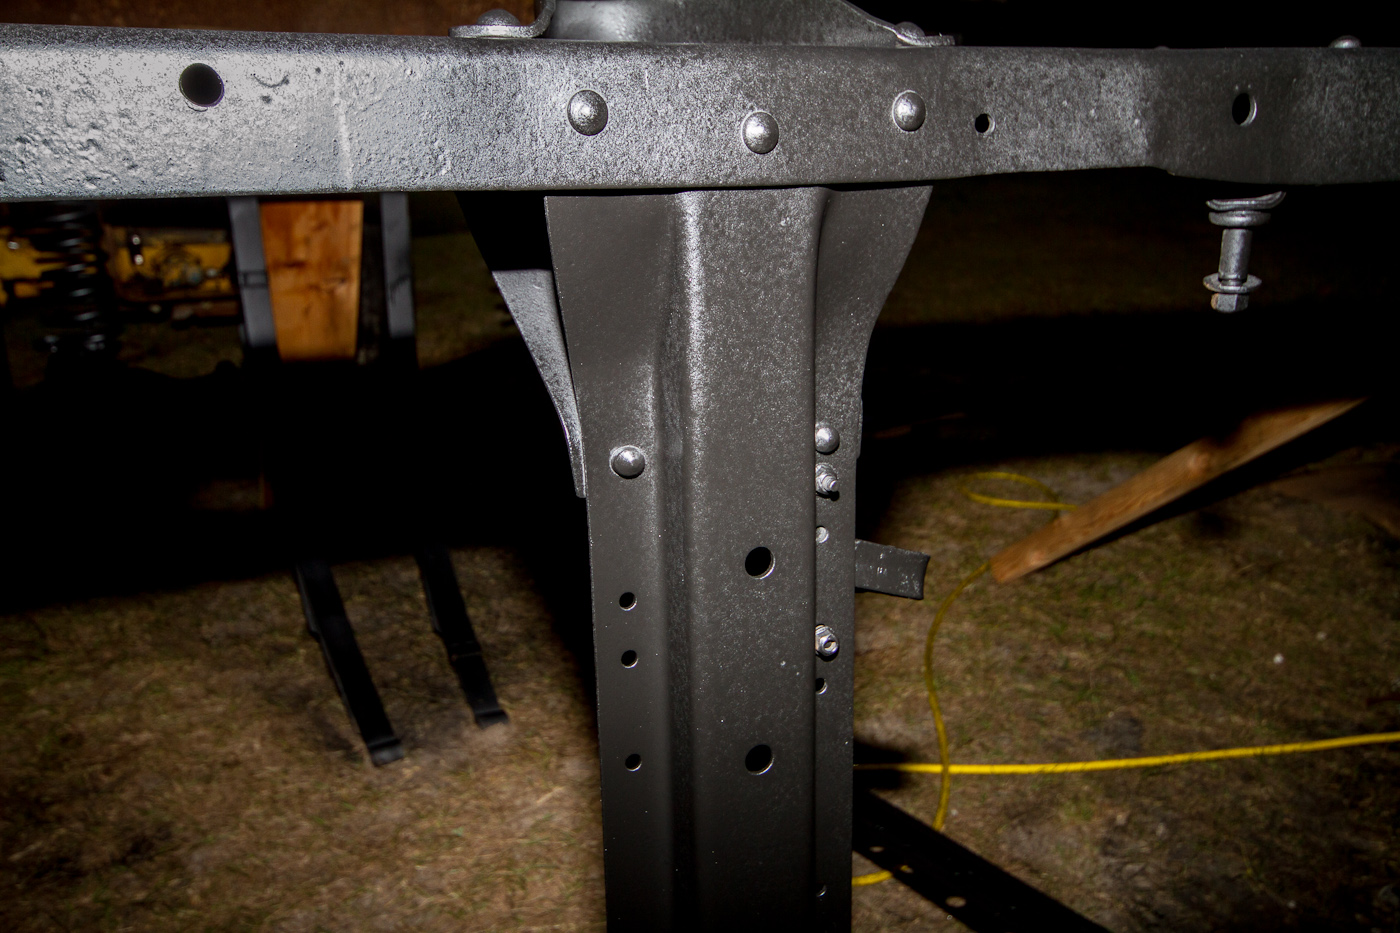
This is only about a half hour after the final bit of spraying, so it's not dry yet, but you can see some serious orange peel in it. Hopefully it dries a little flatter, we'll see Thursday, after it's had a two full days to bake in the Florida sun...

http://www.ronman.org/pics/f150/IMG_0281.jpg

http://www.ronman.org/pics/f150/IMG_0282.jpg

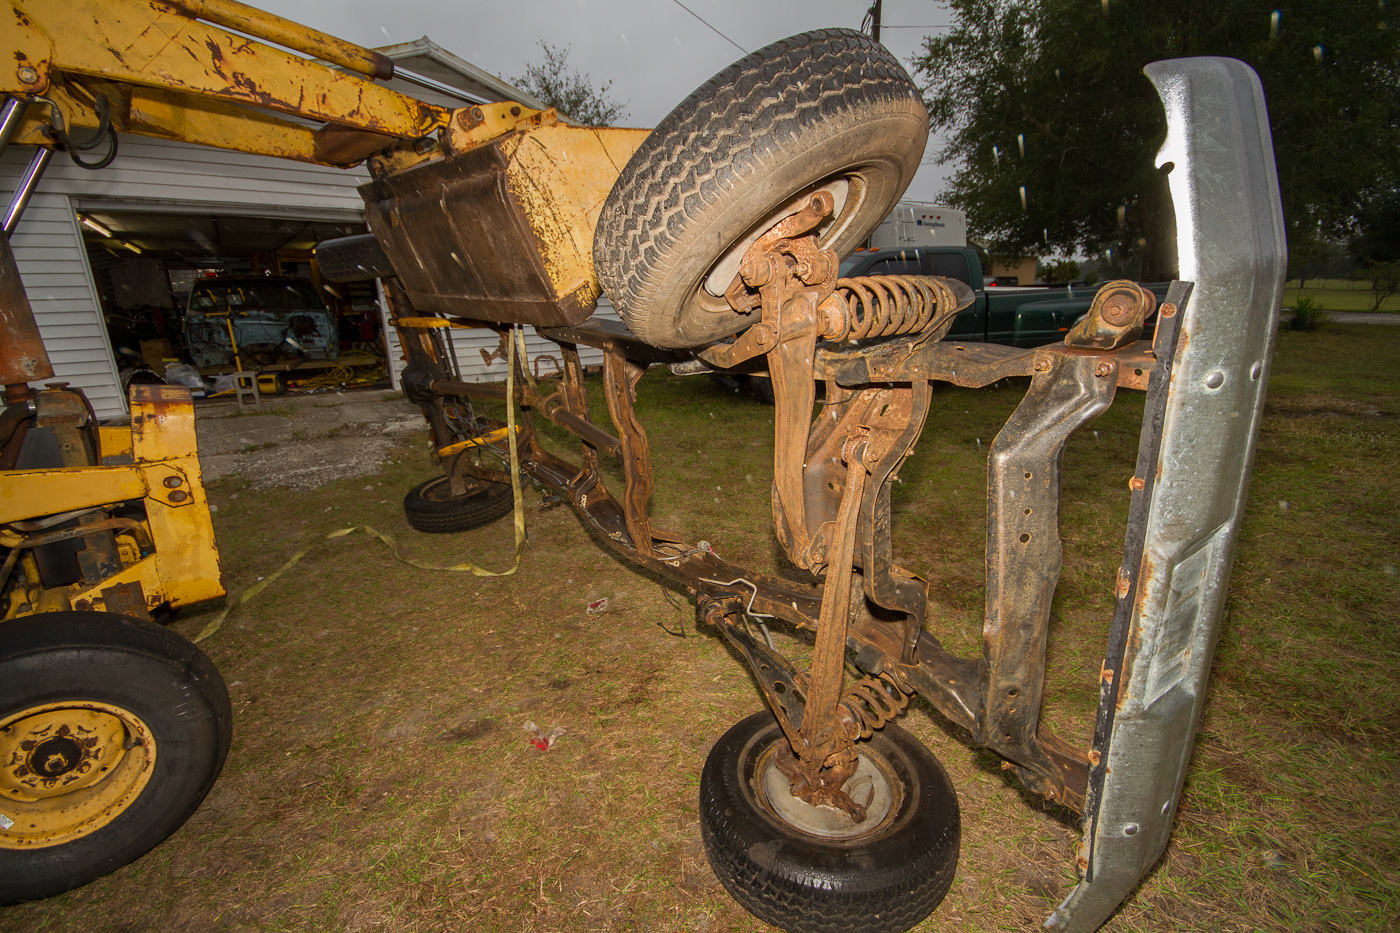
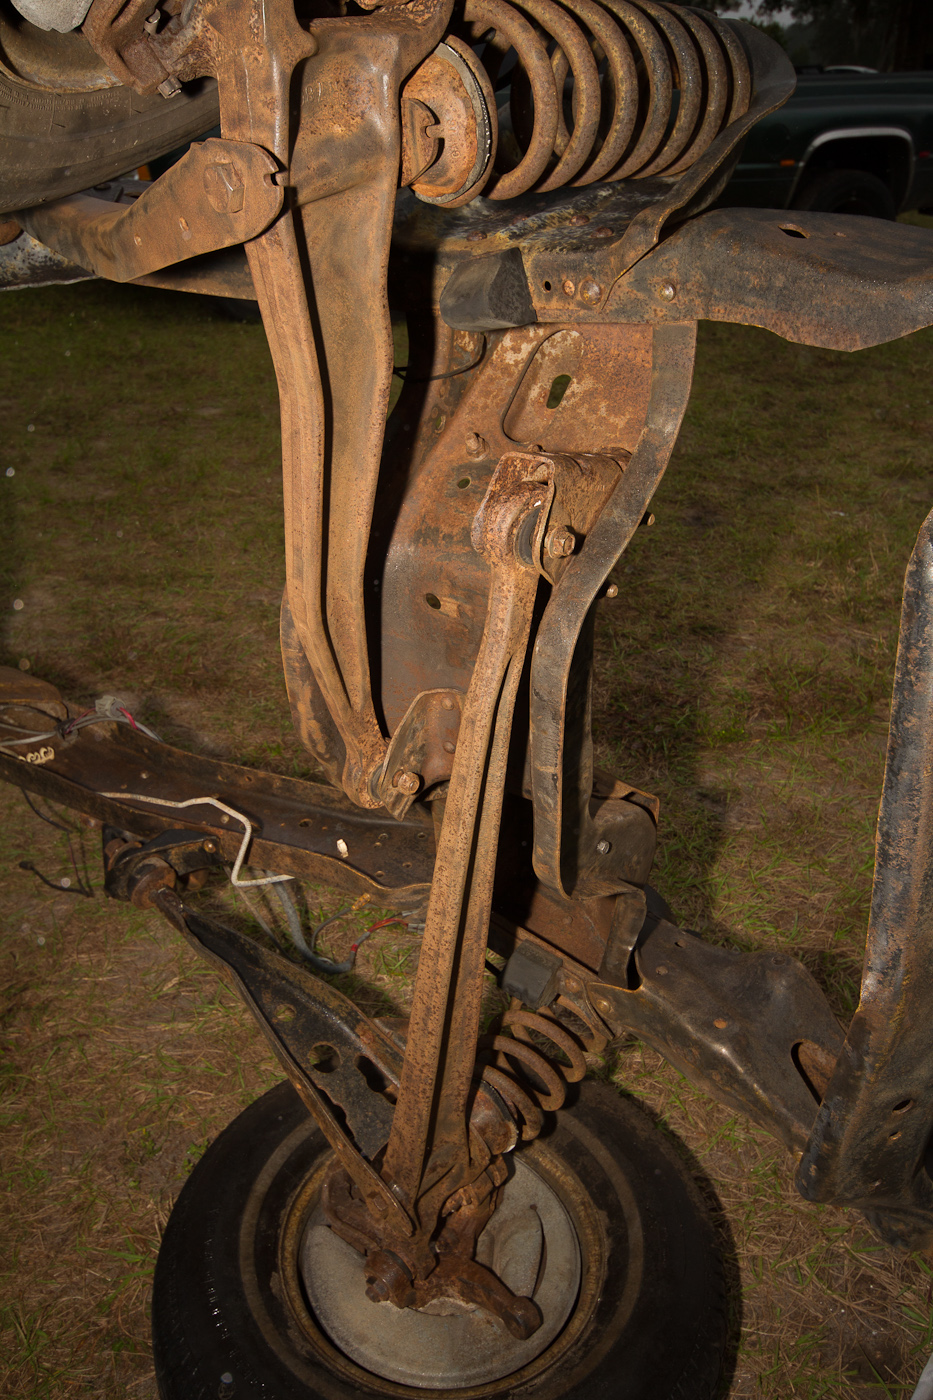
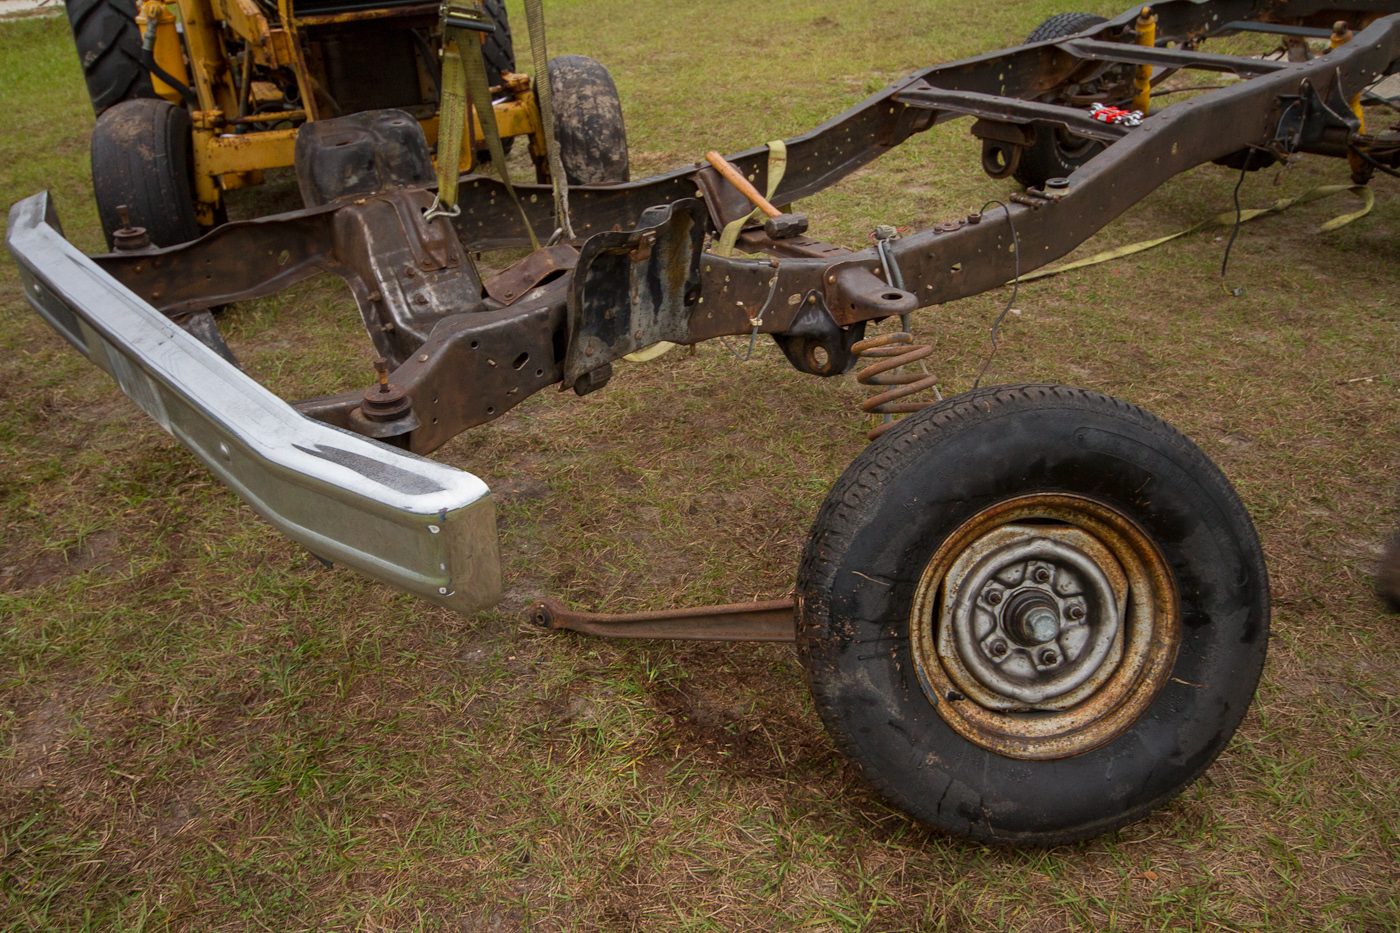
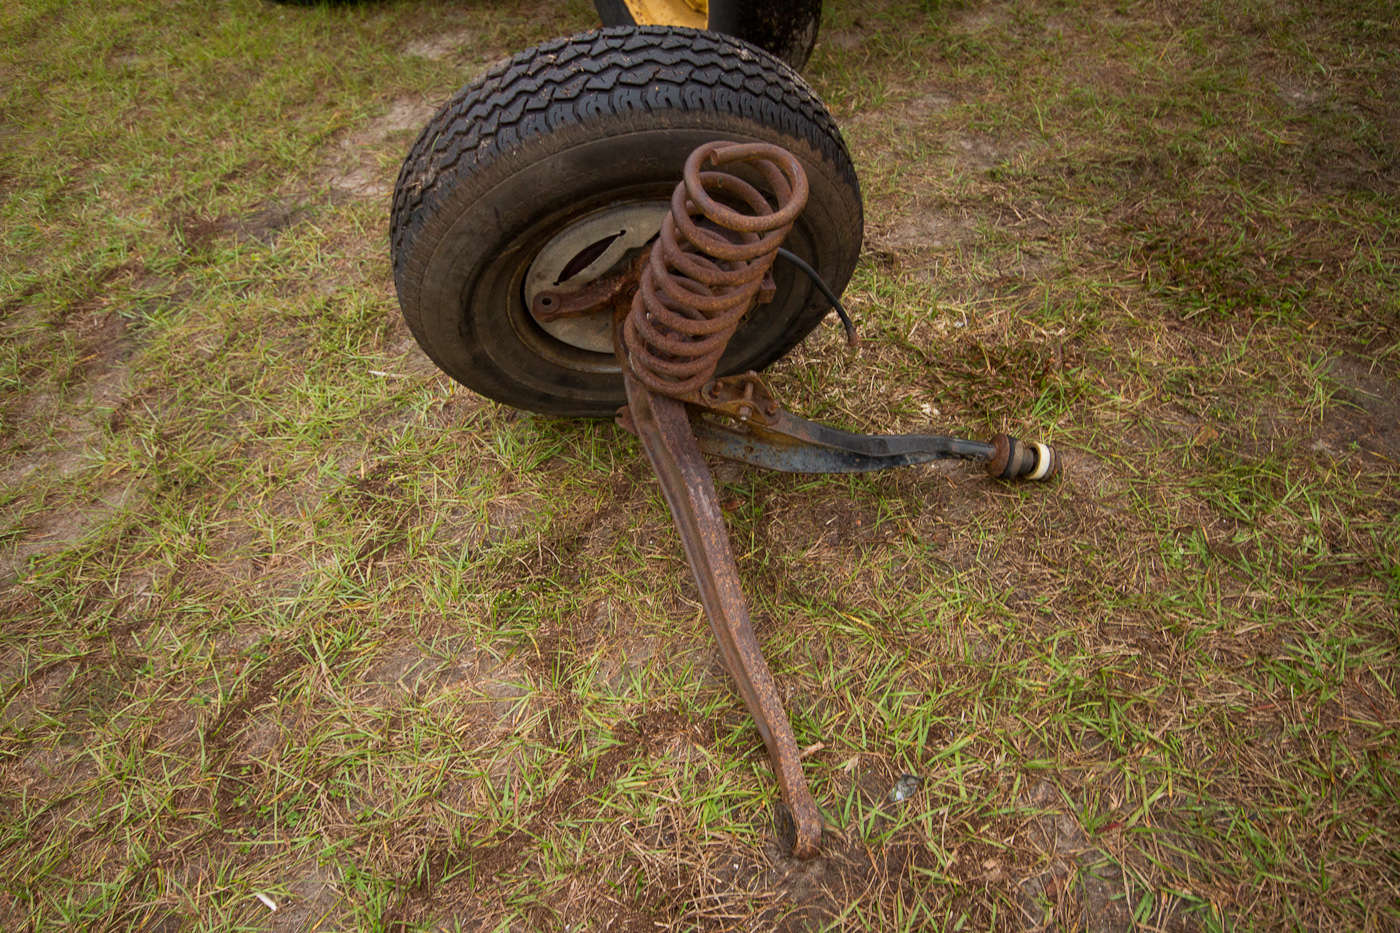
Coils are gonna need some attention with a brush, but I'm OK with that. I didn't disassemble the leafs fully (Mike vetoed that plan) so they're cleaned up as good as we could get them and they got sprayed too. They still need some attention to detail with the brush, as well...

http://www.ronman.org/pics/f150/IMG_0284.jpg

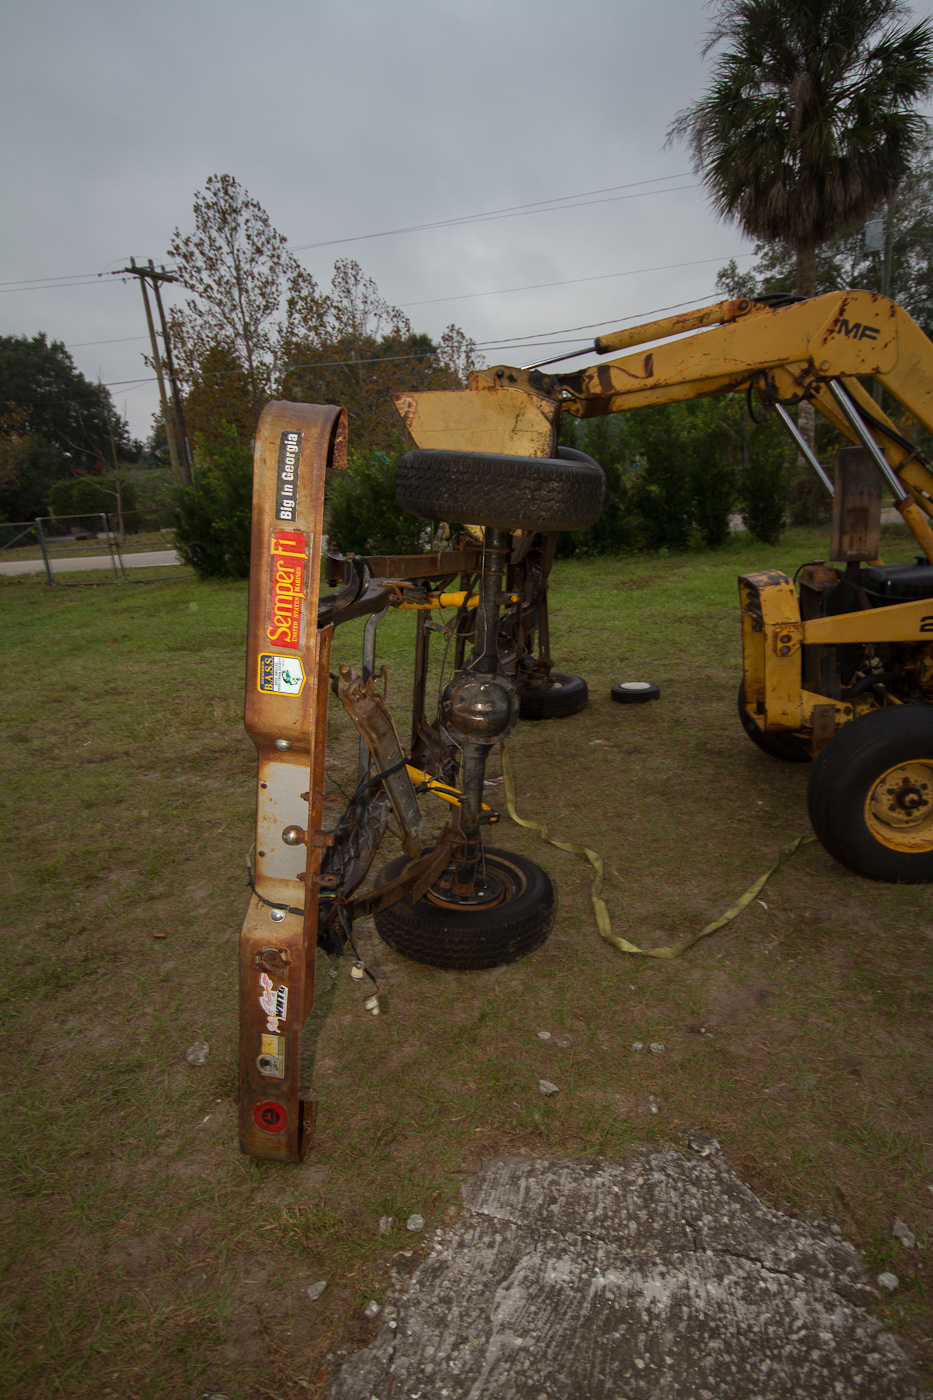
"greasy side" of the frame, as in "keep the shiny side up and the greasy side down." There better not be any fucking grease on this any time soon!

http://www.ronman.org/pics/f150/IMG_0285.jpg

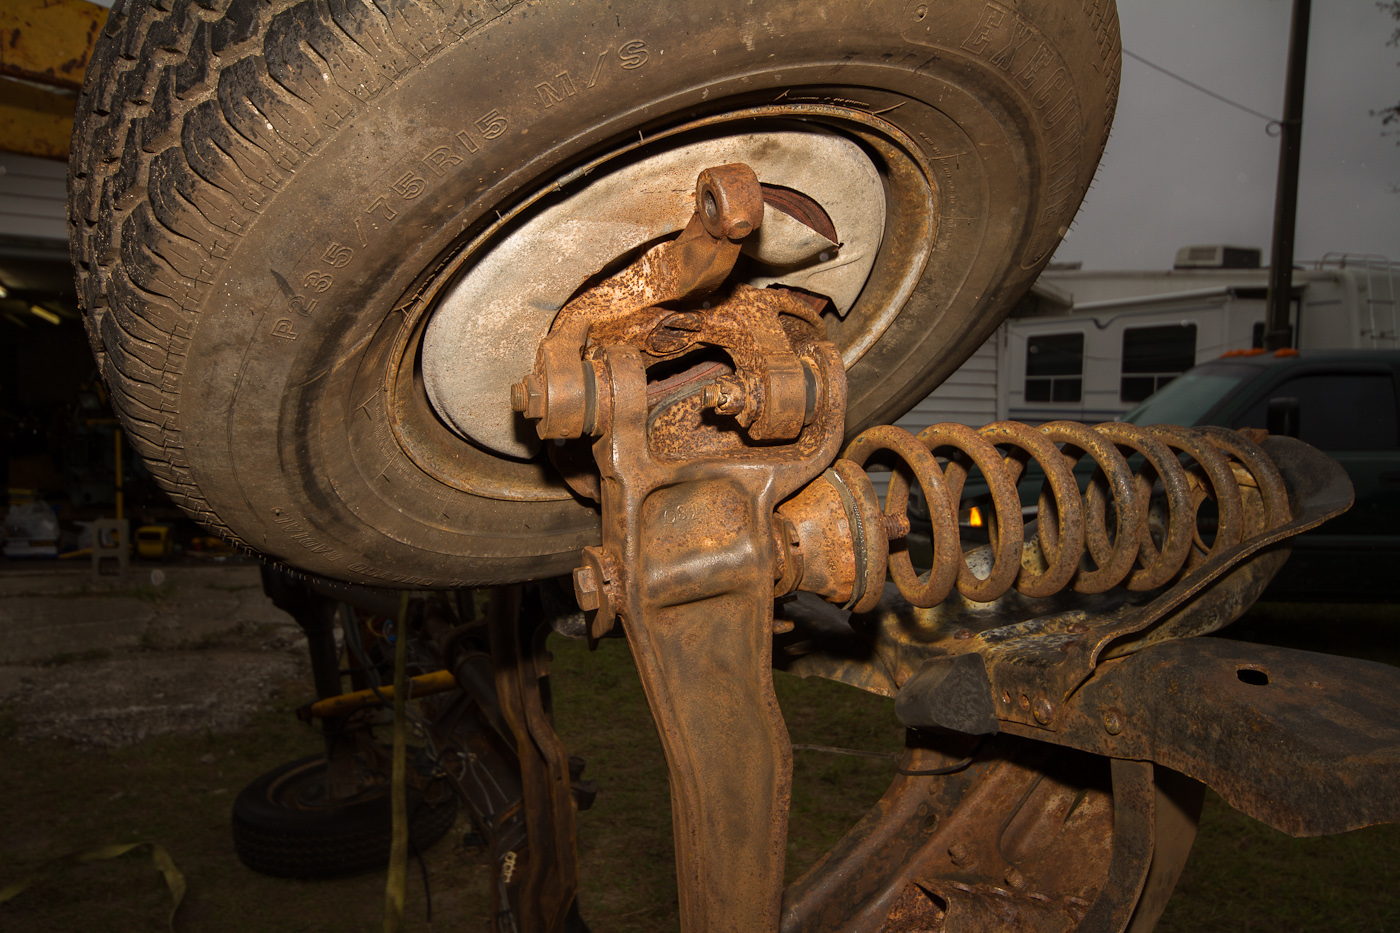
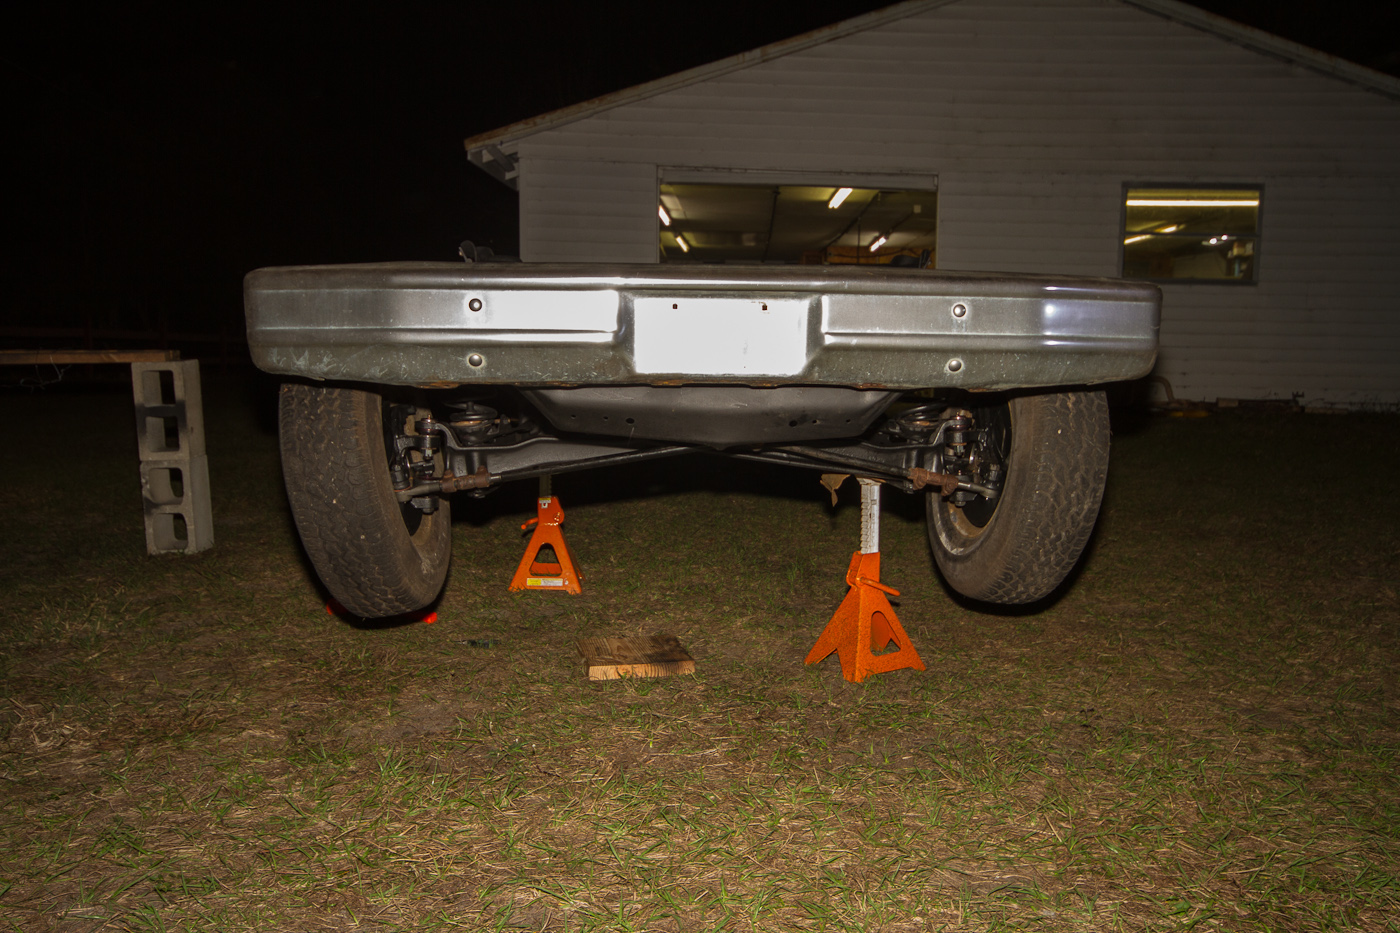
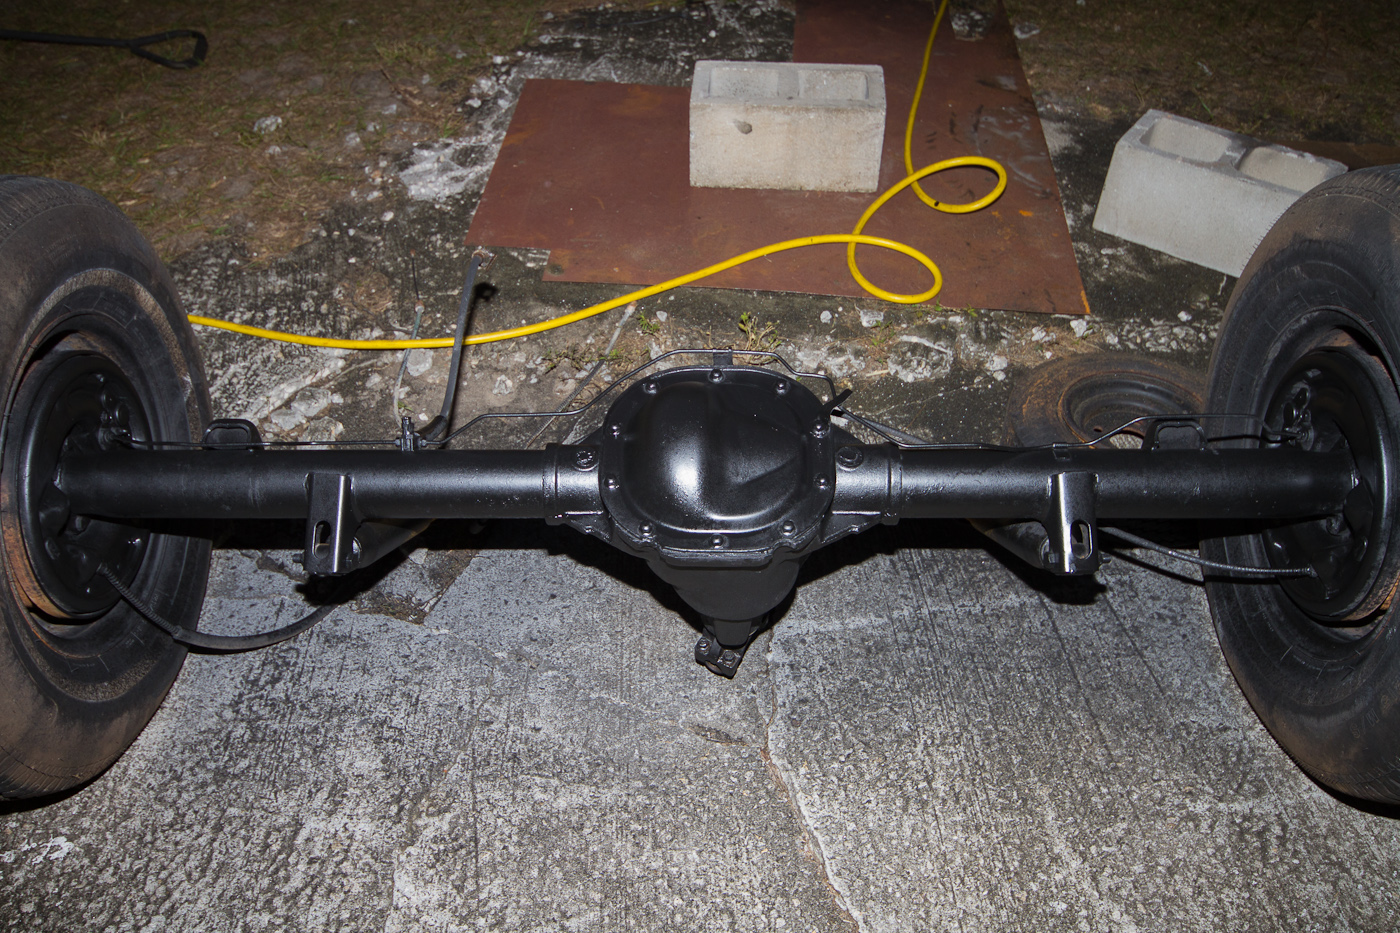
Drums are toast, as are the tires, so who cares about overspray here. It needs a second coat of paint.

http://www.ronman.org/pics/f150/IMG_0287.jpg

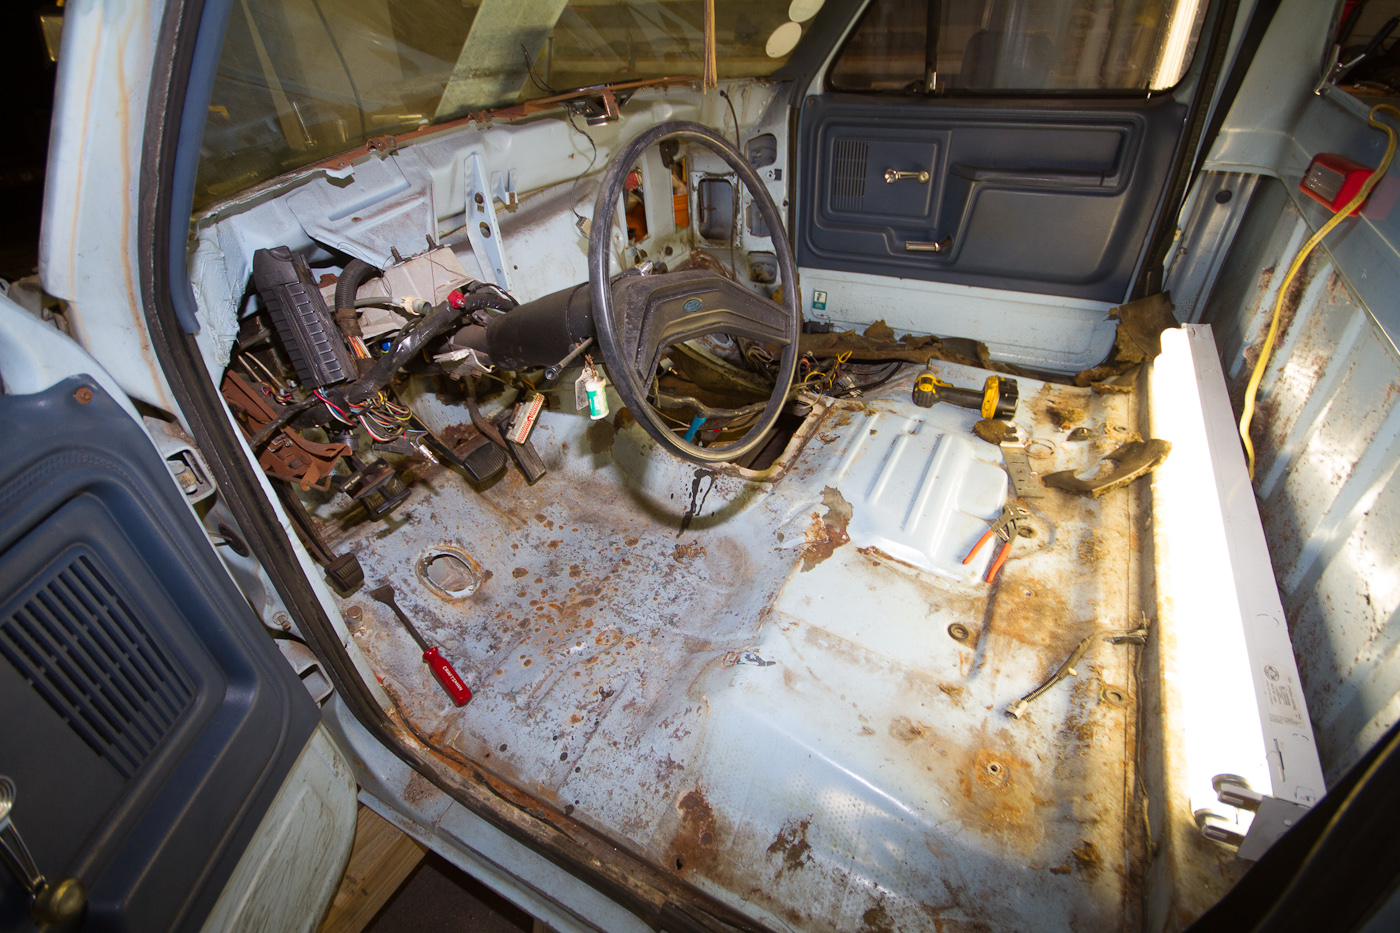
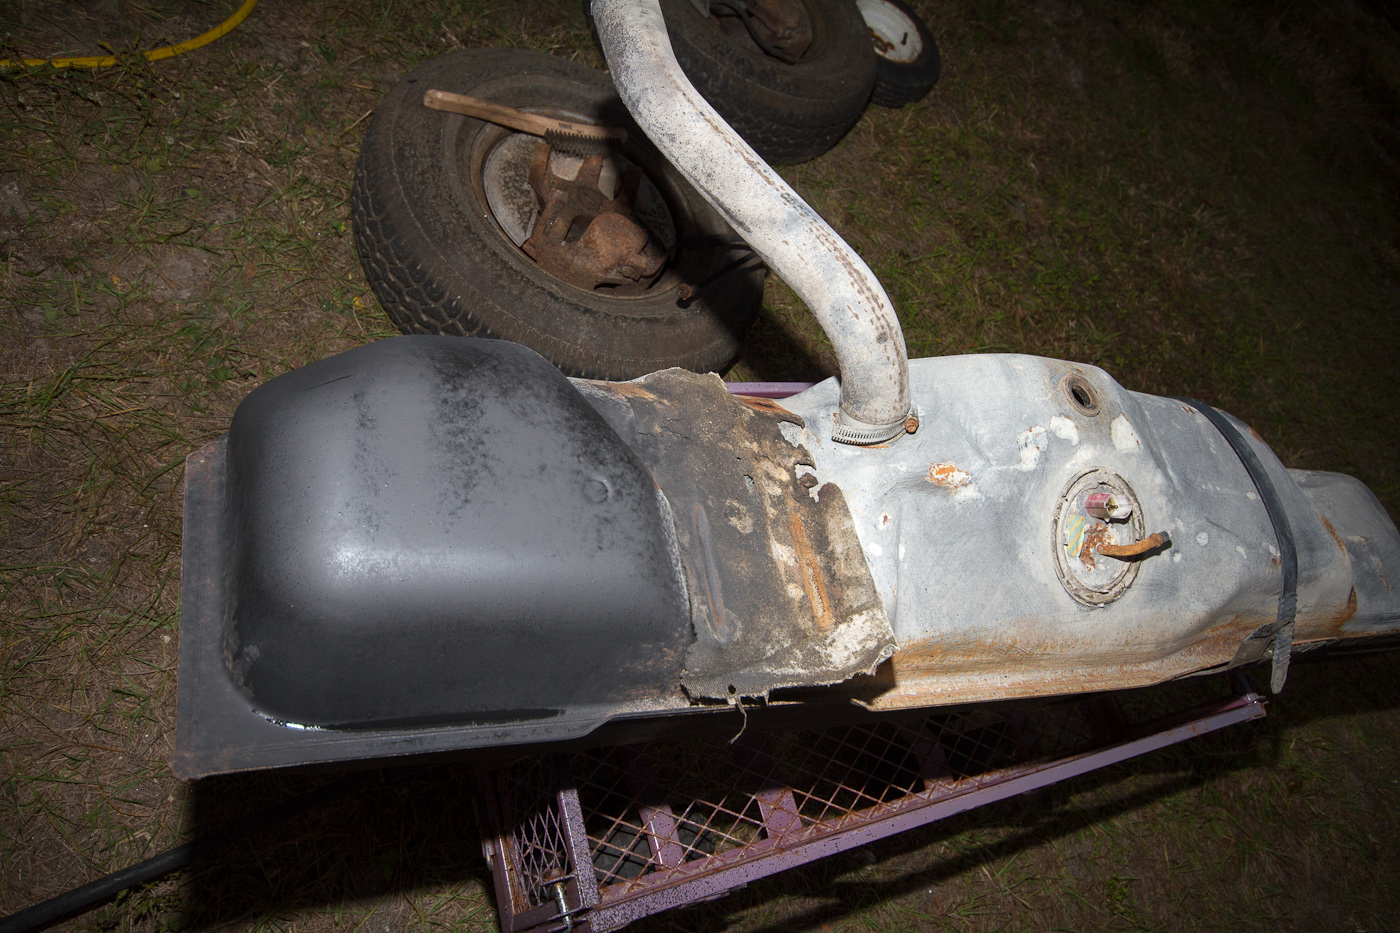
Gas tank hasn't really been cleaned up. The whole bottom half of it (below the seam) is still NASTY, with a healthy coating of grease and dirt. It's gotta be pressure-washed, and I've gotta pull the sending unit out so I have a nice big hole to stick the pressure washer wand into to blow out some of the varnish that's in there. After that I'll probably drop some rocks and some kind of strong solvent in there, and give it a vigorous shake to try to clean it up some before putting it back together and getting it ready for paint.

http://www.ronman.org/pics/f150/IMG_0288.jpg

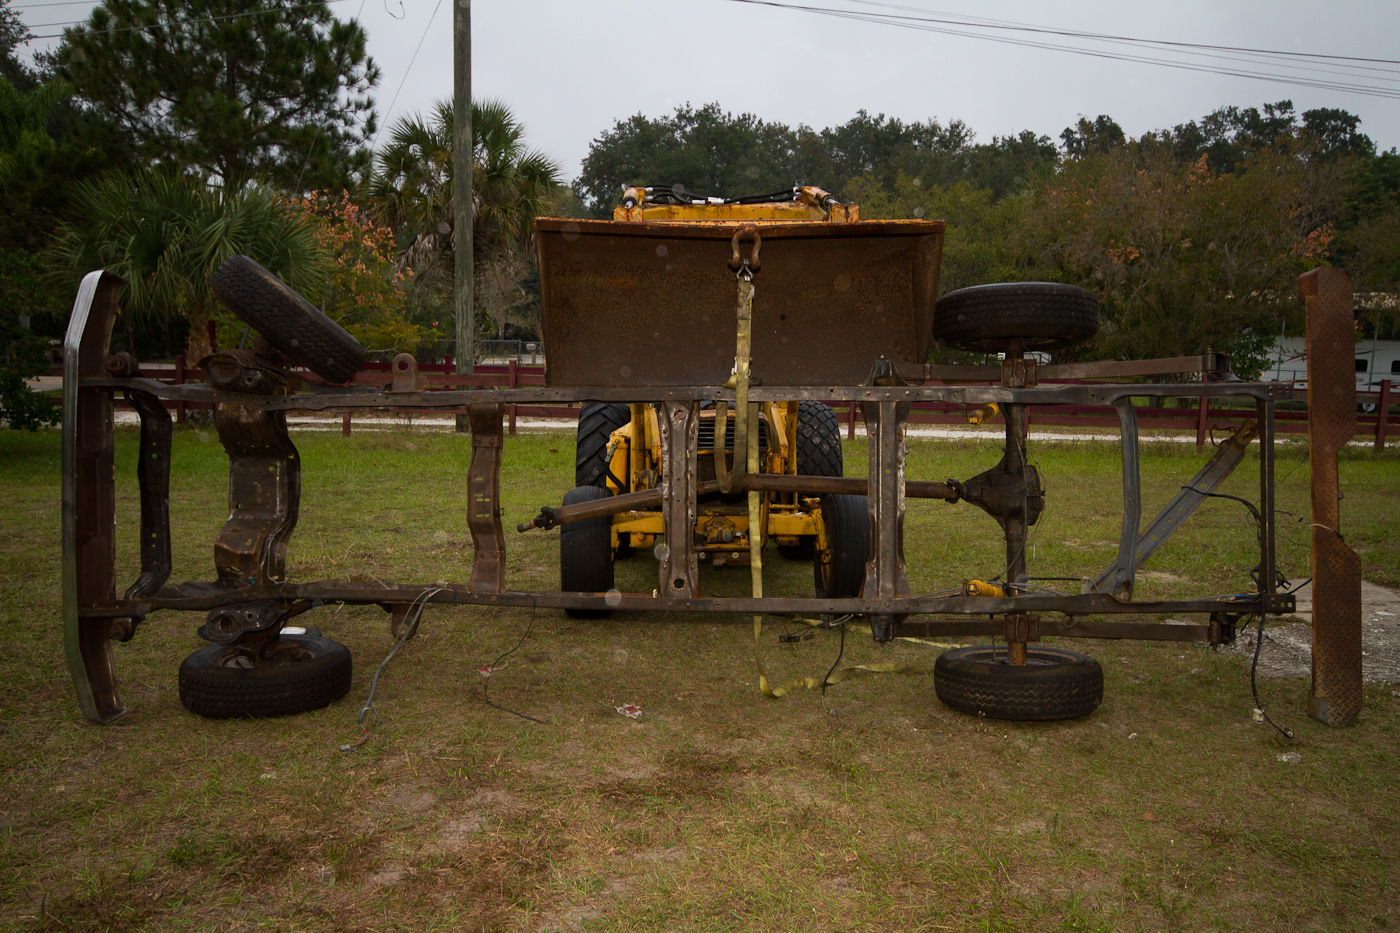
So, Thursday we'll lift the frame with the loader and flip it over so that the rail that's facing the ground can be painted. If all goes well with the "new" paint plan, we'll flip it over Friday and do the side I did today once more. If not, whatever, it's still lightyears ahead of where it was. Gas tank has to be addressed, and the rear needs a second coat. Either Saturday evening or next Monday (Mike has family in town this weekend, so Sunday is off-limits) we'll either lay the frame down and start putting the suspension back together under the lights, or work on the motor. Current plan is to hopefully get the motor and trans in the frame within the next week, and perform an ops test before the body gets done.

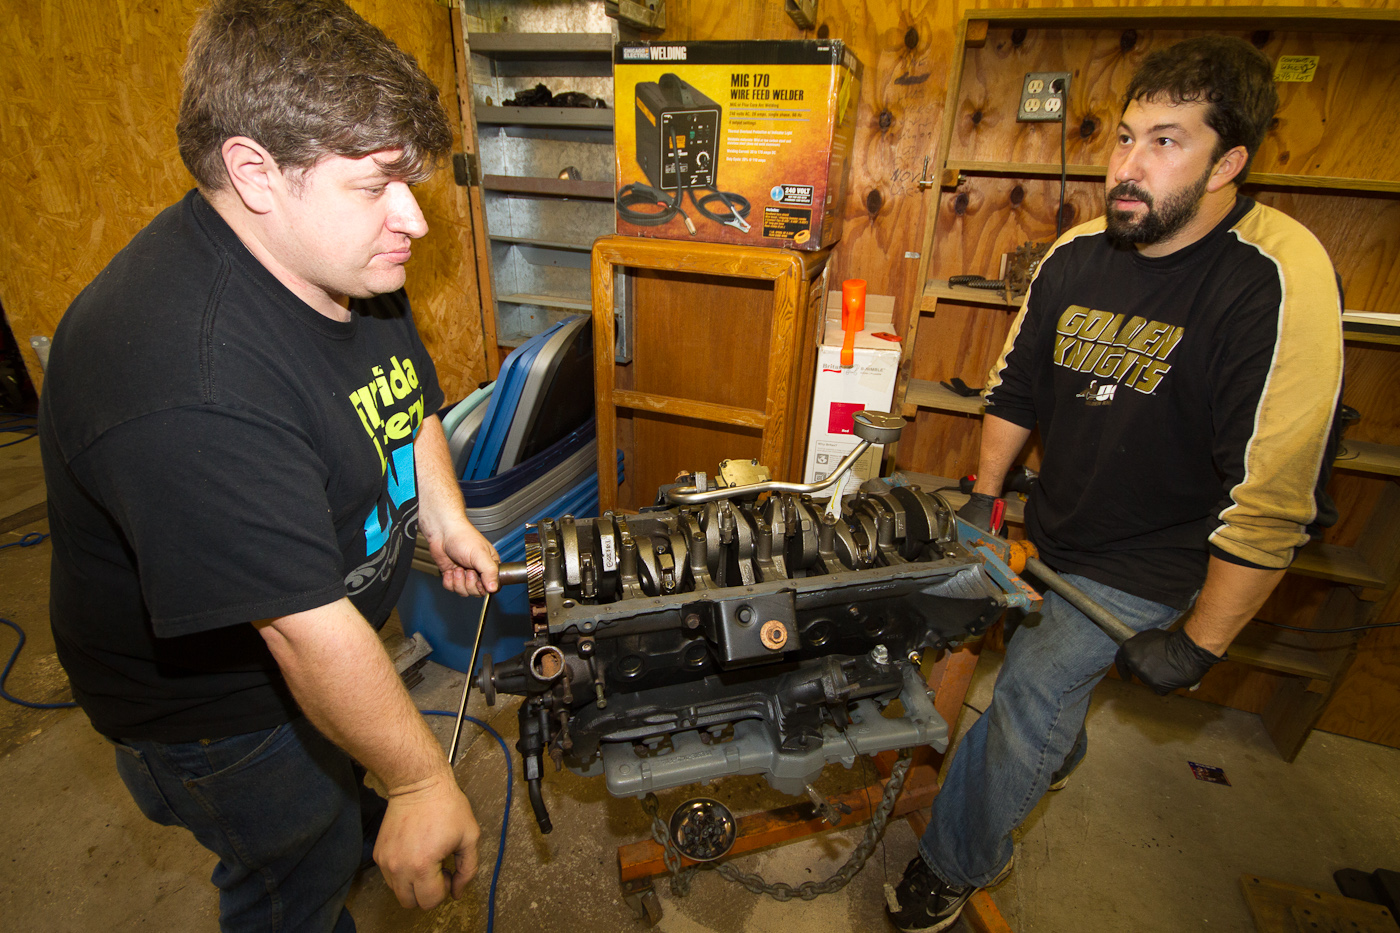
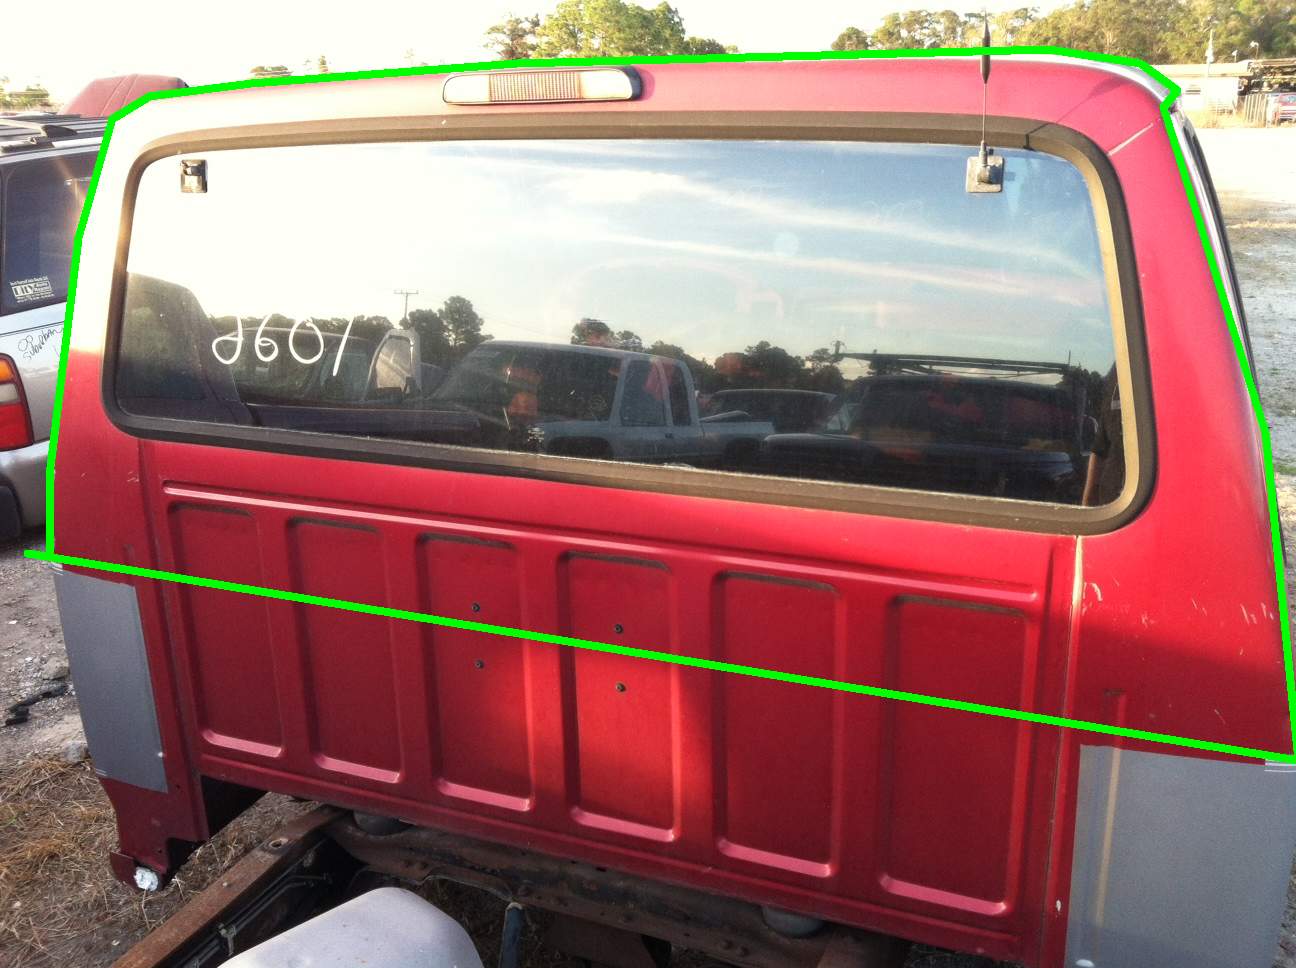
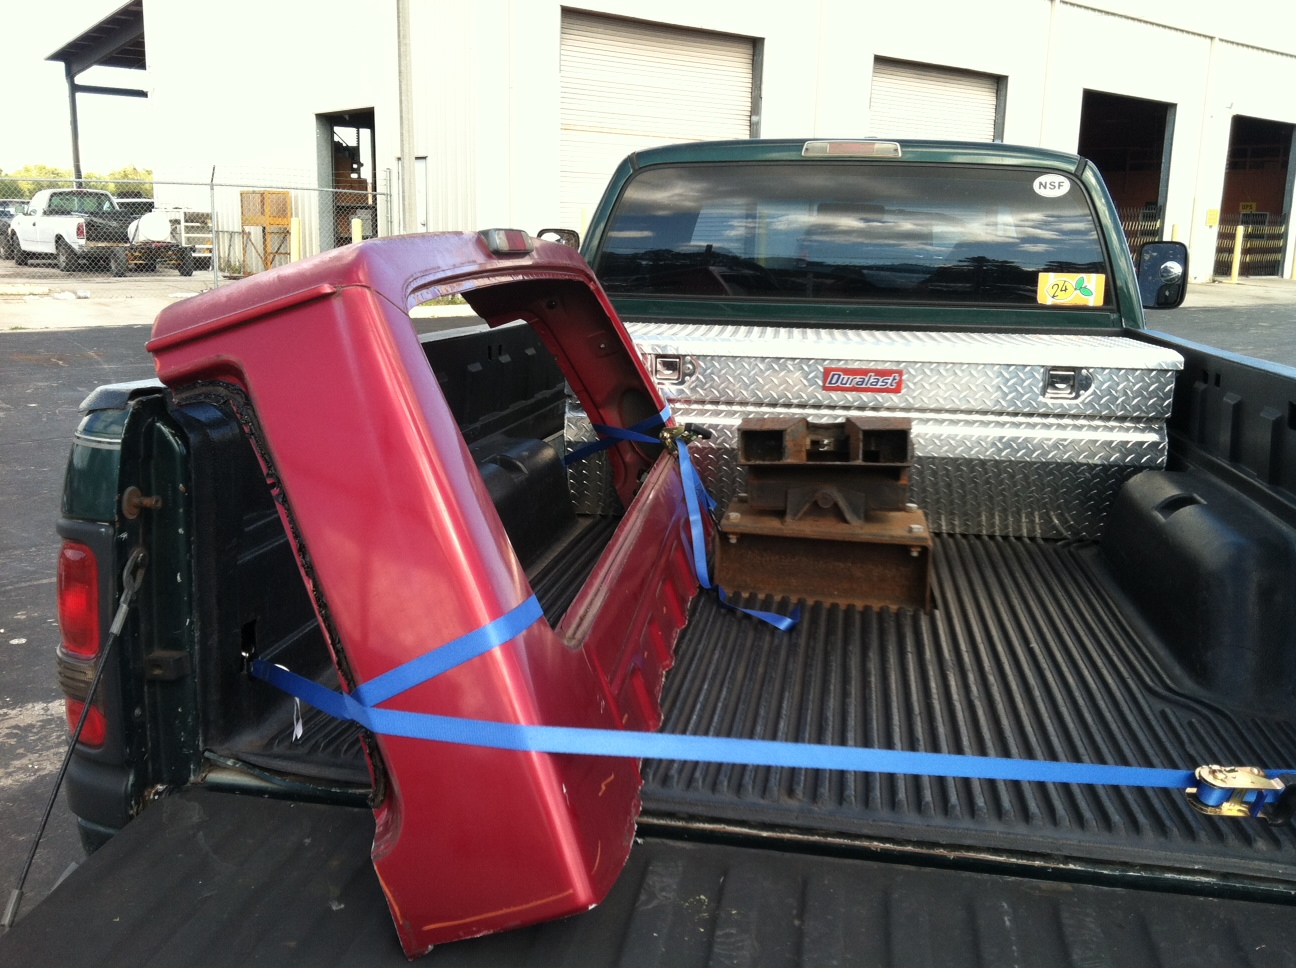
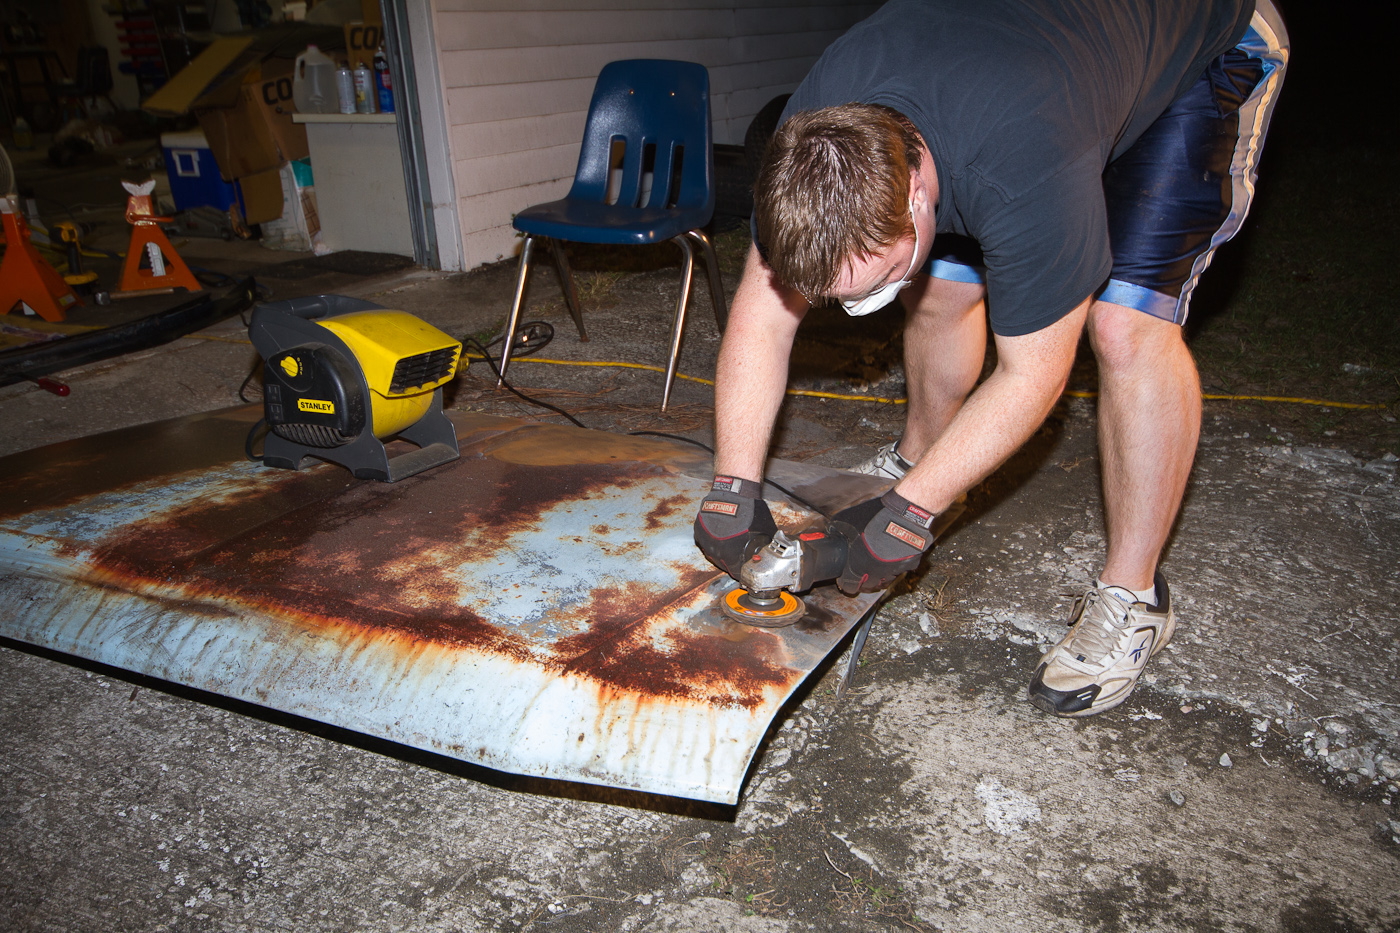
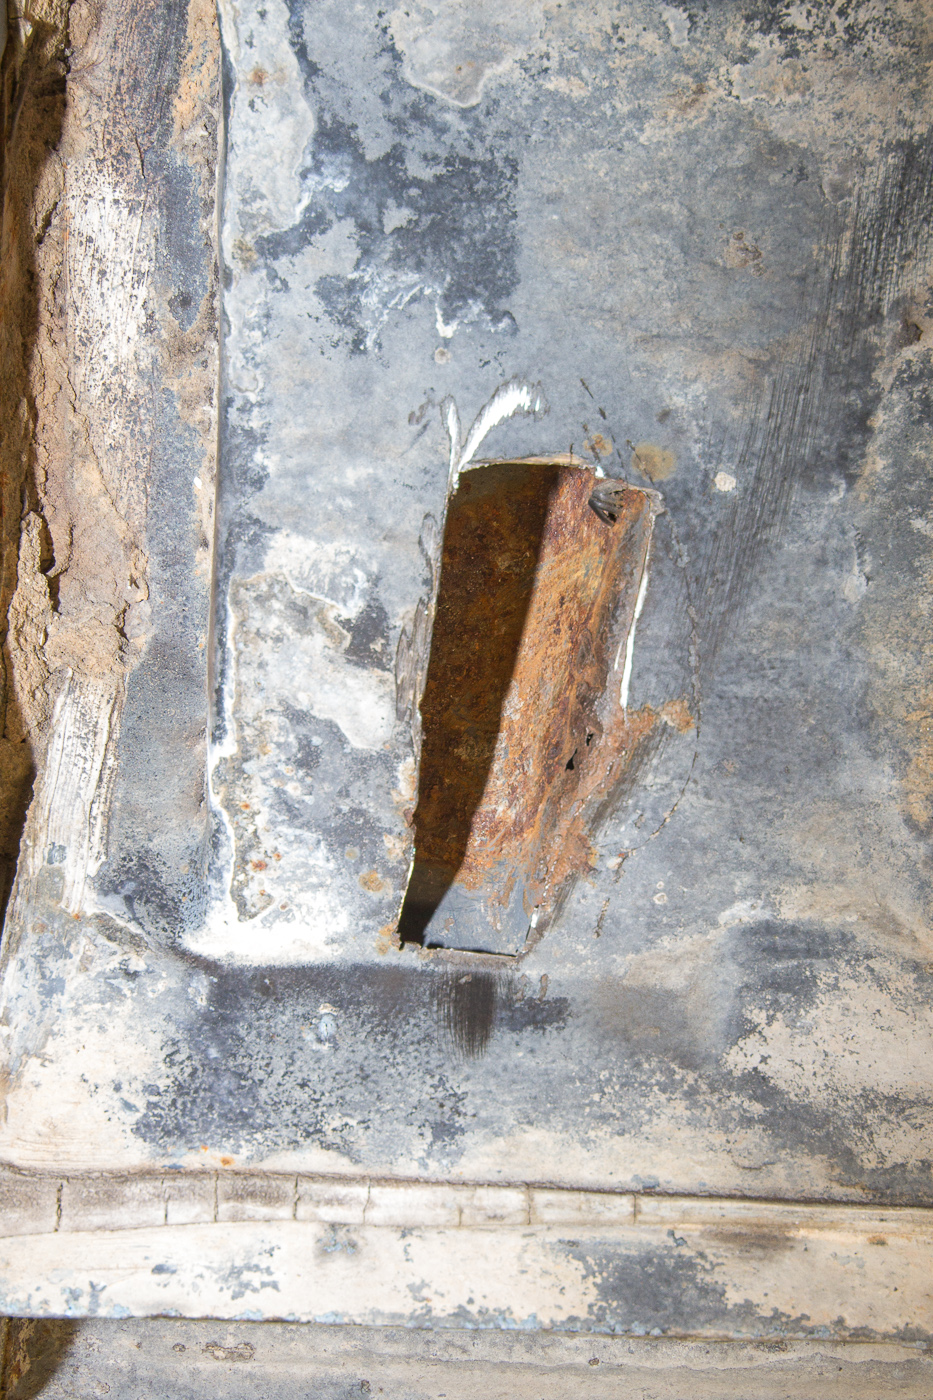
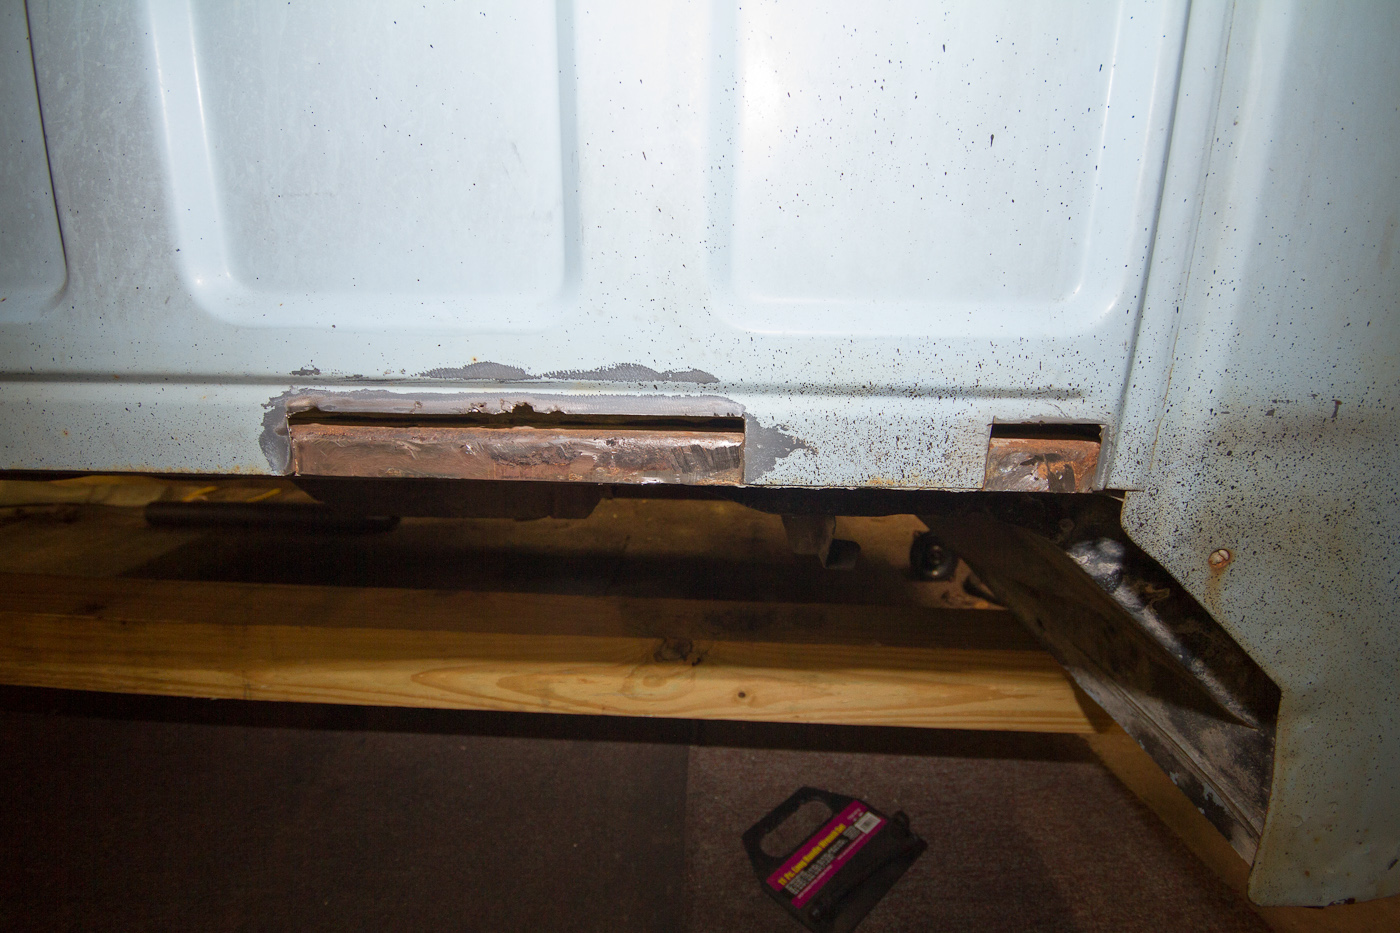
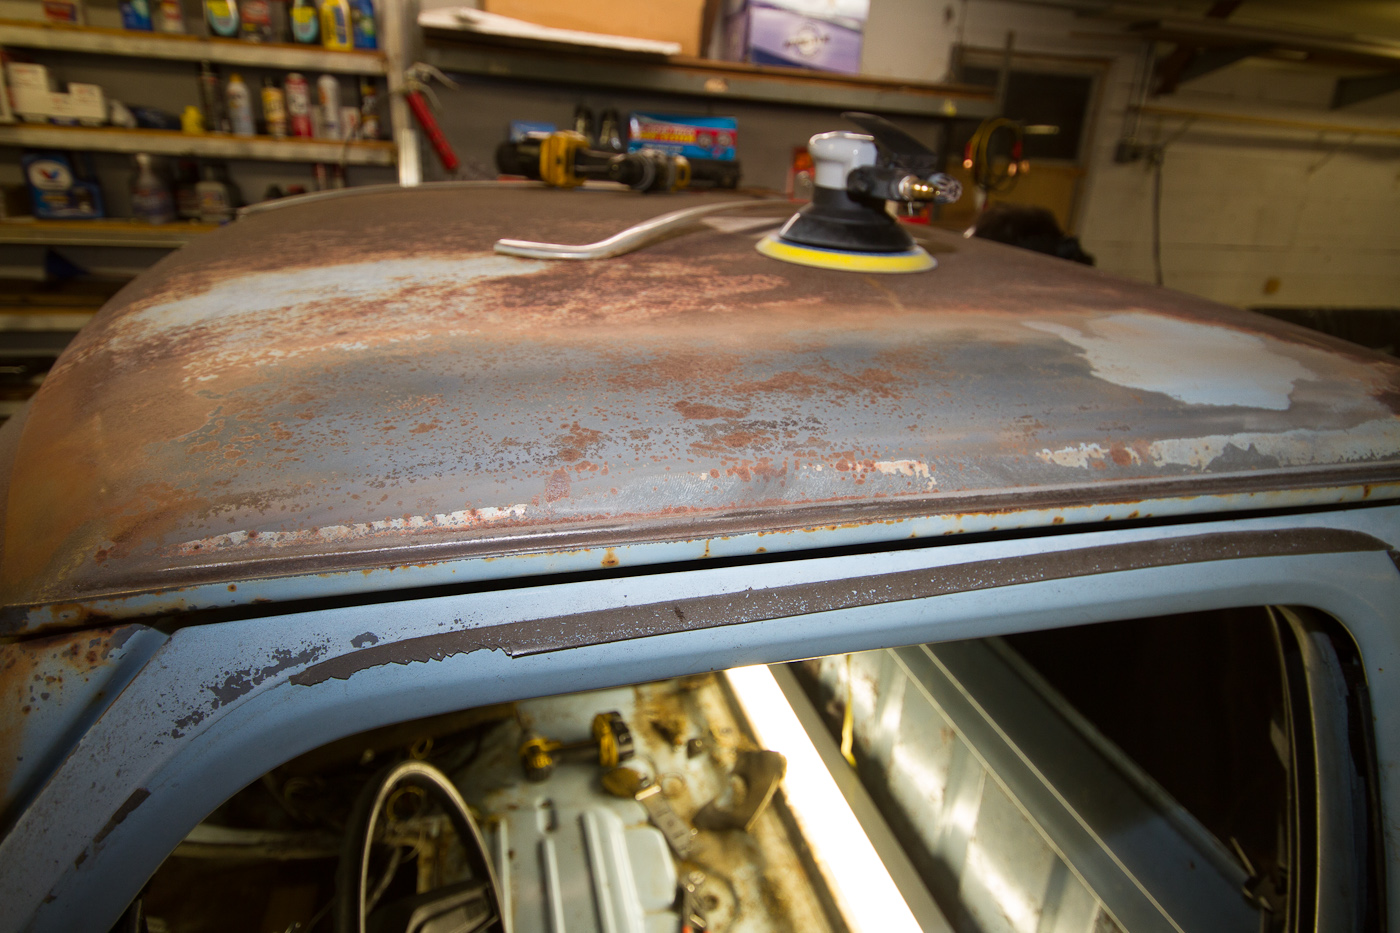
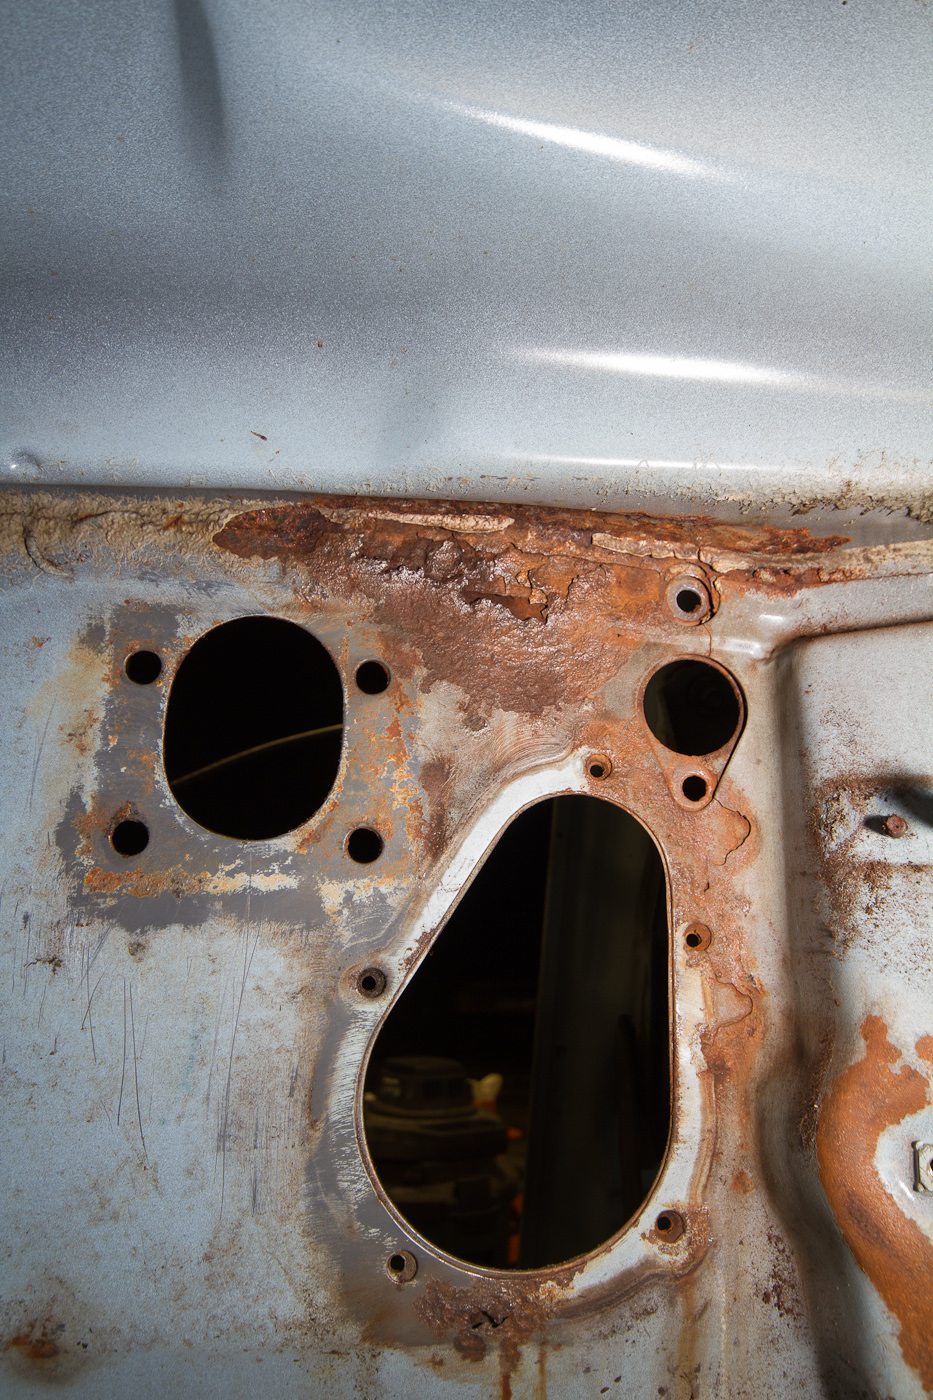
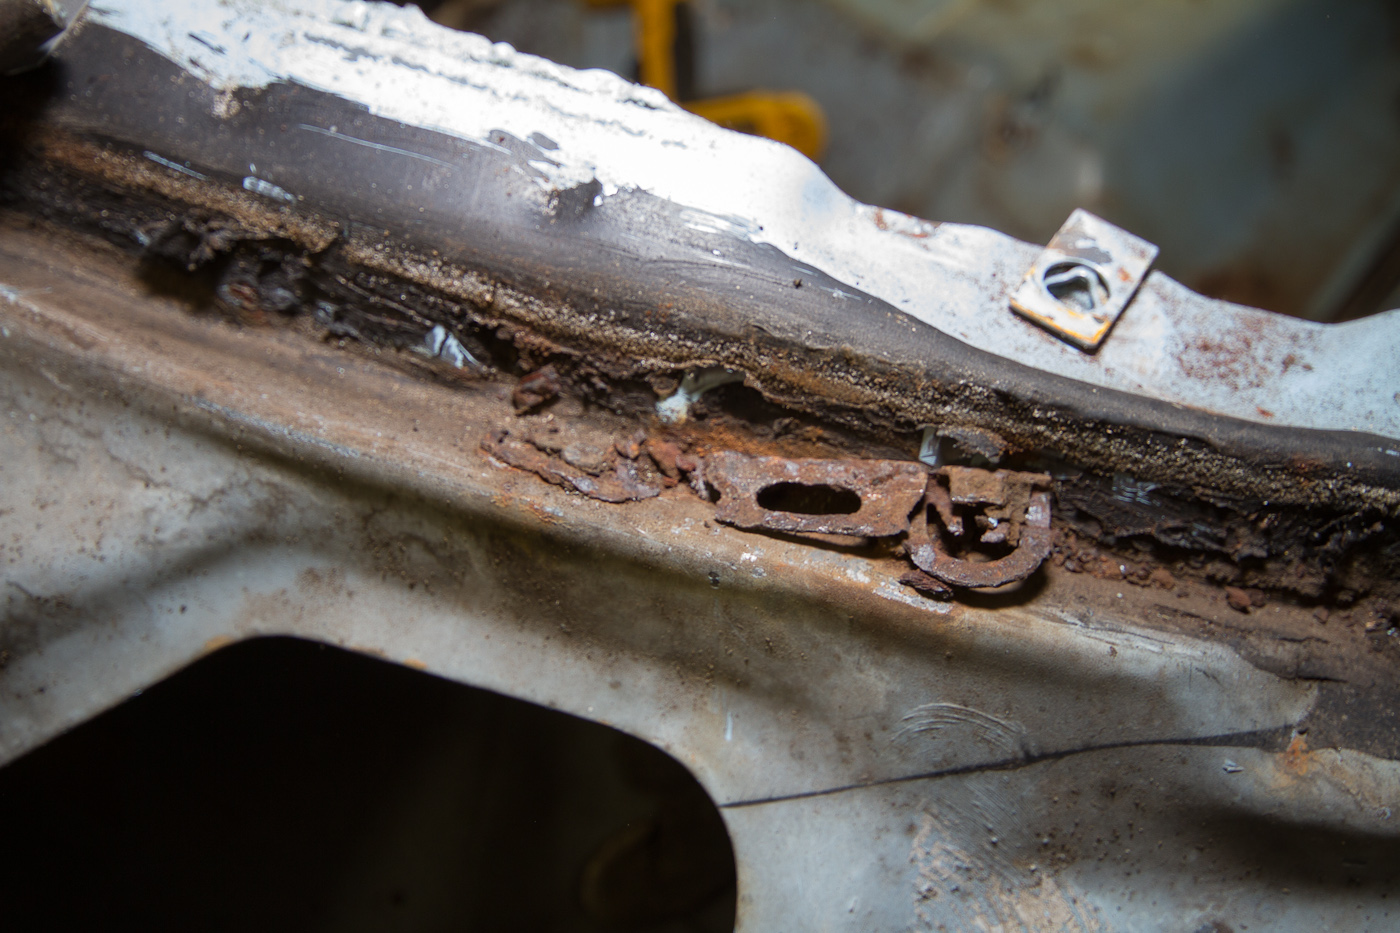
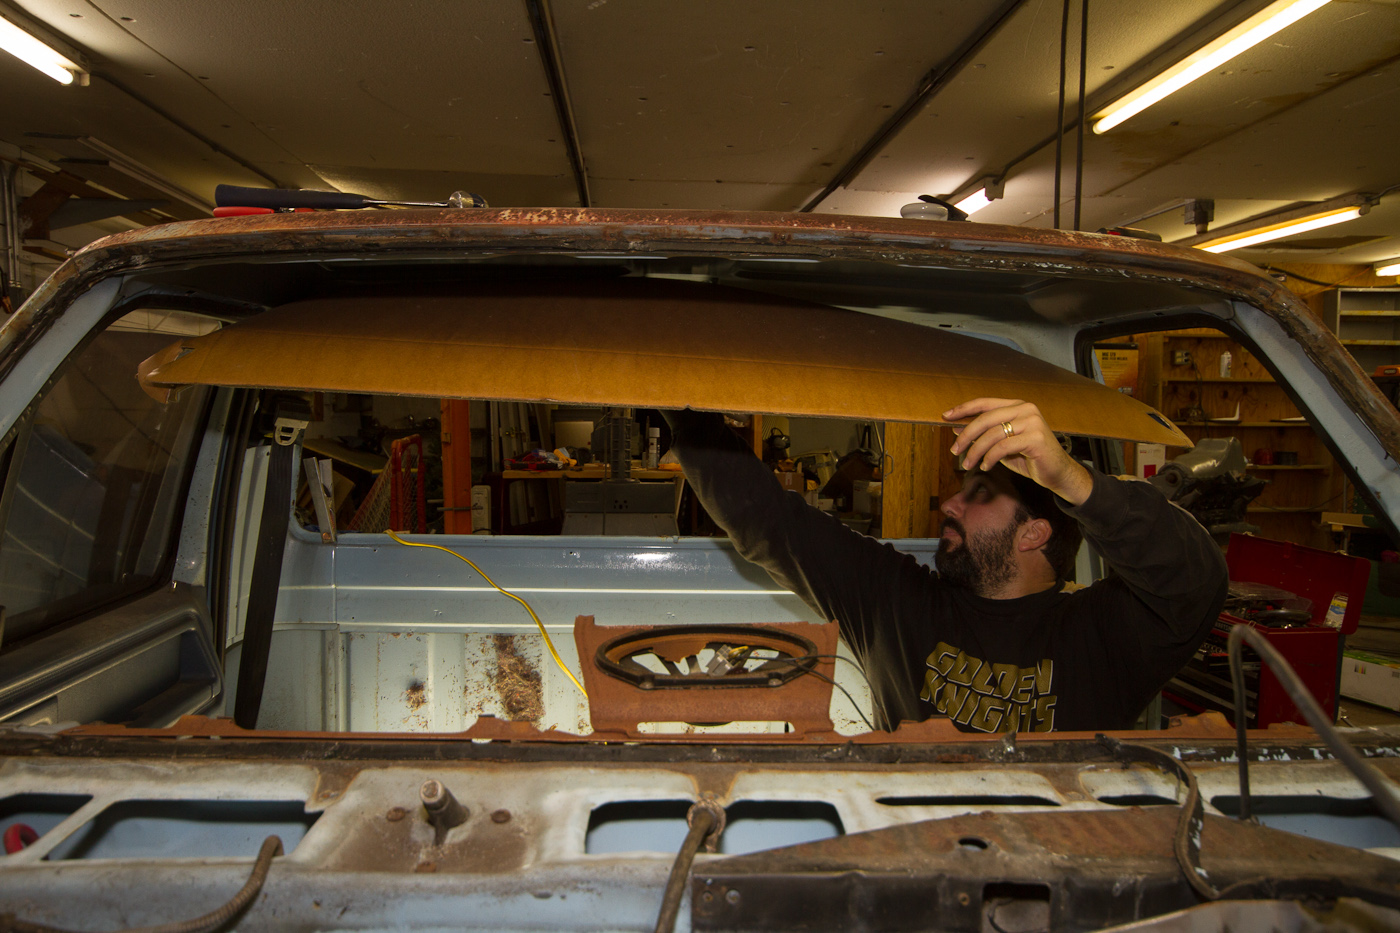
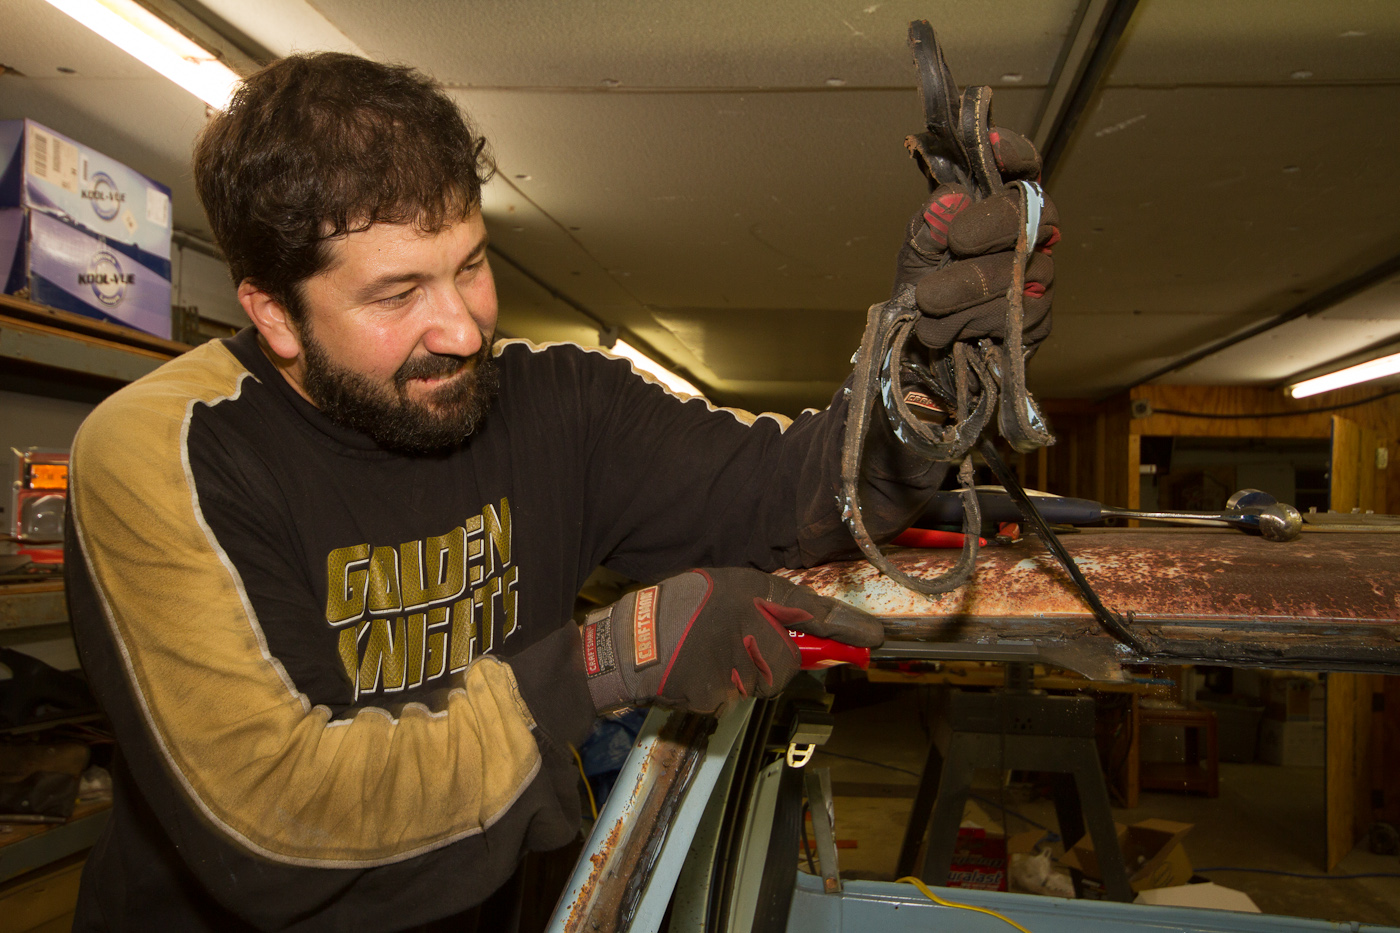
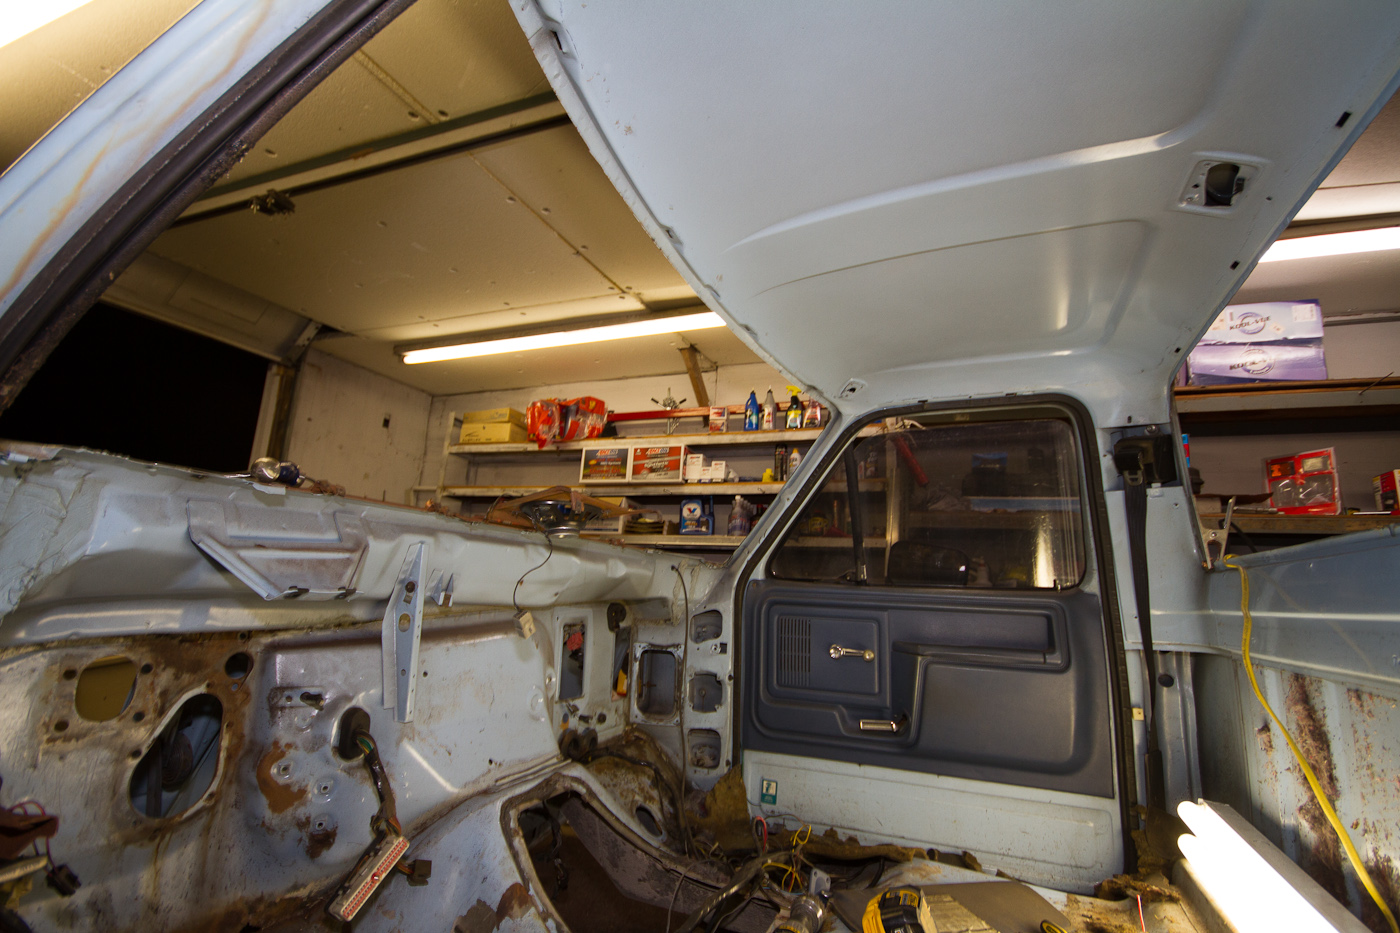
And on the subject of the body, I was talking to Jeff (Speedycop, duh) on the phone earlier this evening and he said that instead of buying a sheetmetal brake and trying to fab patch panels for the rear window frame, why not just take my handy DeWalt 18V sawzall to the junkyard and cut a frame out of a truck with less rust. This is a BRILLIANT plan and when I told Mike a half hour later he had the same sort of epiphany I did. He's gonna start calling junkyards (there are LOTS of them around here) tomorrow morning when he gets home from Alro with a 4x8 sheet of 20ga and (hopefully) a 6' stick of 4" c-channel so we can make a new crossbar for my press, and if he finds anything I'll go to the yard Monday or Tuesday when I'm off work again. Oh, also today he got a regulator for our MIG and a bottle of CO2/argon welding gas, which will come in handy once we get the new window frame bits to weld in.

Official photographer/Team Police Brutality|Speedycop & the Gang
Lackey-mechanic-whatever/NSF Racing
Sycophant/Judge Phil, Jay Lamm, Kim Harmon
Galaxie Driver/not Parnelli Jones

Re: My F150 project

Use muriatic acid along with many lbs of chain, nuts, and bolts to slosh around the inside of the fuel tank.  Feel free to let it sit for awhile as well and then work it some more.

Speedycop/NSF Racing /Pinewood Dirtbags
'10 Summit, CMP3, Autobahn, '11 CMP1, NJMP, CMP2, Summit, G'man, Stafford, Charlotte, Autobahn, ECR '12 CMP1, NJMP, G'man, NHMS1, Summit, CMP2, NHMS2, ECR, '13 CMP1, ECR, Summit, NJMP, THill, CMP2, MSR, NHMS, Sears '14 Barber, Sears1, ECR, CMP1, NJMP1, BWillow, Sebring, CMP2, THill, Sears2, '15 Sears1, Barber, Ridge, THill, '16 Sears1

Re: My F150 project

Hmm, muriatic acid... there is a pool supply store about 3/4 mile from me. Have to get a chain, though.

Official photographer/Team Police Brutality|Speedycop & the Gang
Lackey-mechanic-whatever/NSF Racing
Sycophant/Judge Phil, Jay Lamm, Kim Harmon
Galaxie Driver/not Parnelli Jones

Re: My F150 project

Before you fool around too much with that gas tank check on the price of a new one.  You might find it's not worth the effort to mess with the old tank.  I don't remember the price of that front tank you have but for the rear tank of my '92 Ford F250 it was maybe $130 shipped to my door for new from Rockauto.

Nick
Focke Ewe racing -> Muttonheads! Racing -> Torque Junkies
86ish VW GTI...now with TDI Powah!

Re: My F150 project

No reason to replace it, it's perfectly fine, just a bit dirty. And I'm trying to spend as little as I can, not drop $130 on a gas tank I don't need. That $130 will buy me a new vinyl floor, or wheels, or tint the windows...

Official photographer/Team Police Brutality|Speedycop & the Gang
Lackey-mechanic-whatever/NSF Racing
Sycophant/Judge Phil, Jay Lamm, Kim Harmon
Galaxie Driver/not Parnelli Jones

Re: My F150 project

Ideally today would have been a paint day, but it decided to rain. So, instead, when I got over there around 6, I started out by helping get another friend's '01 Altima out of the garage after an intake manifold gasket replacement that took us entirely too long to accomplish. Once I got to a point where I could get to work on the truck, I started out by enlisting Greg's help in laying the frame on the ground, so that I could put the straps to it and lift it up and set it (carefully, on the rubber bumpstops) on tall stands.
While the others finished up the intake job, we set about getting the rear end rolled underneath (it was raining at this point, so I don't have pictures of the axle getting attached) and with the two extra sets of hands, err, on hand, we lifted the frame up off the rear stands and rolled the rear in place. And then sat it down quickly because the shackles were compressed from overtightening the old bushings, and needed a little stretching before we could get the new poly bushings to slide in.
After that we got the Altima finished up (burping the cooling system took forever, too) and they went on their way, we decided since it was raining that we should work on the motor. So, we pulled the pan quickly and, with Greg's help, \lifted up on the front of the block while Mike spun it over 180 degrees on the stand. And then the three of us took razor blades and de-RTV'd the oil pan and block gasket surfaces. We spun the crank a couple times, too, and with the crank pointing skyward all looked perfectly normal, which we were relieved to see. There's no surface rust or any sort of dirt on the bottom end, and the cam lobes are still soaked in assembly lube.
The front seal (timing cover to balancer) looked somewhat suspect, and since we had a full gasket kit on hand anyway, I elected to replace it. I'm 99.9% sure the engine builder didn't actually replace it, but at least they did the rear main seal. I was a little worried about that...

Other stuff: Mike got the spindles and backing plates (which I sandblasted Friday night) painted and ready to go, and shot primer on the gas tank.
Question: Does anybody know of a source for a fuel level sender for an '86 F150? I just need the little PCB. The one in there now only has the top and bottom-most solder pads intact, all the others have worn away. Either that, or a service manual that says how many ohms full and empty are supposed to be so we can try to find a universal replacement?

This week will be slow. Mike is going out of town on business and I've got overtime scheduled at work. I'll be watching the weather Monday and Tuesday, and if it's decent enough I'll go out and shoot the framerail that until tonight was pointed at the ground, and the gas tank and the spindles and whatever else I can find to put a finish coat on.

Just a couple crappy pictures, since my camera spent most of the evening fogged up.

http://www.ronman.org/pics/f150/IMG_0314.jpg

http://www.ronman.org/pics/f150/IMG_0315.jpg

http://www.ronman.org/pics/f150/IMG_0316.jpg

http://www.ronman.org/pics/f150/IMG_0320.jpg

http://www.ronman.org/pics/f150/IMG_0321.jpg

Official photographer/Team Police Brutality|Speedycop & the Gang
Lackey-mechanic-whatever/NSF Racing
Sycophant/Judge Phil, Jay Lamm, Kim Harmon
Galaxie Driver/not Parnelli Jones

Re: My F150 project

According to Ford's 1986 Light truck shop manual, at:
10 ohms, the pointer should be at or above F by approximately two pointer widths,
73 ohms, the pointer should be at or below L by approximately two pointer widths.

Al (one of Speedy's A&Ds)

Re: My F150 project

Thanks Al.
Hopefully I can get some time next week to hit a few junkyards with that in mind and Mr. Fluke in hand and look for something that I can solder in.

Official photographer/Team Police Brutality|Speedycop & the Gang
Lackey-mechanic-whatever/NSF Racing
Sycophant/Judge Phil, Jay Lamm, Kim Harmon
Galaxie Driver/not Parnelli Jones

Re: My F150 project

Measly iPhone 4 pics this time, since I keep forgetting to grab my real camera when I head over to the garage...

Did some painting Monday. Finally got the chance to shoot the outside of the d/s frame rail and do some touchup on other spots, as well as spraying the disc brake dust shields, spindles, engine accessory brackets, gas tank, and the driveshafts.

http://ronman.org/pics/f150/photo3.JPG
http://ronman.org/pics/f150/photo4.JPG

Also, I resolved to get some high-temp paint to do the new exhaust downpipe with. It's already starting to develop a little surface rust just from sitting outside for the past couple days, and I cannot abide that.

http://ronman.org/pics/f150/photo5.JPG

Still not super happy with the pattern I'm getting out of the gun, it's still splotchy and instead of laying down an even, uniform mist of paint it puts down a lot of heavier dots that remind me more of an acoustic 'popcorn' ceiling being sprayed. This last time, I thinned the paint 1:1 with spirits, as opposed to something more like 2:3 the last time. The paint is definitely going on, and it's drying nice and hard, it's just the application I have concerns about. I'm doubly concerned about what's gonna happen when I try shooting primer. I don't know at this point if it's a gun problem, or if it's just something inherent to the alkyd enamel paint we're using, Still need some experimentation, apparently...

Today I drove out to Eckler's Corvette in TItusville to pick up some Eastwood Internal Frame Coating, since they had it in stock. I decided that the long hose/omnidirectional nozzle arrangement would be useful and, more importantly, reusable. So, we'll use the Eastwood stuff somewhere on the cab, and use the hose and tip to spray the Rust Reformer product up into the crevices in the frame we can't get a brush into. Unfortunately the can cap itself isn't quite universal, but Rustoleum switched the Rust Reformer cap from the small, older style to this type, so it should work. Should.

http://ronman.org/pics/f150/photo2.JPG

I also hit several junkyards in search of a rear window frame and a price for the custom cut that would need to be made to get it. Finally settled on a super-clean late '95 F250 at Cocoa Auto Salvage (just a few miles up the road from NSF International Racing HQ) for a fair price. They're supposed to be cutting the cab around the C/D pillar, along the gutter, and up towards the windshield ~2 feet, and down the back wall outside the seams also ~2 feet. Hopefully I can get out of work an hour early tomorrow or Thursday so I can go pick it up...

http://ronman.org/pics/f150/photo1-1.jpg

Official photographer/Team Police Brutality|Speedycop & the Gang
Lackey-mechanic-whatever/NSF Racing
Sycophant/Judge Phil, Jay Lamm, Kim Harmon
Galaxie Driver/not Parnelli Jones

Re: My F150 project

ronman wrote:

Also, I resolved to get some high-temp paint to do the new exhaust downpipe with. It's already starting to develop a little surface rust just from sitting outside for the past couple days, and I cannot abide that.

Some restorers and car show freaks use graphite lube to coat cast iron manifolds. Might work on a pipe as well. This guy uses the spray can version, although I've seen folks just using the tube stuff as well

http://forums.corvetteforum.com/c3-tech … nique.html

http://temp.corvetteforum.net/c3/paul79//graphite_002.jpg

"Real ZomBees prefer Bacon"
IOE(x2) MGB/SAAB 96, Judge's Choice, Class C Win, & 2011 Hooniverse Car of the Year!
MRolla, Stick Figure/Animal House, Free Range MR2, SAAB Sonett, "The Death Flip"
2008 Exoskeleton Jag Fiasco, Concours d Lemons - Rue Britannia, worse British car.

Re: My F150 project

Graphite spray gets on EVERYTHING. It's great for moving parts, like jackscrews, but I wouldn't recommend it as a header coating unless you want your arm coated in it every time you reach past your exhaust.

Re: My F150 project

I found some enamel that's rated to "2,000 degrees" but I'm confident there are numerous asterisks. Still, if it works, it's better than rust...

Finally got my cab piece today. Made the 87 mile round trip over lunch at, ahem, extralegal speeds, and got back just 15 minutes late. Woo.

Yo dawg, I heard you like trucks...

http://www.ronman.org/pics/f150/cab_new.jpg

And while on the way back, my trusty Dodge hit a major milestone:
http://www.ronman.org/pics/f150/odo.jpg

I think I'll treat it to a coolant flush and an oil change (and a bath, cough cough) this weekend to celebrate.

Official photographer/Team Police Brutality|Speedycop & the Gang
Lackey-mechanic-whatever/NSF Racing
Sycophant/Judge Phil, Jay Lamm, Kim Harmon
Galaxie Driver/not Parnelli Jones

Re: My F150 project

http://ronman.org/pics/f150/photo1-1.jpg

^^^ TWO Cell Phone Antennas! 

Baller!

Dangerous Banned Technology (NOLA 09), Judges Choice (Houston 2010), Organizers Choice (NOLA 2010), Most Heroic Fix (Dallas 2010), $100 from Jay's Pocket (Dallas 2010), Dangerous Homemade Technology (NOLA 2010), Ununhexium Legends of Lemons Status,  Index of Effluency (Dallas 2011), Most Heroic Fix - (Houston 2011), Index of Effluency (TWS - 2012), Organizers Choice (Dallas 2013)

Re: My F150 project

Too late now, but you shoulda just got the whole cab, instead of the back wall.

Mo' money, but much less cutting/patching/welding time.

Jim C.
If God meant for us to race, we'd all have baggy Nomex skin.
08TMS.09NL.10GM, SP, NL.11SP, NL.12SP, VIR, NL.13GM, NJ.14NJ, VIR, WGI.15AB.16GM.17NCM.18GM.19...

46 (edited by ronman 2012-12-08 08:08 AM)

Re: My F150 project

I don't want to replace the whole cab, as detailed in the multiple paragraphs about the truck's family and sentimental value...

Official photographer/Team Police Brutality|Speedycop & the Gang
Lackey-mechanic-whatever/NSF Racing
Sycophant/Judge Phil, Jay Lamm, Kim Harmon
Galaxie Driver/not Parnelli Jones

47 (edited by ronman 2012-12-10 09:26 PM)

Re: My F150 project

Couple days' updates here...

Saturday, I managed to drag Tim out to lend a hand with the front end, and to do some sanding/grinding. We started out by wrestling the main bits of the front suspension into place. So with the radius arm bushings in place, the assemblies were lifted into place and, due to lack of light and also a spring compressor, we got the "twin I-beam" bolts partly wedged in, and set about other work...

http://www.ronman.org/pics/f150/IMG_0322.jpg

Tim, ever the project manager (he's a PMP,) then insisted that we stop lollygagging/plotting what to do next and give him a task. So we told him to go get the hood out of the bed and bring it over into the light, and then handed him an 80-grit-flapdisk-equipped angle grinder and showed him the basic motion. The fan is to keep the dust down.

http://www.ronman.org/pics/f150/IMG_03220.jpg
http://www.ronman.org/pics/f150/IMG_03221.jpg

Meanwhile, Mike slid under the cab with the die grinder and a cutting disc and got the biggest rusty section cut out and ready to be treated and patched. This is near the back of the cab about 2" in from the doorsill.

http://www.ronman.org/pics/f150/IMG_03222.jpg

He also cut the rustiest bits out of the bottom of the rear cab wall...

http://www.ronman.org/pics/f150/IMG_03223.jpg

To make the patches we cut some metal out of the roof of the new cab section I bought, and sandblasted the paint and primer off it. Here he is trimming the piece to fit with a cutoff disc...

http://www.ronman.org/pics/f150/IMG_03224.jpg

And while that was going on, I put together the new Harbl Freight composite-body RO (that's "random orbital," not "reverse osmosis") sander and stuck on a 120-grit paper to see what the roof would look like with light sanding.

http://www.ronman.org/pics/f150/IMG_03225.jpg

Official photographer/Team Police Brutality|Speedycop & the Gang
Lackey-mechanic-whatever/NSF Racing
Sycophant/Judge Phil, Jay Lamm, Kim Harmon
Galaxie Driver/not Parnelli Jones

Re: My F150 project

Sunday evening, after getting finally getting motivated and realizing that it was too late to go out to NSF Int'l Racing HQ, I headed back out and set to work on finishing out the interior. First and foremost in this was removing the steering column...

http://www.ronman.org/pics/f150/IMG_03226.jpg
http://www.ronman.org/pics/f150/IMG_03228.jpg

Having gotten that out of the way, and now enjoying the ability to actually reach up under the dash, I started figuring out what I needed to do to get the brake booster and pedal box out...

http://www.ronman.org/pics/f150/IMG_03232.jpg
http://www.ronman.org/pics/f150/IMG_03233.jpg

4 nuts, 2 cotter pins and several minutes of prying to no avail and then several more minutes of air hammer and squirts of PB Blaster on the booster studs, and it was free. One of the clutch master studs broke as I tried to take the nut off, so that has to be replaced, but I was pretty much already planning on that anyway. The real bitch of it was that the lower two studs on the brake booster punched through into the housing, and with the actuator rod exposed, I noticed how crunchy and generally terrible it feels. So, it's gonna have to be replaced, too.

http://www.ronman.org/pics/f150/IMG_03238.jpg
http://www.ronman.org/pics/f150/IMG_03242.jpg

The other real bitch is that, with all that stuff cleared out of the way, a significant rust issue was visible. Here's the problem area after some time with a wire brush:

http://www.ronman.org/pics/f150/IMG_03241.jpg

So that's all gotta be cut out and repaired. Fortunately it's mostly flat there, so it *shouldn't* pose too huge a problem. My biggest concern is getting it strong enough to stand up to another 20 years of clutch and brake actuation...

And after all that, I decided we needed to finally suck it up and pull the windshield. My windshield removal tool was having a hell of a time with the seal, so Mike had the brilliant idea to try putting some heat to it. We discovered that 10-15 seconds of heat evenly applied over a section of seal softened it up nicely and the tool now went through it very easily. And we introduced several new cracks, too, but it already was gonna have to be replaced so it's not a problem.

http://www.ronman.org/pics/f150/IMG_03237.jpg
http://www.ronman.org/pics/f150/IMG_03240.jpg

With the glass out we could now easily remove the headliner, which is actually in really, really good shape. Does anybody have experience steam-cleaning a headliner with a cardboard backing?

http://www.ronman.org/pics/f150/IMG_03235.jpg

Winshield seal came out mostly in one piece, with several sections removing large chunks of paint.

http://www.ronman.org/pics/f150/IMG_03236.jpg

Gonna need lots of new trim clips, too. This was also expected.

http://www.ronman.org/pics/f150/IMG_03240.jpg

But, it's pretty much done. Only thing left is to pull the door panels, glass and rubber, and the seatbelts, and it'll be complete and ready for blasting of the rusty areas and sanding.

http://www.ronman.org/pics/f150/IMG_03239.jpg

And for no particular reason, here's the steering column. I've gotta order an intermediate shaft & rag joint and an ignition switch.

http://www.ronman.org/pics/f150/IMG_03243.jpg

Official photographer/Team Police Brutality|Speedycop & the Gang
Lackey-mechanic-whatever/NSF Racing
Sycophant/Judge Phil, Jay Lamm, Kim Harmon
Galaxie Driver/not Parnelli Jones

Re: My F150 project

That brings us to today, which started with a call to NAPA this morning to order rotors, wheel bearings, and seals. I finally picked everything up around 3, and swung by Autozone to rent a spring compressor, and by Home Depot for two cans of high-temp (1200*, allegedly) silver paint for the exhaust, which I had sanded yesterday.

Plenty of yummy Amsoil grease was massaged into the wheel bearings (US-made Timkens that had been bought years ago, but were still wrapped in the original plastic on one side, and new Mexico-made SKF-for-Napa in the other) and the seals were installed...

http://www.ronman.org/pics/f150/IMG_03244.jpg

Closeup hit from my 580EXII flash really shows off the spots I missed while I was painting. Gonna have to go back with a brush one day soon, but whatever, the rotor is on.

http://www.ronman.org/pics/f150/IMG_03245.jpg

Did I mention I also put the steering gearbox in place? 'Cuz I did. Mike decided we should stick the linkage in while we had easy access, so we did.

http://www.ronman.org/pics/f150/IMG_03246.jpg
http://www.ronman.org/pics/f150/IMG_03248.jpg

Happily, though, it's got 4 wheels on it again, and once we eyeball the alignment in the daylight tomorrow, we'll lift it off the stands with the tractor and a major milestone will be crossed off the timetable.

http://www.ronman.org/pics/f150/IMG_03247.jpg

Official photographer/Team Police Brutality|Speedycop & the Gang
Lackey-mechanic-whatever/NSF Racing
Sycophant/Judge Phil, Jay Lamm, Kim Harmon
Galaxie Driver/not Parnelli Jones

Re: My F150 project

Off topic, but two things.

http://www.ronman.org/pics/f150/IMG_03220.jpg

1: Who stole that chair from the local grade school? I seriously haven't seen that style chair since I was in 6th grade.

2: Did he do the entire hood bent over like that? I have two bulging discs in my back, and just thinking of having to do that makes me cringe, I would have found some way to sit on the ground or rigged up a table or something to do it.

Team Final Gear Crew Chief
#138 1997 Pontiac GTP - Supercharged 3800
#42   1999 Ford P71 Crown Vic