Re: My F150 project

1.) Actually the guy who we're doing the truck for used to work at a local high school, and picked it out of the trash one day, along with the pieces of carpet we have on the floor in the garage to lay on when we're underneath something...

2.) No, he quickly realized that that position sucked, and he sat down lol

Official photographer/Team Police Brutality|Speedycop & the Gang
Lackey-mechanic-whatever/NSF Racing
Sycophant/Judge Phil, Jay Lamm, Kim Harmon
Galaxie Driver/not Parnelli Jones

Re: My F150 project

Coming along nicely. I have a bunch of vehicles sitting here waiting for you to finish that one. Just let me know which one you want to do first!

Captain: Speedycop & The Gang Of Outlaws -'94 Mark VIII (Least Horrible Yank Tank Stafford '09, NOLA '10) '61 Caddy (Org Choice-NL '09) '63 Tbird (EPIC Repair Failure-Gingerman '10, I Got Screwed-Summit Pt '10, I.O.E. WINNER Stafford '10!) '77 Lancia Scorpion (I.O.E. WINNER Joliet 2010!) '67 Galaxie 500 (Judges Choice-CMP '11)
Future Fleet: 1957 Ford Prefect 1942 Buick 1959 Bugeye Project GLCOAT

Re: My F150 project

More progress last night...
We started by cleaning up a month's worth of tools that were strewn about (there's only two wrenches and I think 2 sockets missing) and then sweeping up. After that, we made a hole to push the cab dolly over into, and moved it...

http://www.ronman.org/pics/f150/IMG_03250.jpg

Then Josh came over and needed his 300K-mile Camry looked at, so we fixed several vacuum leaks and cleaned the completely-clogged EGR valve. Yay.

That done, we pressed him into servitude and turned the frame around and pushed it in, moved the engine crane in, and got the motor chained up.
And these pics speak for themselves. Major milestone #Idon'tknow passed.

http://www.ronman.org/pics/f150/IMG_03251.jpg
http://www.ronman.org/pics/f150/IMG_03252.jpg

First time the engine has been there in almost 5 years.
http://www.ronman.org/pics/f150/IMG_03253.jpg

Tightening down the motor mounts...
http://www.ronman.org/pics/f150/IMG_03254.jpg


We initially planned on putting the trans in as well, but I decided to postpone that so the bellhousing could be properly cleaned of the 1/8" of tar-like grease that encased it... so Mike installed the clutch instead.

http://www.ronman.org/pics/f150/IMG_03255.jpg

I'll finish scraping and blasting the BH tomorrow and we'll get the trans, driveshafts, gas tank, brake and fuel lines installed, and redo the wiring for the lights, trailer connector, etc. And then after that, the core support has to be broken down, sanded, primed and painted so it (and the radiator) can go on so we can break the motor in. cool

Official photographer/Team Police Brutality|Speedycop & the Gang
Lackey-mechanic-whatever/NSF Racing
Sycophant/Judge Phil, Jay Lamm, Kim Harmon
Galaxie Driver/not Parnelli Jones

Re: My F150 project

You boys are making that look way too easy! Looks like a 6BT Cummins would sit right nice in those frame rails! big_smile

Re: My F150 project

I completely agree, but it'd collapse those puny little springs...

Official photographer/Team Police Brutality|Speedycop & the Gang
Lackey-mechanic-whatever/NSF Racing
Sycophant/Judge Phil, Jay Lamm, Kim Harmon
Galaxie Driver/not Parnelli Jones

Re: My F150 project

How's the budget holding up?

Re: My F150 project

We've spent a shitload of money, but the good news is that most of what needs to be spent, has already been spent. There's still some stuff to buy - fuel pump, alternator, battery, AC lines, maybe a radiator - but that's all within reason. The big spendy item that is still remaining is the paint. We got the epoxy primer already, but it's a long way from being ready to spray with that, and it ideally needs to be painted within a few days of the primer...

Official photographer/Team Police Brutality|Speedycop & the Gang
Lackey-mechanic-whatever/NSF Racing
Sycophant/Judge Phil, Jay Lamm, Kim Harmon
Galaxie Driver/not Parnelli Jones

58 (edited by ronman 2012-12-14 11:15 AM)

Re: My F150 project

Another late night yesterday, but we made some good progress. Mike finished the cleanup on the bellhousing, and got it bolted back to the trans. When I arrived we stuck the trans on the back of the motor, and then started working on the driveshafts. Had to spend some quality time with an emery cloth to get the carrier bearing surface clean enough to accept the new bearing, but it finally went on and with some more Amsoil grease to move things along the slip joint was attached and the rear ujoint attached to the pinion yoke.

http://www.ronman.org/pics/f150/IMG_03256.jpg
http://www.ronman.org/pics/f150/IMG_03257.jpg
http://www.ronman.org/pics/f150/IMG_03258.jpg

After that was knocked out, we started to work on the firewall rust problem, which meant first removing the thick gusset plate spot-welded to the firewall where the steering column and brake booster attach.

http://www.ronman.org/pics/f150/IMG_03259.jpg

This would take some considerable time and effort, so while that was going on Mike went to work fixing the broken taillight wires, the correct way, with solder and heatshrink.

http://www.ronman.org/pics/f150/IMG_03260.jpg

Like I said, considerable effort, especially with no way to sharpen drillbits.

http://www.ronman.org/pics/f150/IMG_03261.jpg

We eventually gave up on the drilling, since the plate was still very much attached in spite of drilling out every visible spot weld. Out came Mr. Air Hammer and very quickly the remaining 5 welds we didn't drill were wrested from the firewall and our gusset was freed. Now begins the fun part, of cutting out the rusty bits and forming a piece of 18ga to fit. This would be much easier with a plasma cutter. That might be next on the list of tools to buy after this project...

http://www.ronman.org/pics/f150/IMG_03262.jpg

Last work of the night was running the fuel lines, brake lines and wiring harness up the frame. Note the very sexy convoluted tubing that replaced the ancient vinyl tape wrapping, and the butt turrible taps for the trailer connector that still have to be cut out and soldered properly... also note that this pic was taken before the freshly-painted proportioning valve was mounted to the frame and connected to the brake lines.

http://www.ronman.org/pics/f150/IMG_03263.jpg

We'll mount the gas tank tonight after blasting and painting its retaining straps. I still need to go to the junkyard and try to source a new(er, working) fuel sender board, so we can put that in, and I have to swing by Autozone to get a new fuel pump so that can be buttoned up. The good news is that, after we mount the gas tank, we'll actually be right back on schedule. Bodywork is gonna eat into that pretty heavily...

Official photographer/Team Police Brutality|Speedycop & the Gang
Lackey-mechanic-whatever/NSF Racing
Sycophant/Judge Phil, Jay Lamm, Kim Harmon
Galaxie Driver/not Parnelli Jones

Re: My F150 project

If you want to avoid all that pesky body work and surprise the hell out of your friend, you could always just bust out of the sawzall.

http://www.mytrain.com/truck/16.jpg

Team Final Gear Crew Chief
#138 1997 Pontiac GTP - Supercharged 3800
#42   1999 Ford P71 Crown Vic

Re: My F150 project

Haha, funny you post that pic... he has an intense, seething hatred of Dakotas.

Official photographer/Team Police Brutality|Speedycop & the Gang
Lackey-mechanic-whatever/NSF Racing
Sycophant/Judge Phil, Jay Lamm, Kim Harmon
Galaxie Driver/not Parnelli Jones

Re: My F150 project

Really nice job thus far, Ron.  I'm really impressed what you all are doing for your friend.  What, again, does he think is happening with his truck right now?

Speedycop/NSF Racing /Pinewood Dirtbags
'10 Summit, CMP3, Autobahn, '11 CMP1, NJMP, CMP2, Summit, G'man, Stafford, Charlotte, Autobahn, ECR '12 CMP1, NJMP, G'man, NHMS1, Summit, CMP2, NHMS2, ECR, '13 CMP1, ECR, Summit, NJMP, THill, CMP2, MSR, NHMS, Sears '14 Barber, Sears1, ECR, CMP1, NJMP1, BWillow, Sebring, CMP2, THill, Sears2, '15 Sears1, Barber, Ridge, THill, '16 Sears1

Re: My F150 project

Rusting, just at a slightly slower rate than over the last 10 years... and taking up space in the garage.

-------------------------------------------------------------------------------------

We got the the hood completely de-rustified tonight (which I didn't take any pics of) and did some other crap.
Among the other crap:

Our "install gas tank" milepost was reached, meaning our schedule is still doing OK.

Here I am trying to figure out why the adhesive is separating from this several-year old piece of ~3/16" thick rubber I found at the surplus store; the sheet itself was like 16x24, originally intended as a noise isolator for my FASS fuel pump on my diesel. It wasn't needed when the pump came with its own rubber insulator of a similar type... so, after more than 2 years in the belly of my camper, it got dug out and cut up to replace the nasty tar-and-felt crap Ford used to insulate the tank from its rub points on the frame crossmembers.

http://www.ronman.org/pics/f150/IMG_03265.jpg

Ford paid scant attention to NVH in 1986. Not me!!

http://www.ronman.org/pics/f150/IMG_03266.jpg

I also shot the straps with Rustoleum truck bed coating (their Rhinoliner-in-a-spray-bomb product which I bought a can of on a whim to see if it was actually worth a flip, or if I'm still better off going with 2 gallons of roll-on Herculiner, which I am) and glued some cut pieces of the rubber floor out of my aunt's postal Jeep to replace the tar-felt.

http://www.ronman.org/pics/f150/IMG_03267.jpg

Woohoo, tank is in!

http://www.ronman.org/pics/f150/IMG_03268.jpg

We also got a piece of metal cut to fix the first part of the firewall. Here Mike is tacking it into place in its hole...

http://www.ronman.org/pics/f150/IMG_03264.jpg

And yes, that's SEM weld-thru primer on the edges.
Here's the reverse angle early on in the game:

http://www.ronman.org/pics/f150/IMG_03269.jpg

And the big gusset plate spot-welded back in place, and part-way through the wekd grinding process.

http://www.ronman.org/pics/f150/IMG_03270.jpg

The next hurdle is cutting out the rust underneath the gusset there on the underside of the firewall. I've gotta blast it and see how much actually has to be cut out, so Mike (who is much better at metal fab than me) can make a patch. Also, we pulled the rear brakes apart so I can take the drums to a friend's shop to get them turned Monday. The shoes - which I think may be just the second set in the truck's life - still had a fair bit of meat left on them, but the d/s particularly was odd: there was over 1/4" pad left, but 4 of the 6 rivets on each shoe were sticking up, causing a bit of a groove in the drum. It's not too bad, since the miles driven on it are, uh, pretty low, so hopefully I can just cut them and slap 'em back on with new shoes and hardware. I was very relieved to see that it did not, in fact, need a new axle seal on the d/s, as I suspected initially when I was performing the first pressure-washing of the frame. Inside the drum it's nice and dry on both sides, with no sign at all of any leakage in the past.

Official photographer/Team Police Brutality|Speedycop & the Gang
Lackey-mechanic-whatever/NSF Racing
Sycophant/Judge Phil, Jay Lamm, Kim Harmon
Galaxie Driver/not Parnelli Jones

Re: My F150 project

I'm still a little apprehensive about going through all that work and leaving the frame without any top-coat, especially in the hidden areas.

While it might be ok, I just have a gut-bad-feeling about it long term.

The project is looking great tho, really look forward to the updates.

"Real ZomBees prefer Bacon"
IOE(x2) MGB/SAAB 96, Judge's Choice, Class C Win, & 2011 Hooniverse Car of the Year!
MRolla, Stick Figure/Animal House, Free Range MR2, SAAB Sonett, "The Death Flip"
2008 Exoskeleton Jag Fiasco, Concours d Lemons - Rue Britannia, worse British car.

Re: My F150 project

We discussed that early on Pete, and agreed. The rust reformer is covered with two coats of Majic alkyd enamel flat black. It's a very hard finish, as witnessed by the shallow scratches the motor mount bolts put in while we jockeyed it into place. cool

Official photographer/Team Police Brutality|Speedycop & the Gang
Lackey-mechanic-whatever/NSF Racing
Sycophant/Judge Phil, Jay Lamm, Kim Harmon
Galaxie Driver/not Parnelli Jones

Re: My F150 project

And now I can sleep at night, heh-heh-heh!

"Real ZomBees prefer Bacon"
IOE(x2) MGB/SAAB 96, Judge's Choice, Class C Win, & 2011 Hooniverse Car of the Year!
MRolla, Stick Figure/Animal House, Free Range MR2, SAAB Sonett, "The Death Flip"
2008 Exoskeleton Jag Fiasco, Concours d Lemons - Rue Britannia, worse British car.

Re: My F150 project

Quick update, since I'm tired...

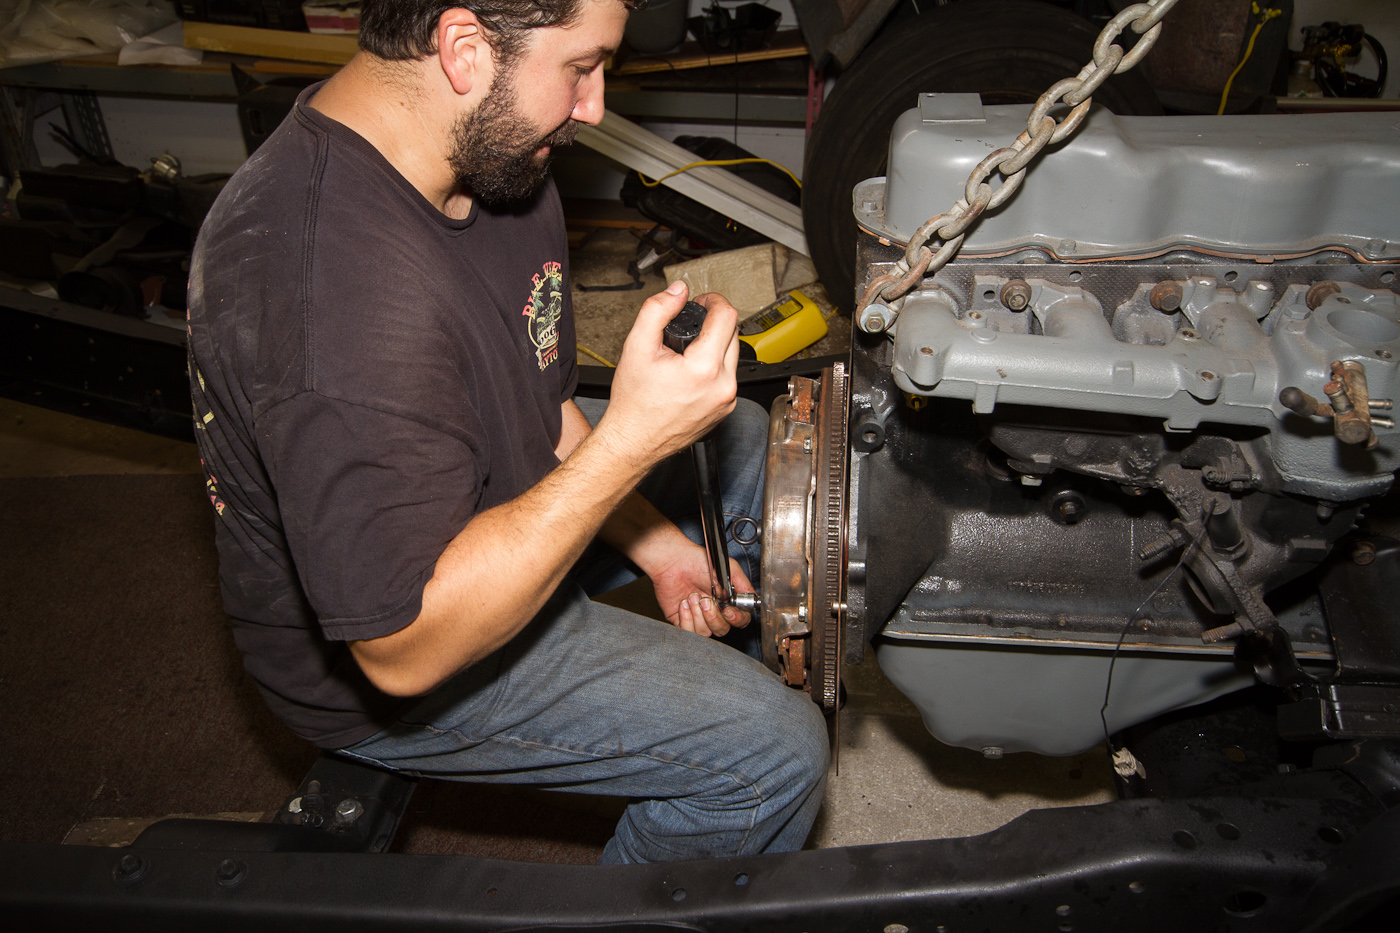
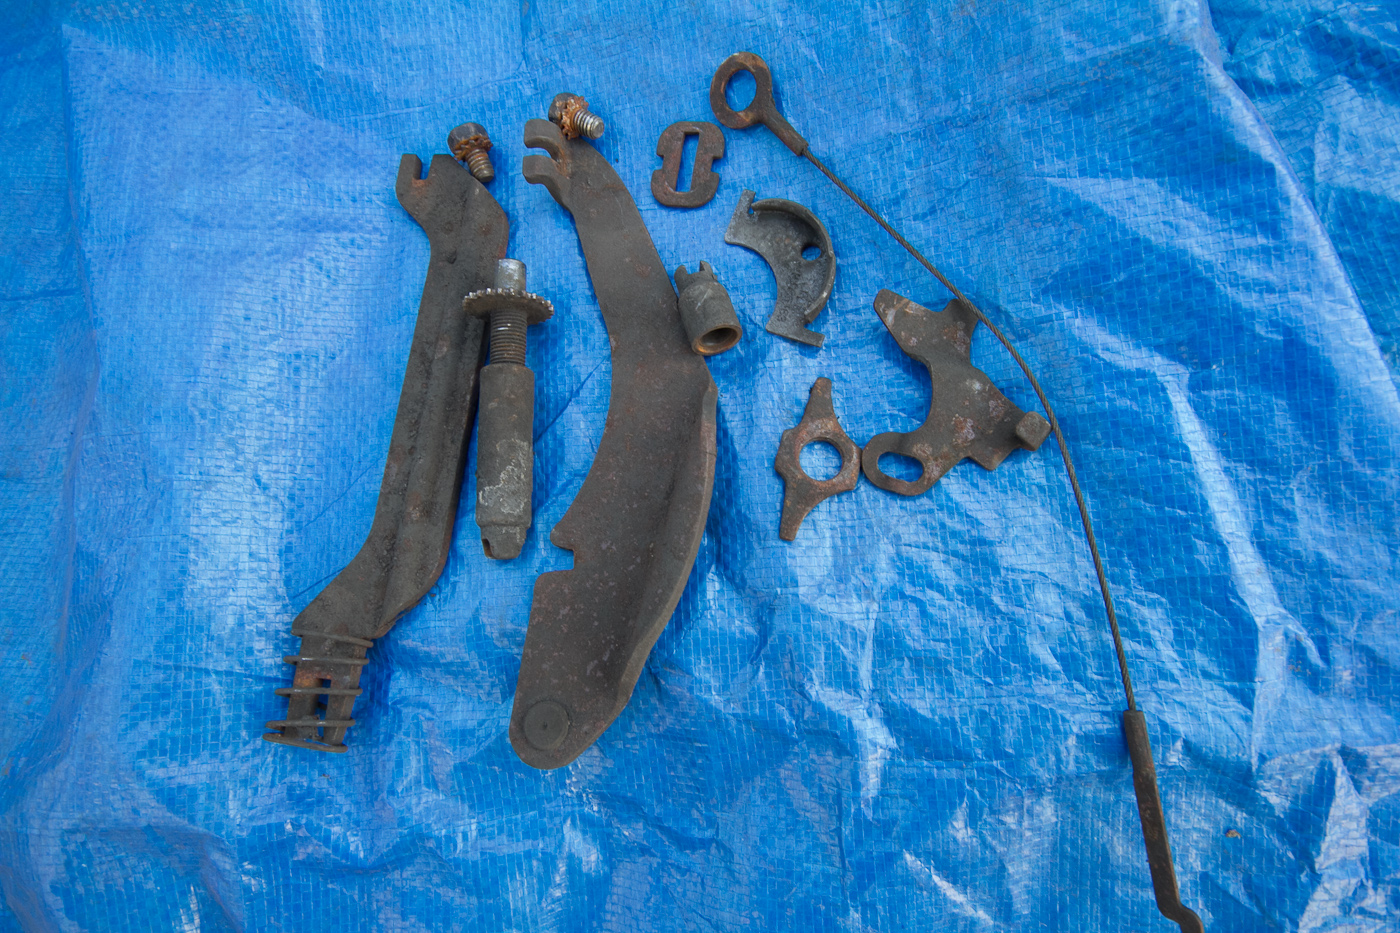
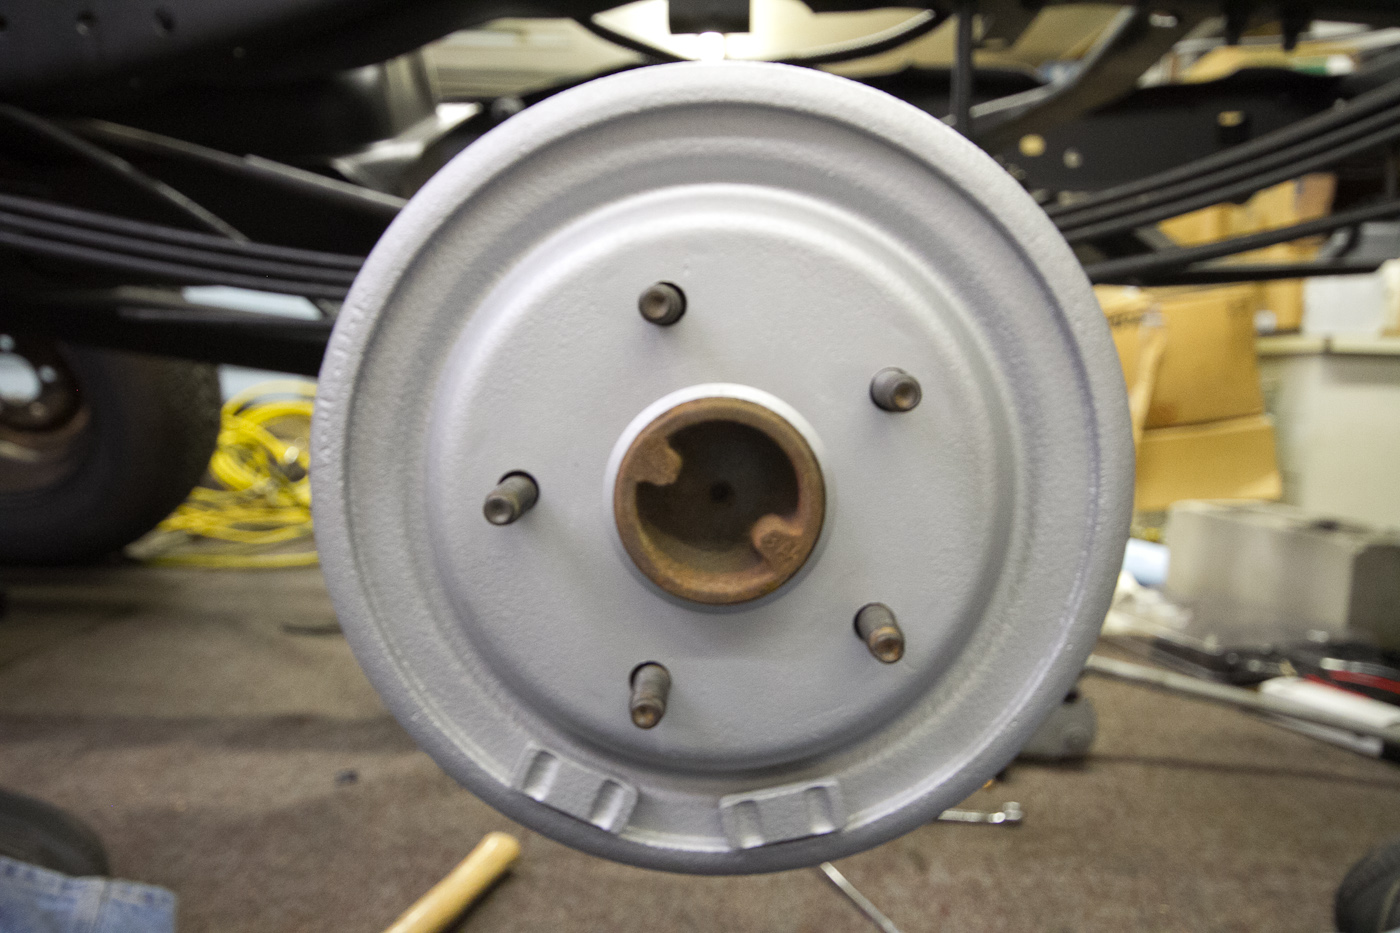
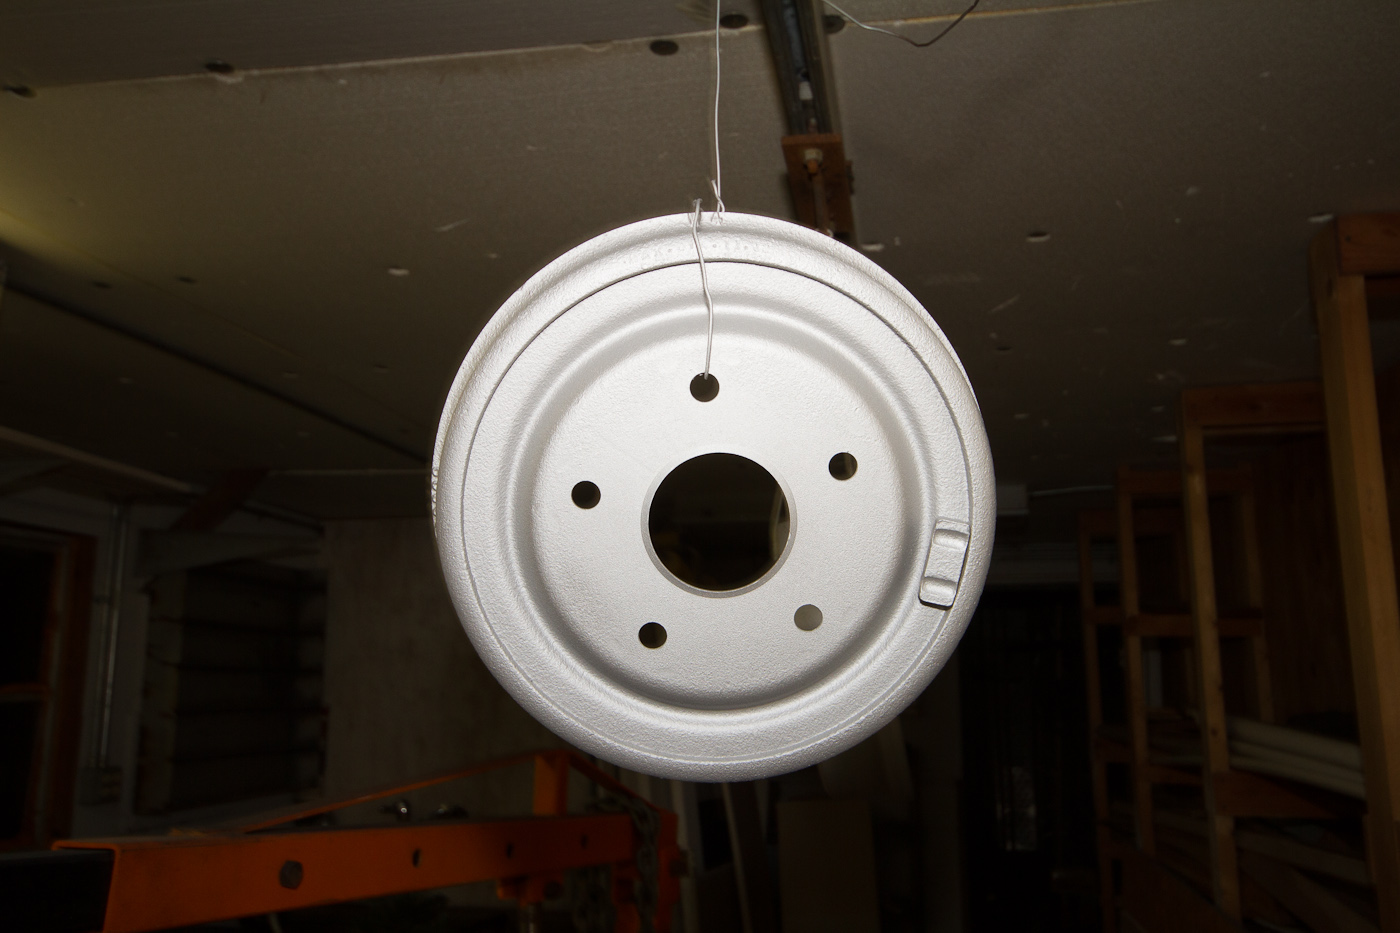
I too the brake drums over to my friend's shop and put them on the lathe. They cleaned up OK, certainly good enough, so after leaving there after a couple hours' of shooting the shit, I headed to Harbl Freight and picked up a pneumatic nibbler, another angle grinder, and a couple other things we needed, and then swung by NAPA to pick up shoes and a hardware kit. Mike had to go out for a bit right when I got there, so in the meantime I sandblasted the outside of the drums and a couple other things, and then prepped and painted them.

http://www.ronman.org/pics/f150/IMG_03273.jpg

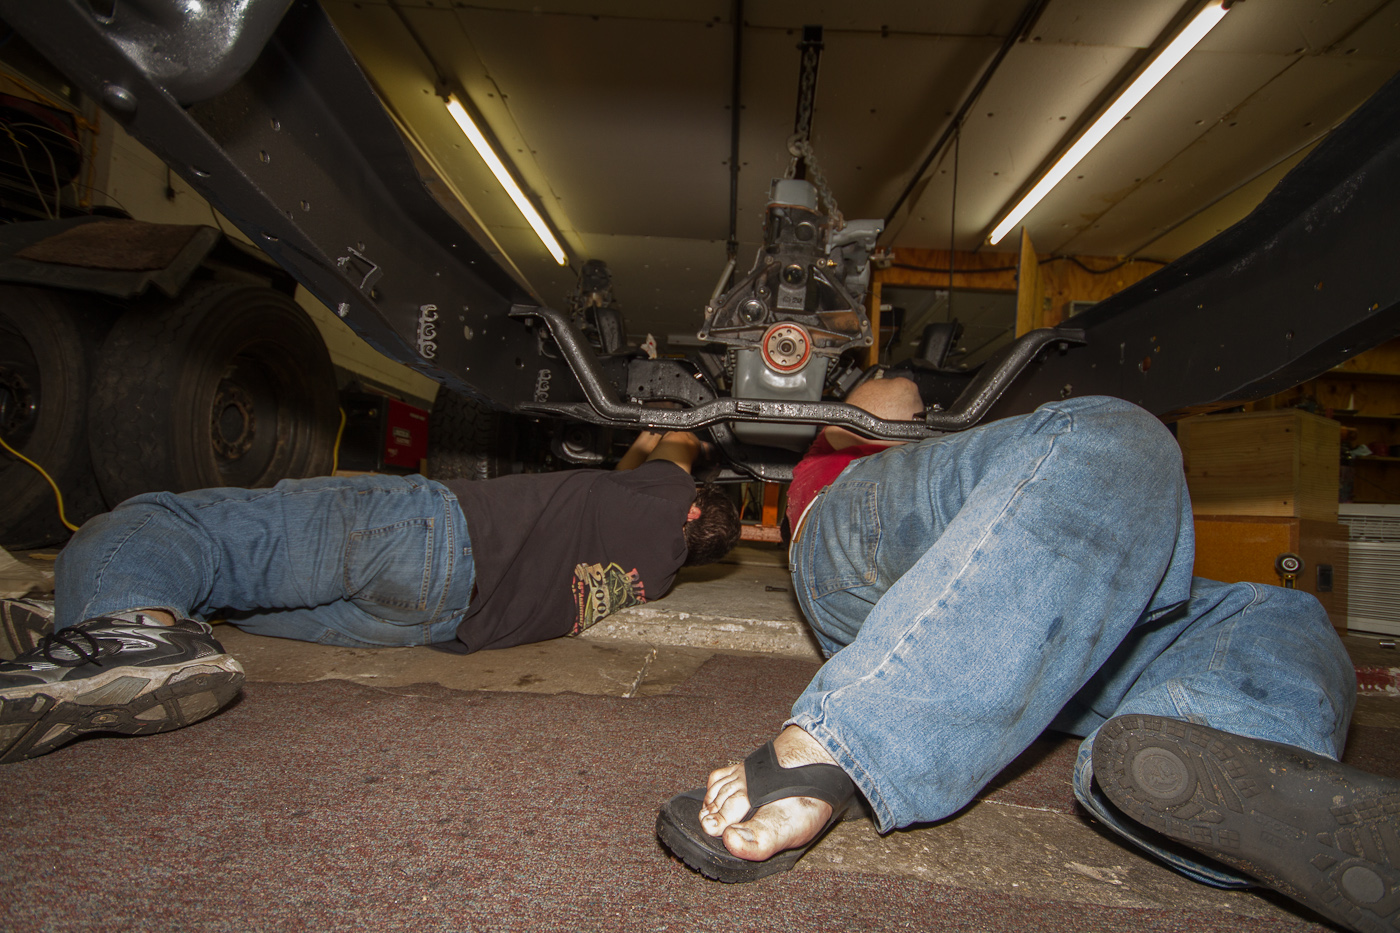
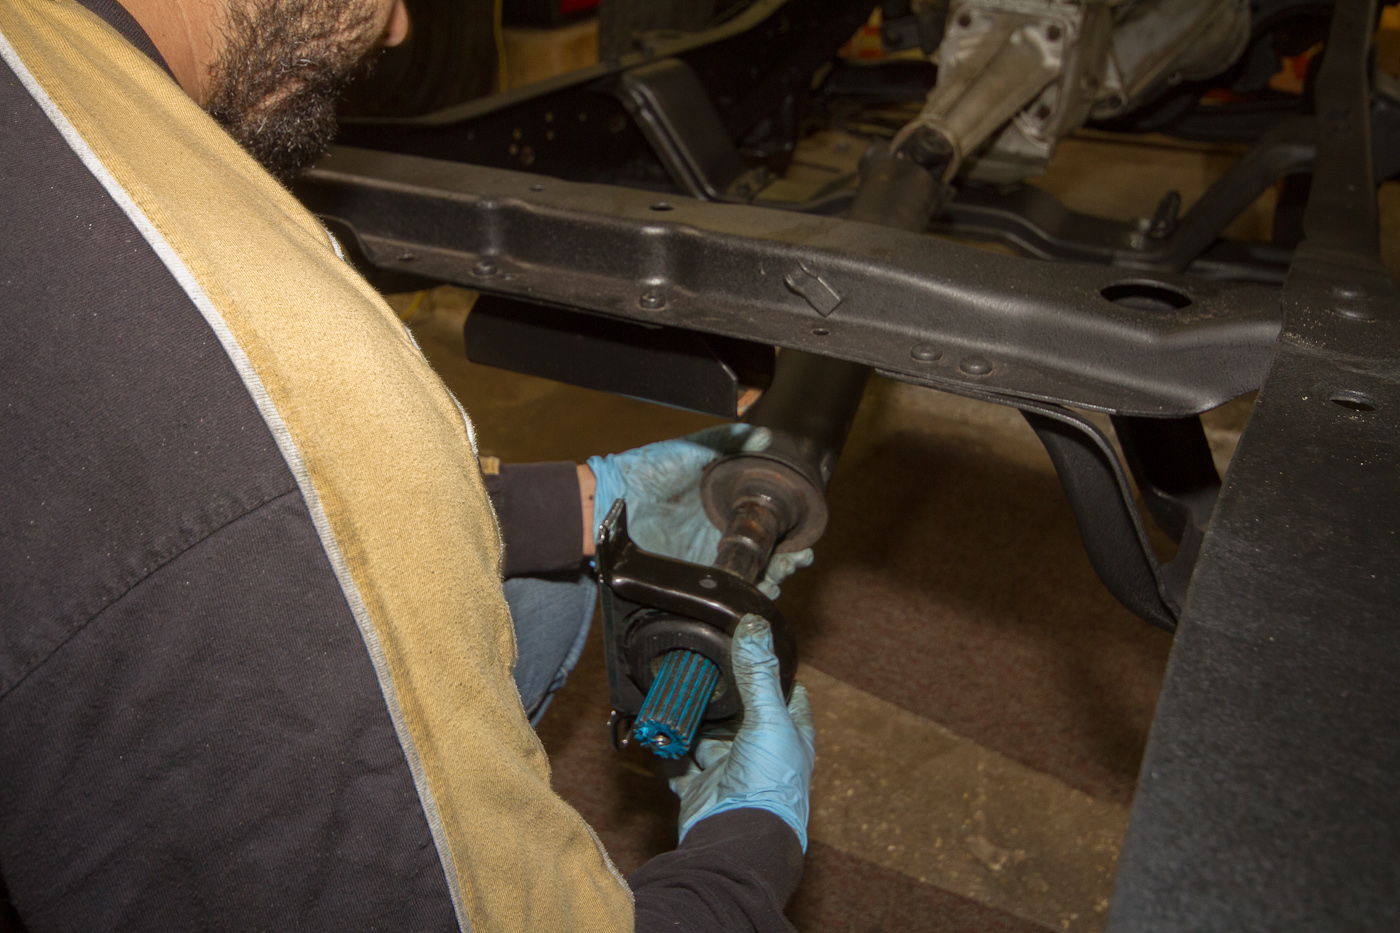
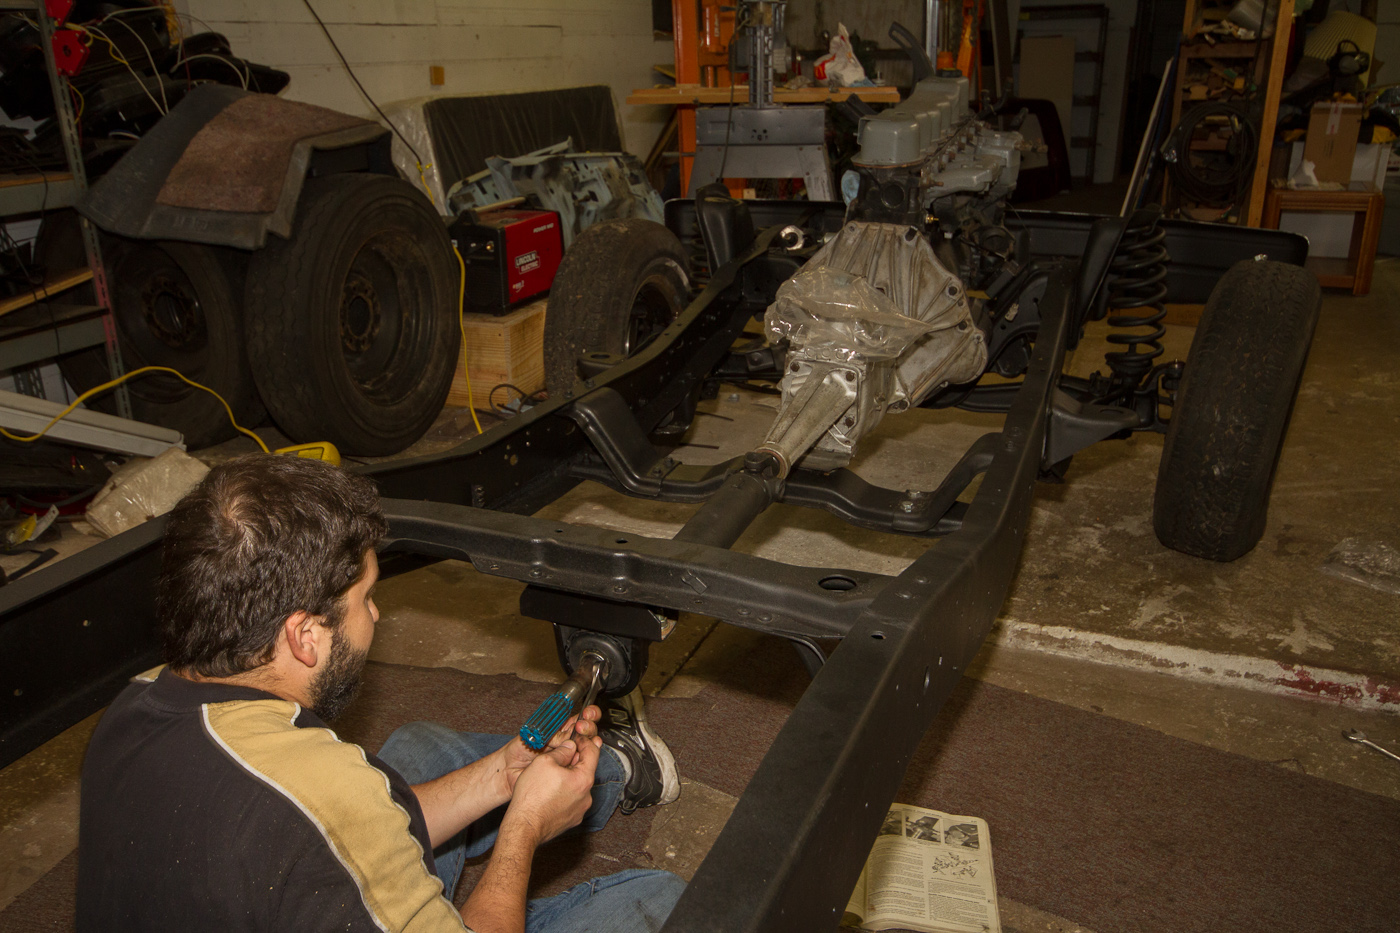
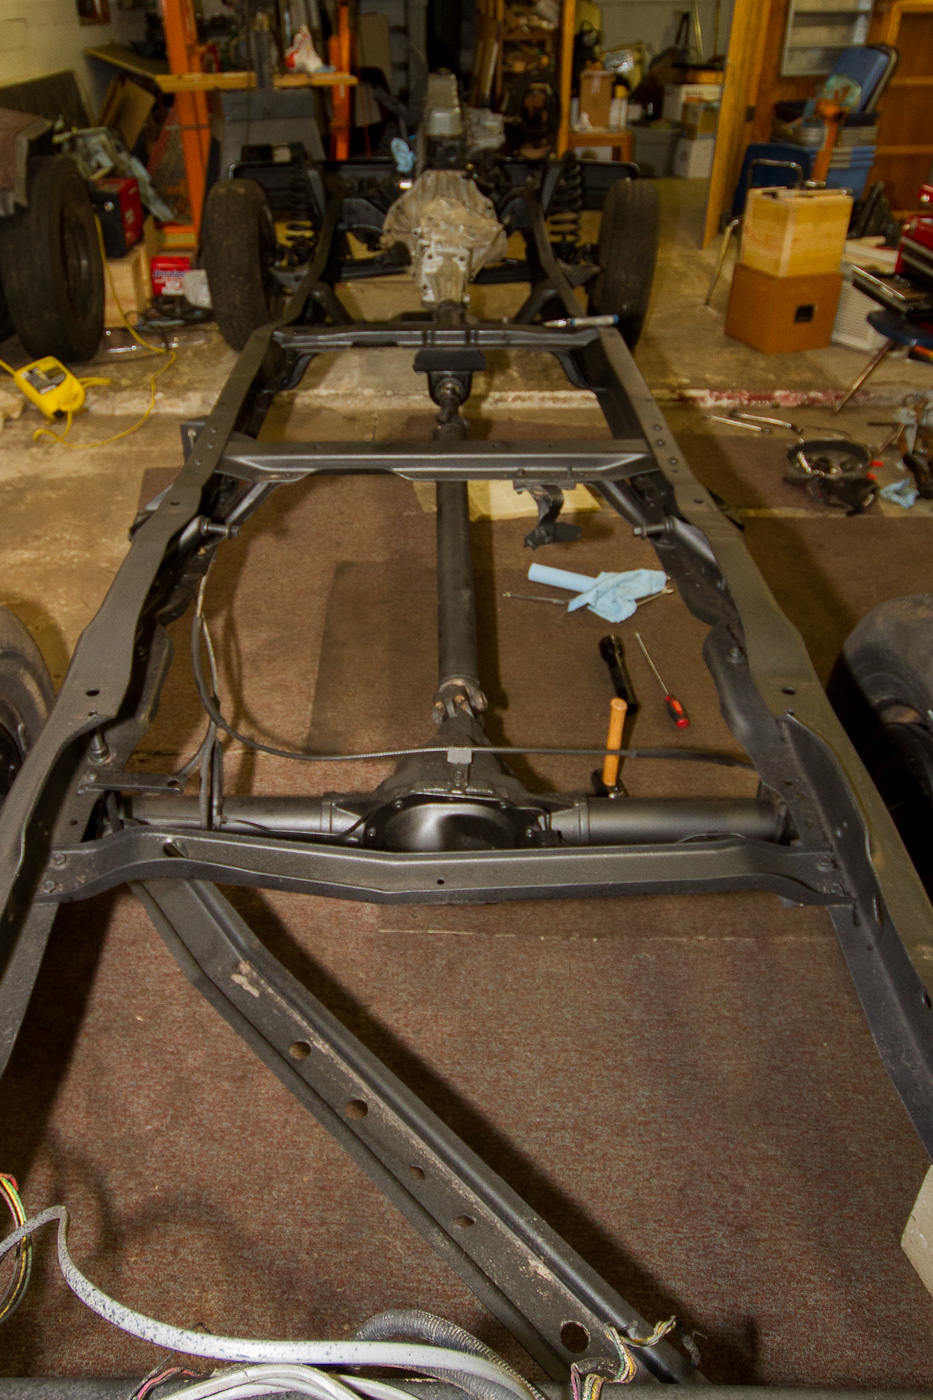
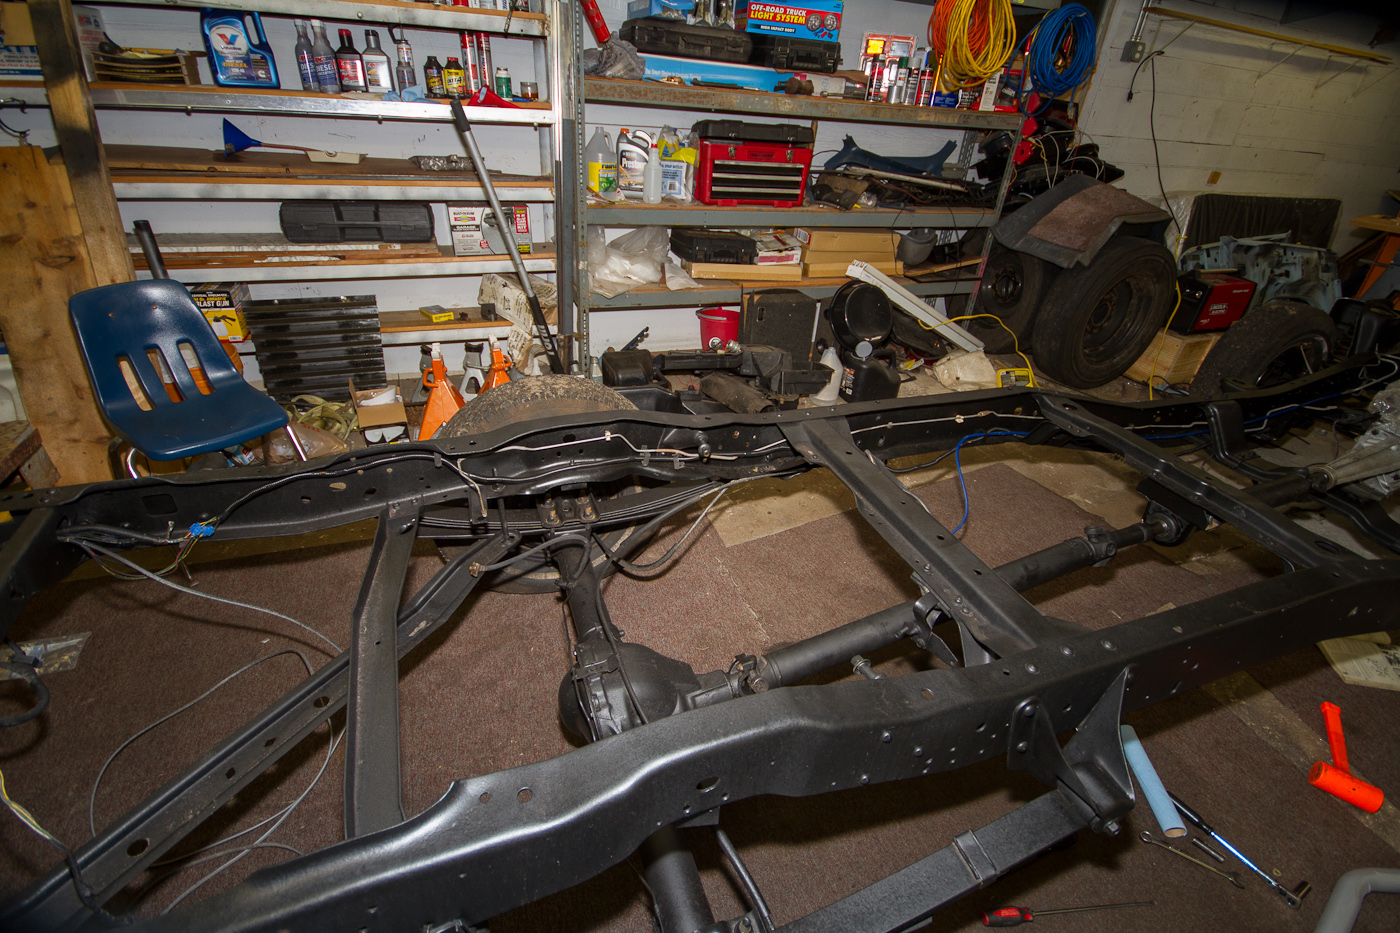
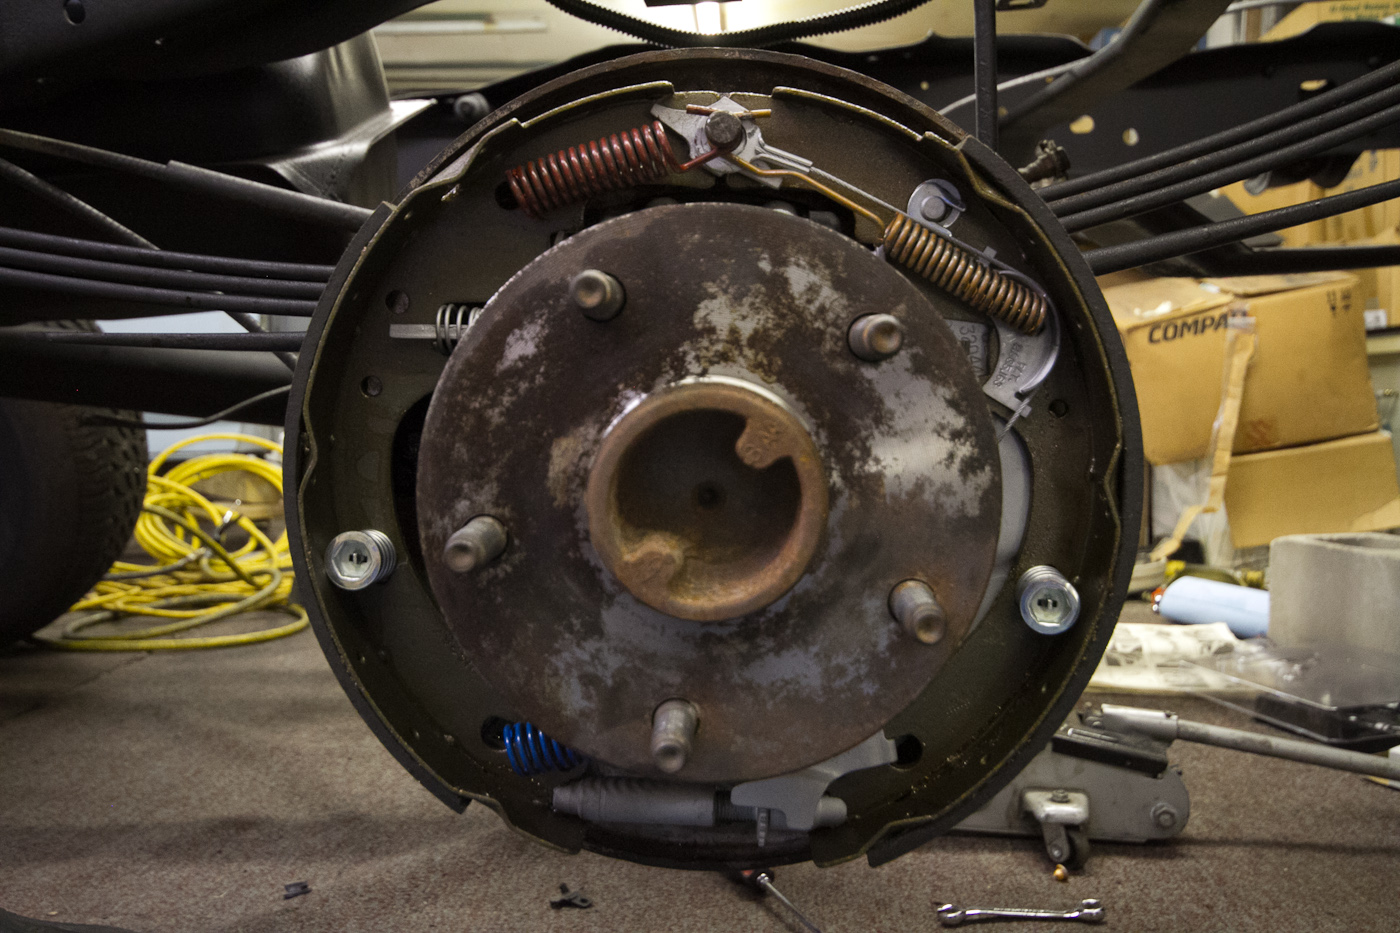
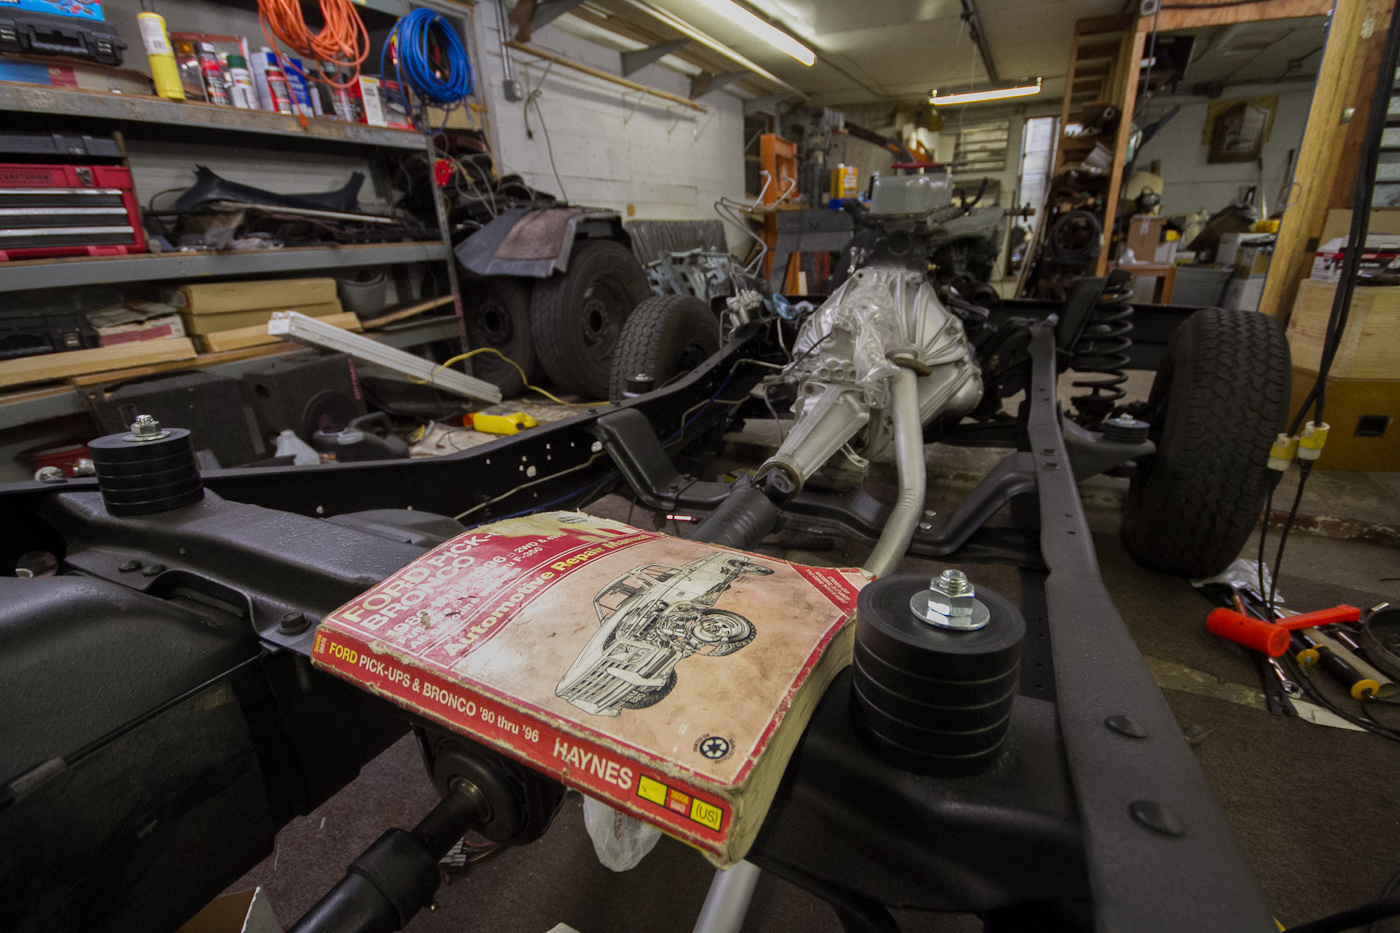
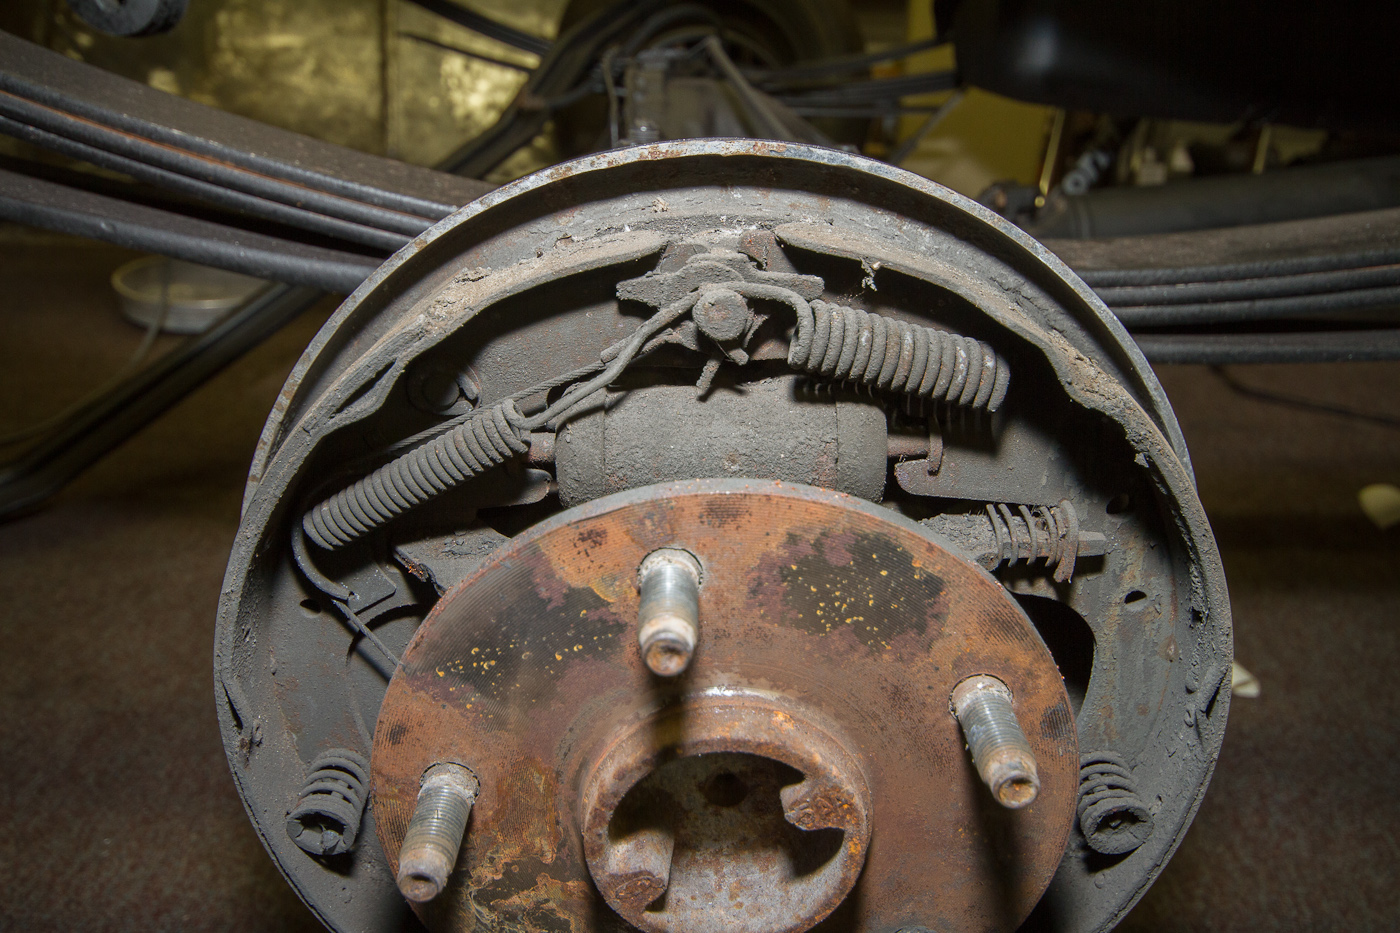
Then I started work on the brakes. After stripping them down and checking the P/S wheel cylinder and not being able to move it at all, I took it off the truck and tried to get it moving. No dice, even with a small sledgehammer, and the other side is the same way. So later today I'll be picking up a set of cylinders so I can put the brakes together again.

http://www.ronman.org/pics/f150/IMG_03275.jpg

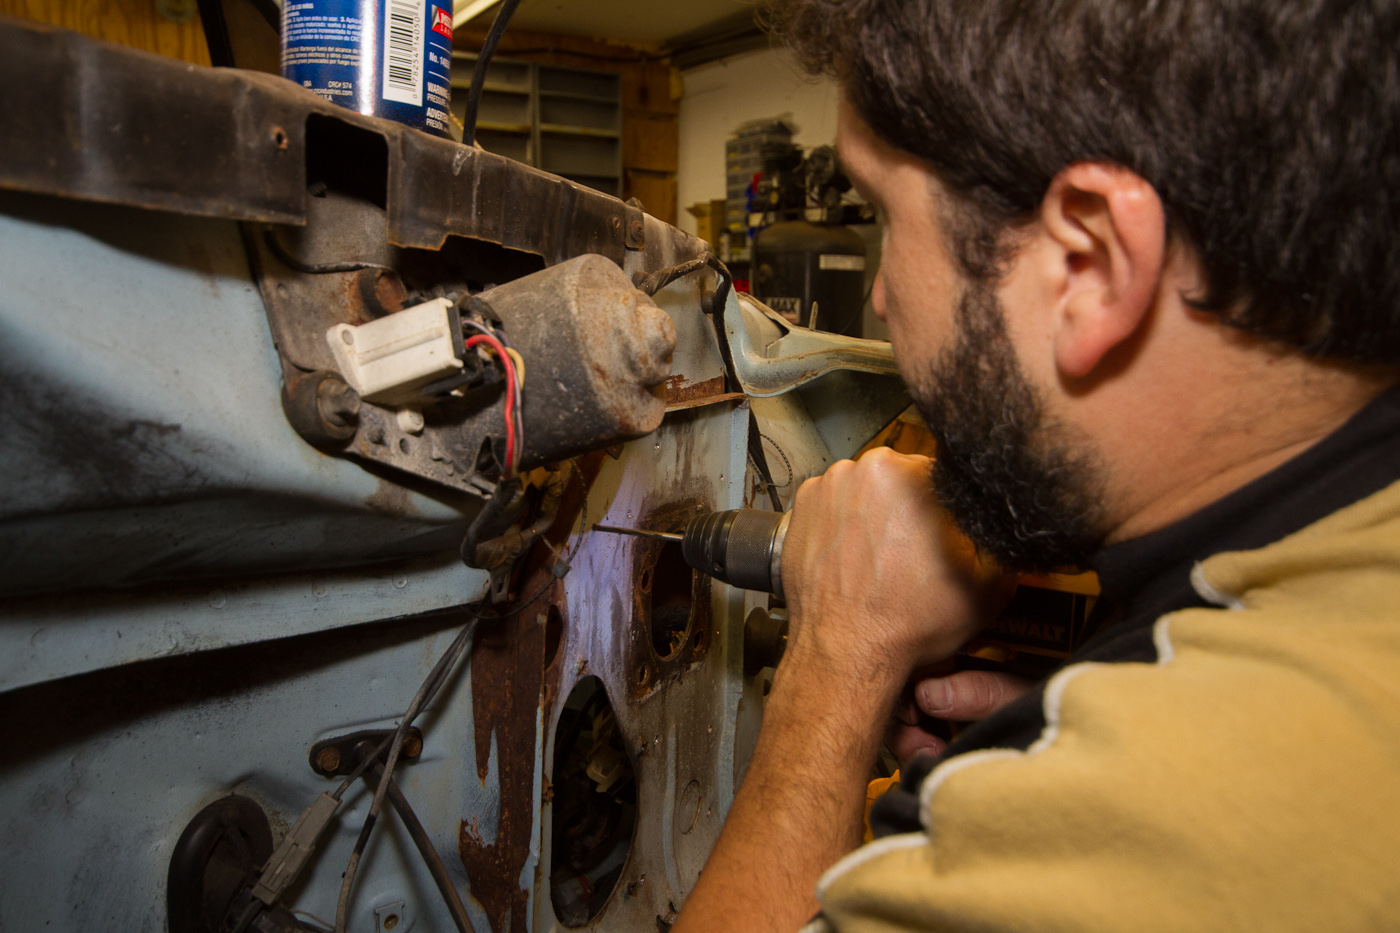
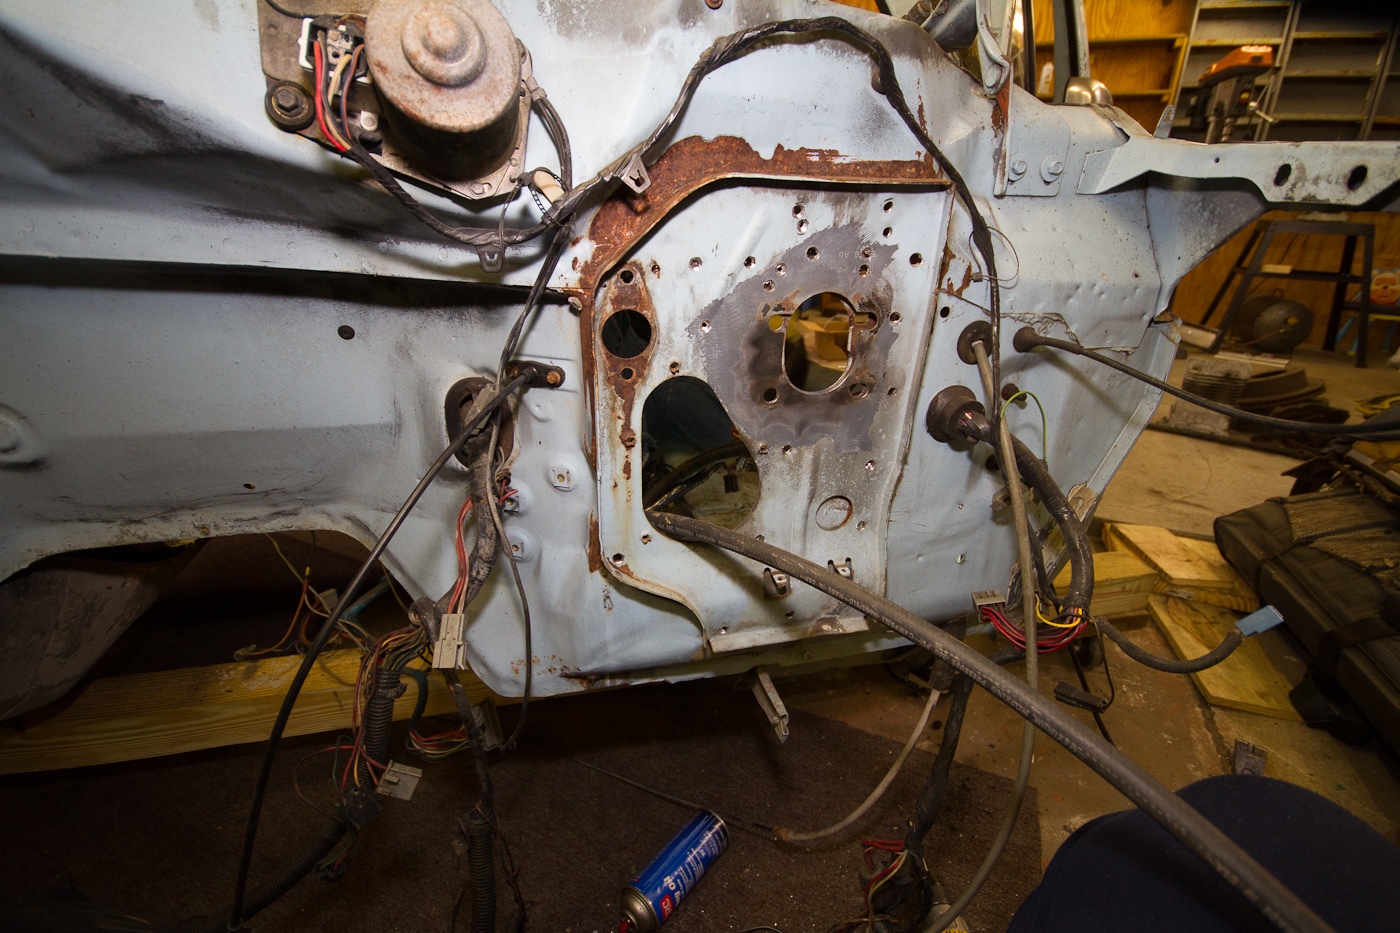
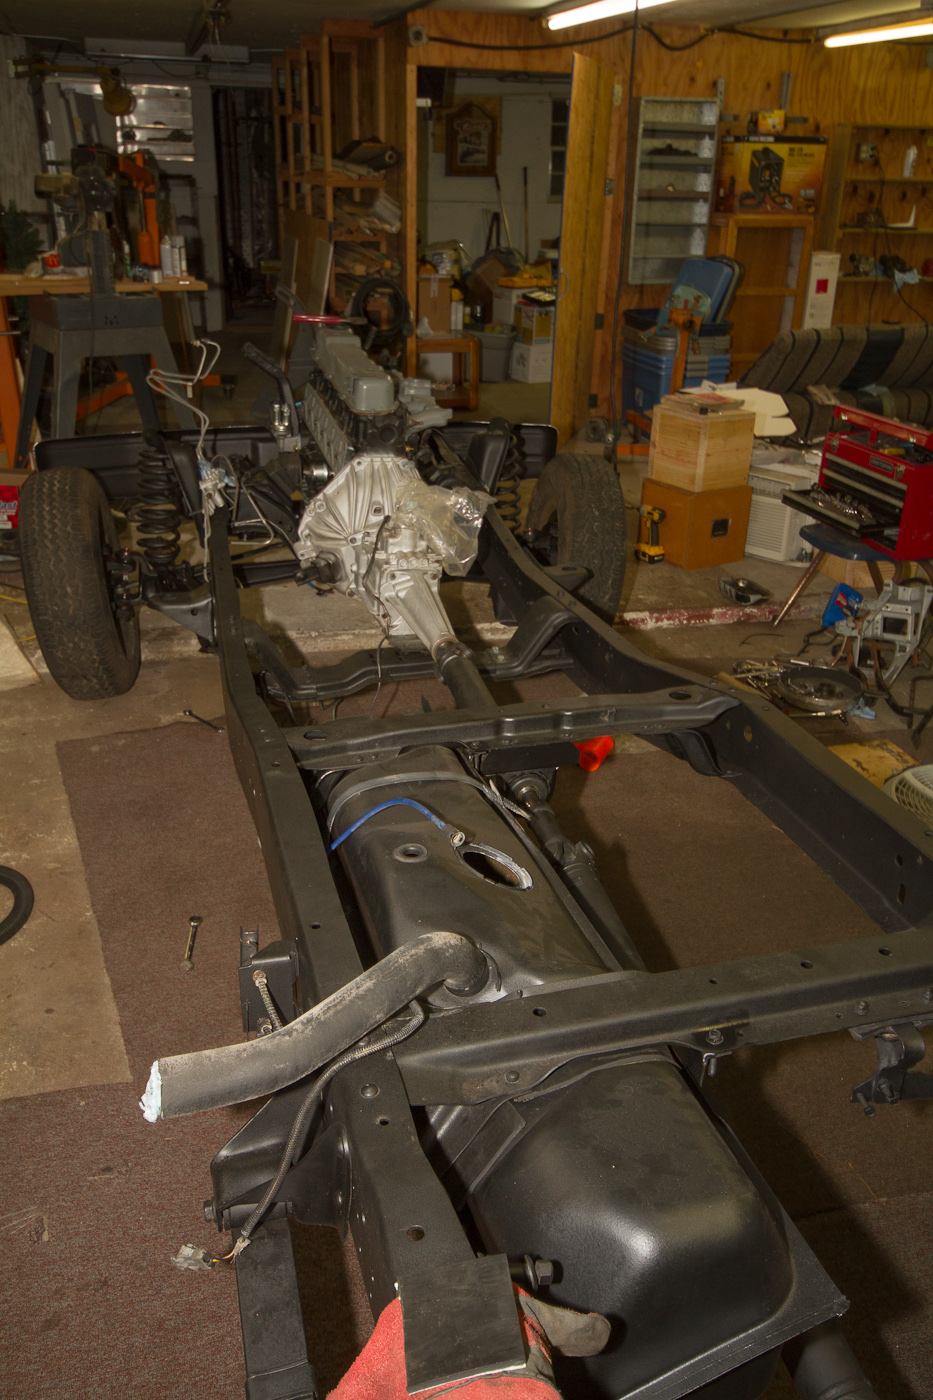
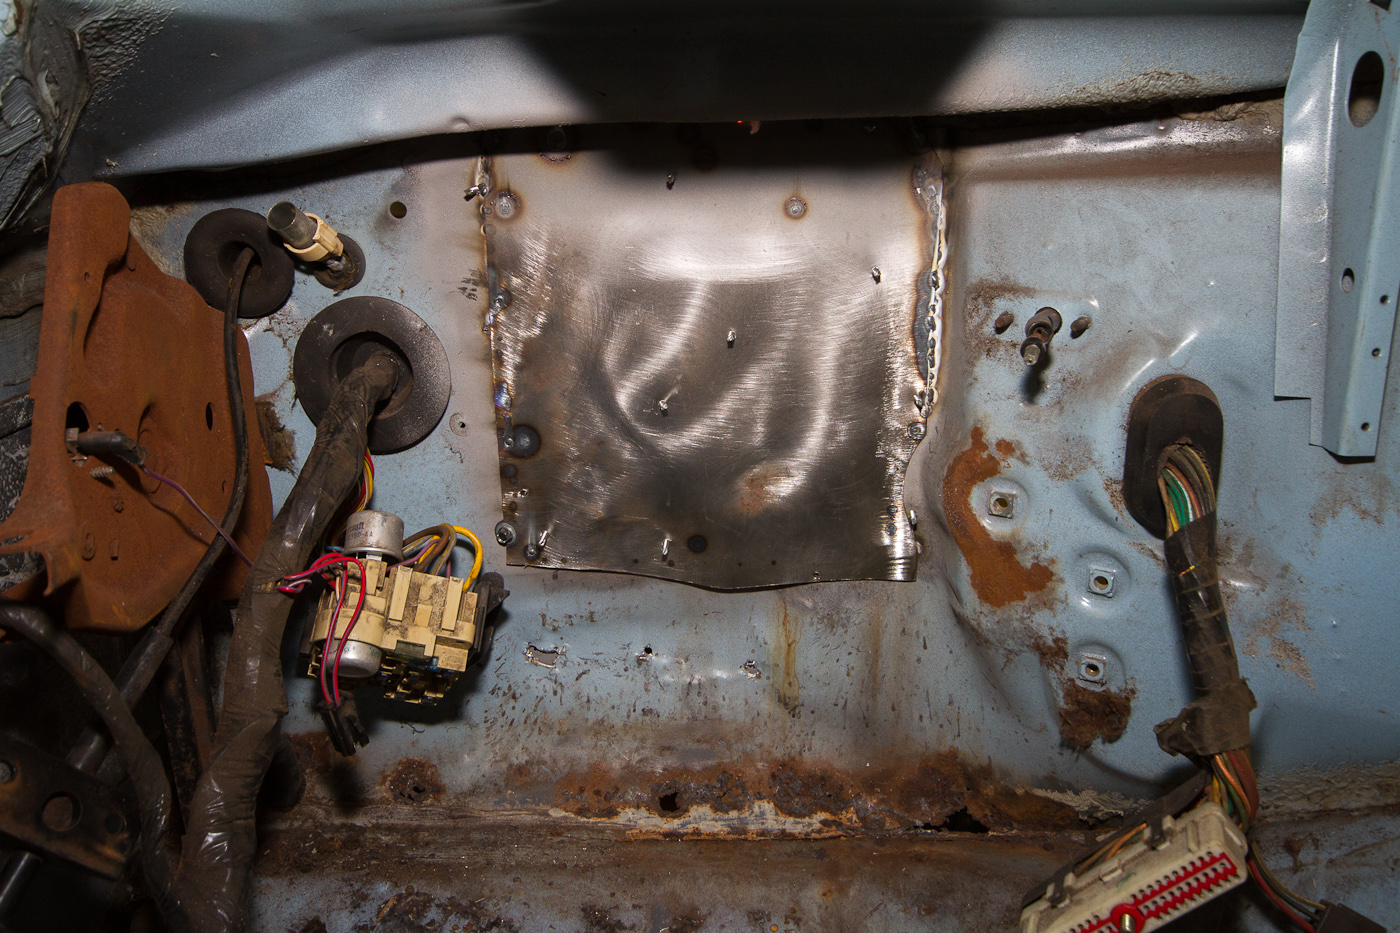
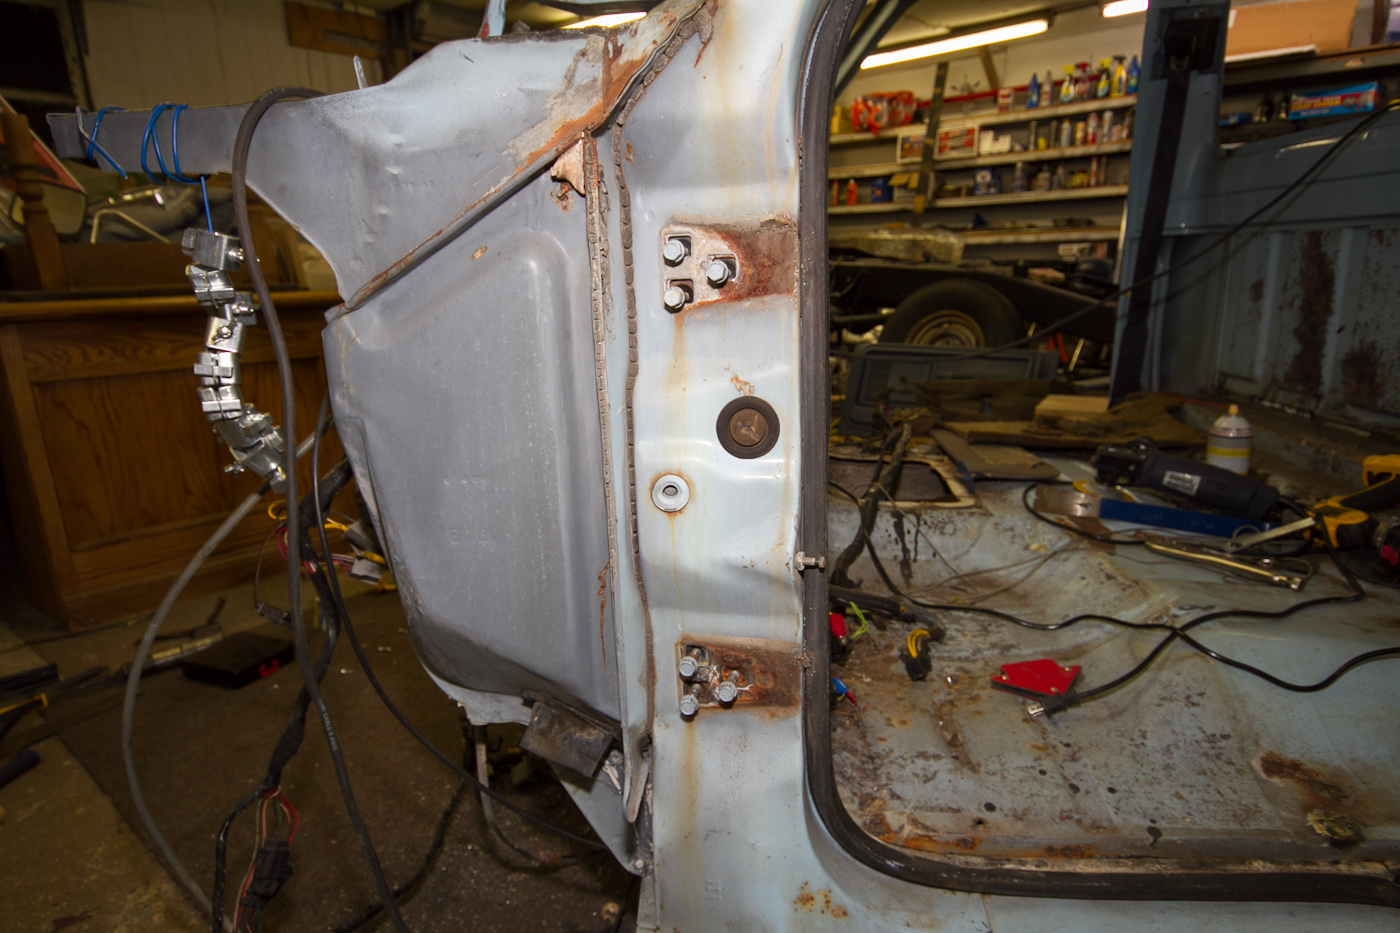
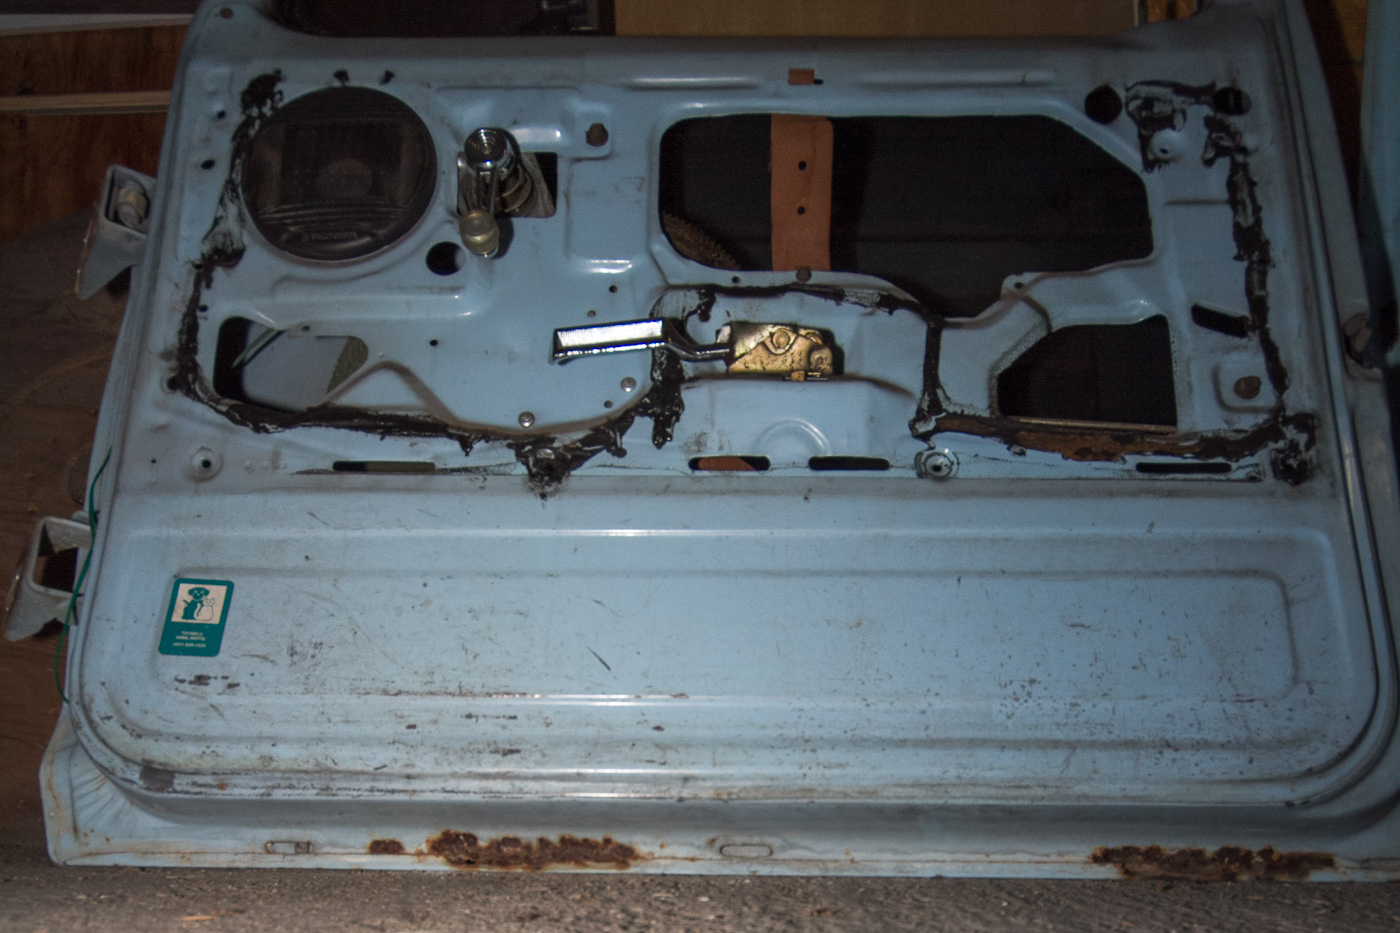
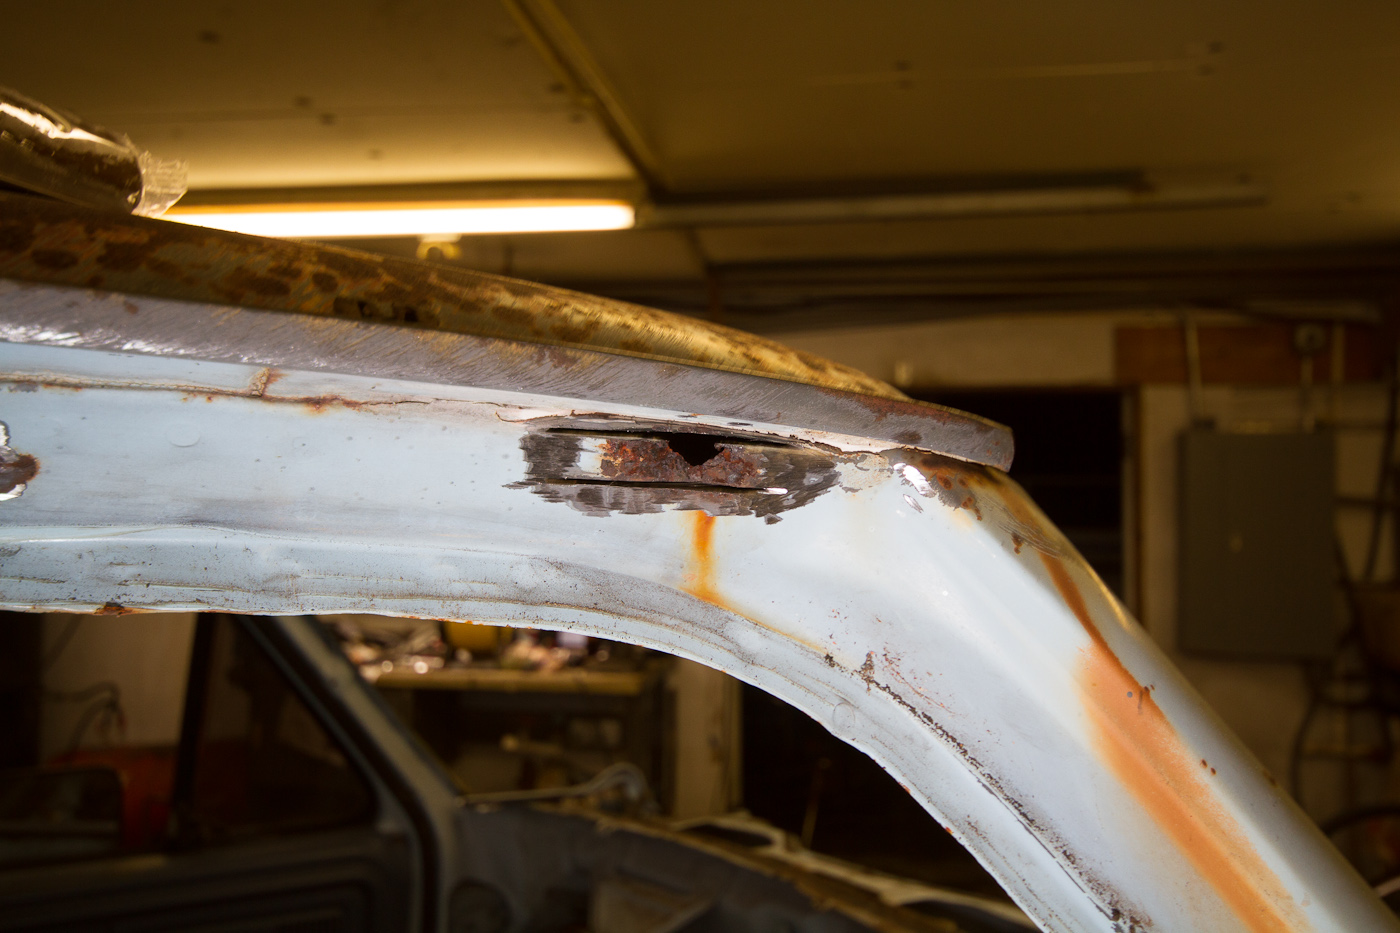
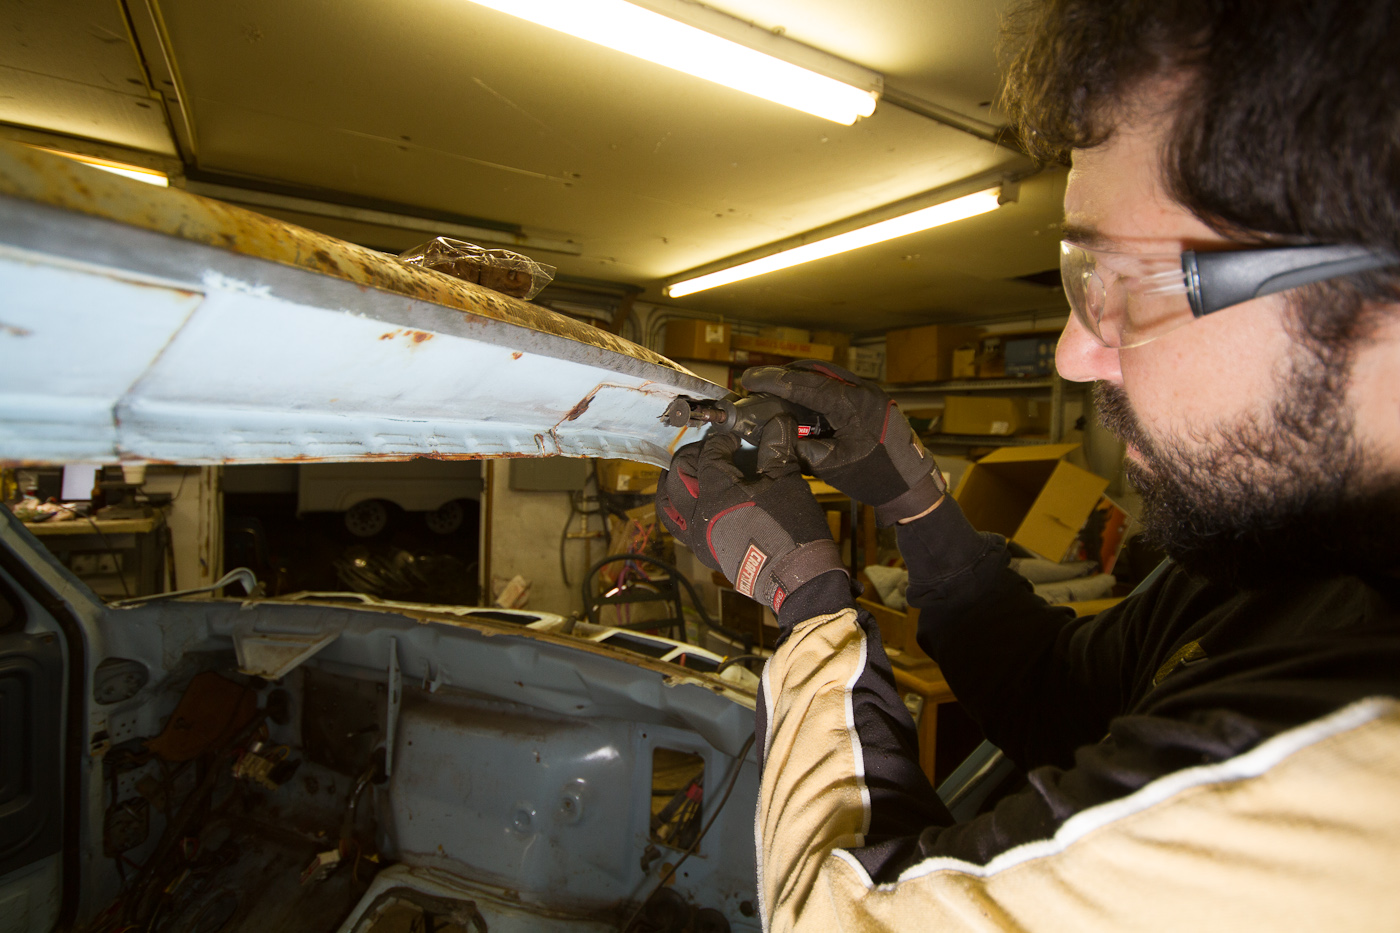
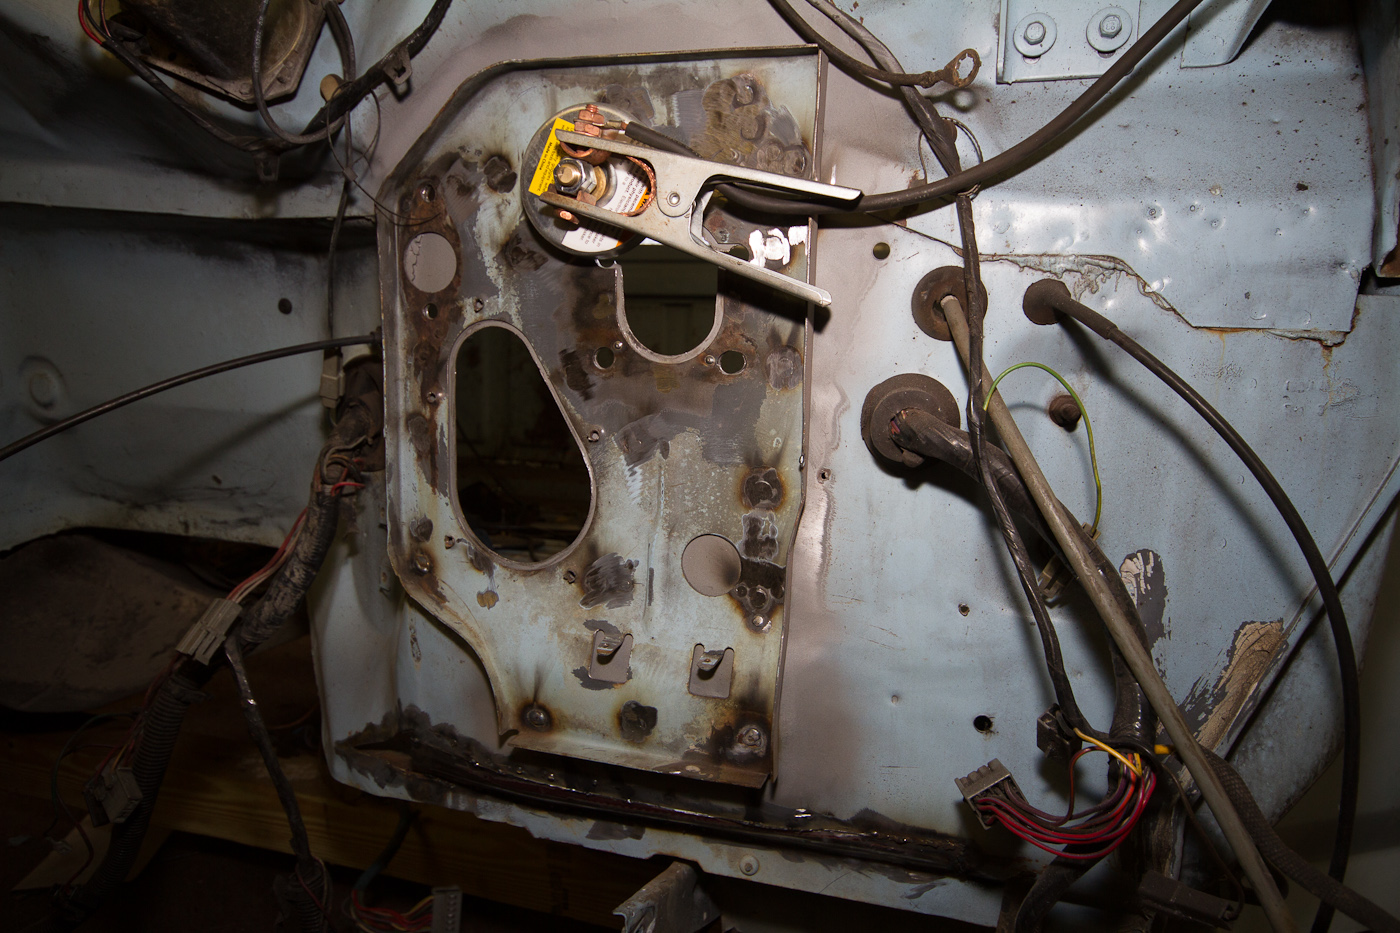
I also pushed the frame outside a bit and sandblasted the insides of the backing plates, which was really badly needed. Unfortunately, that proved to be the last thing the blaster wanted to do, because its handle split in two. I'm taking it back and getting another one later today, too. In the meantime, Mike got back to work on the cab, cutting out more rusted-through sections in the P/S door frame:

http://www.ronman.org/pics/f150/IMG_03271.jpg
http://www.ronman.org/pics/f150/IMG_03272.jpg

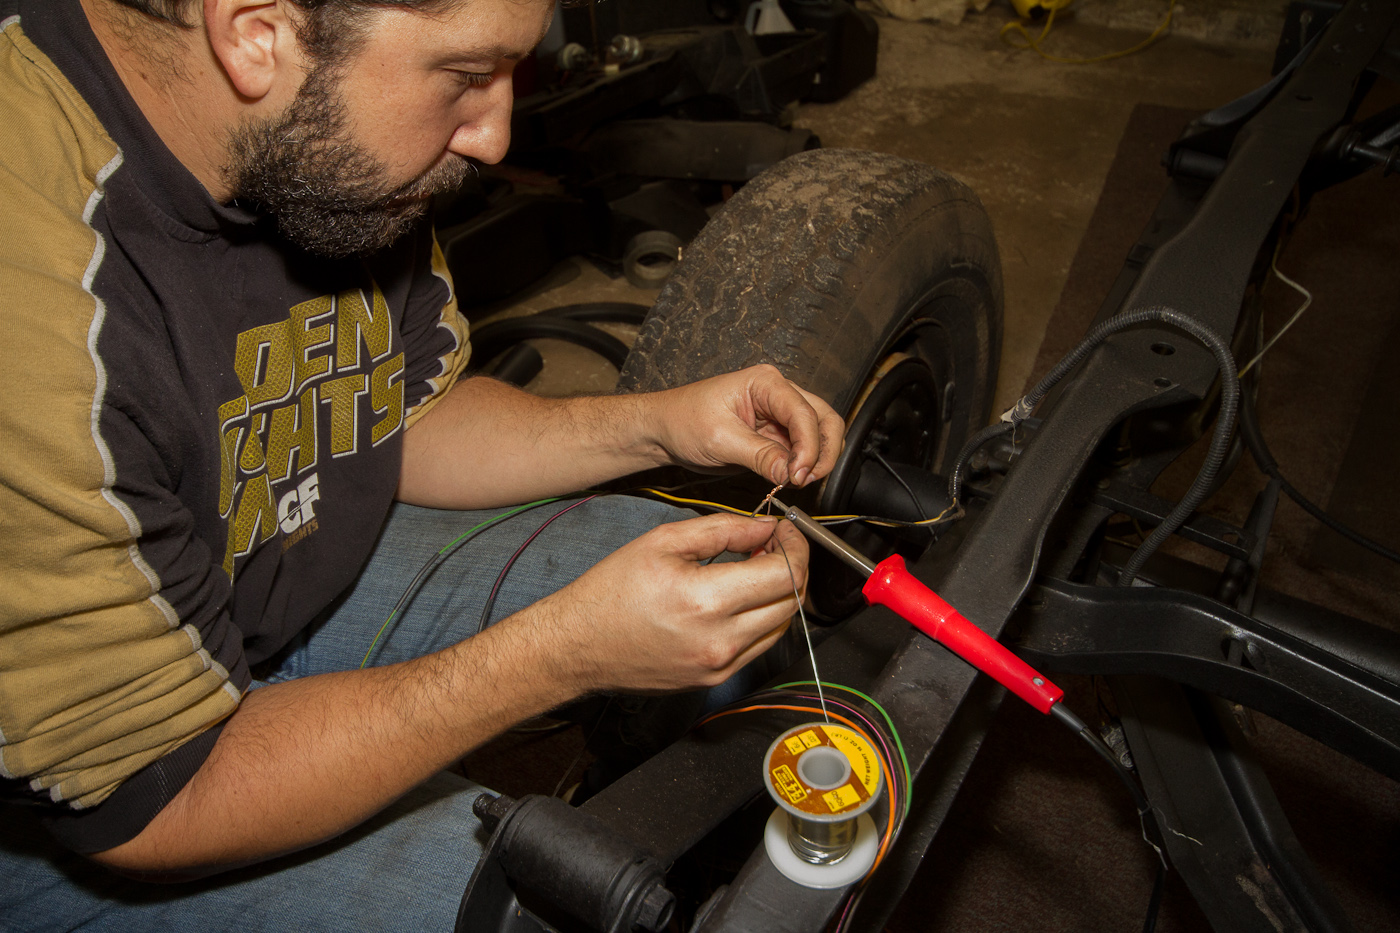
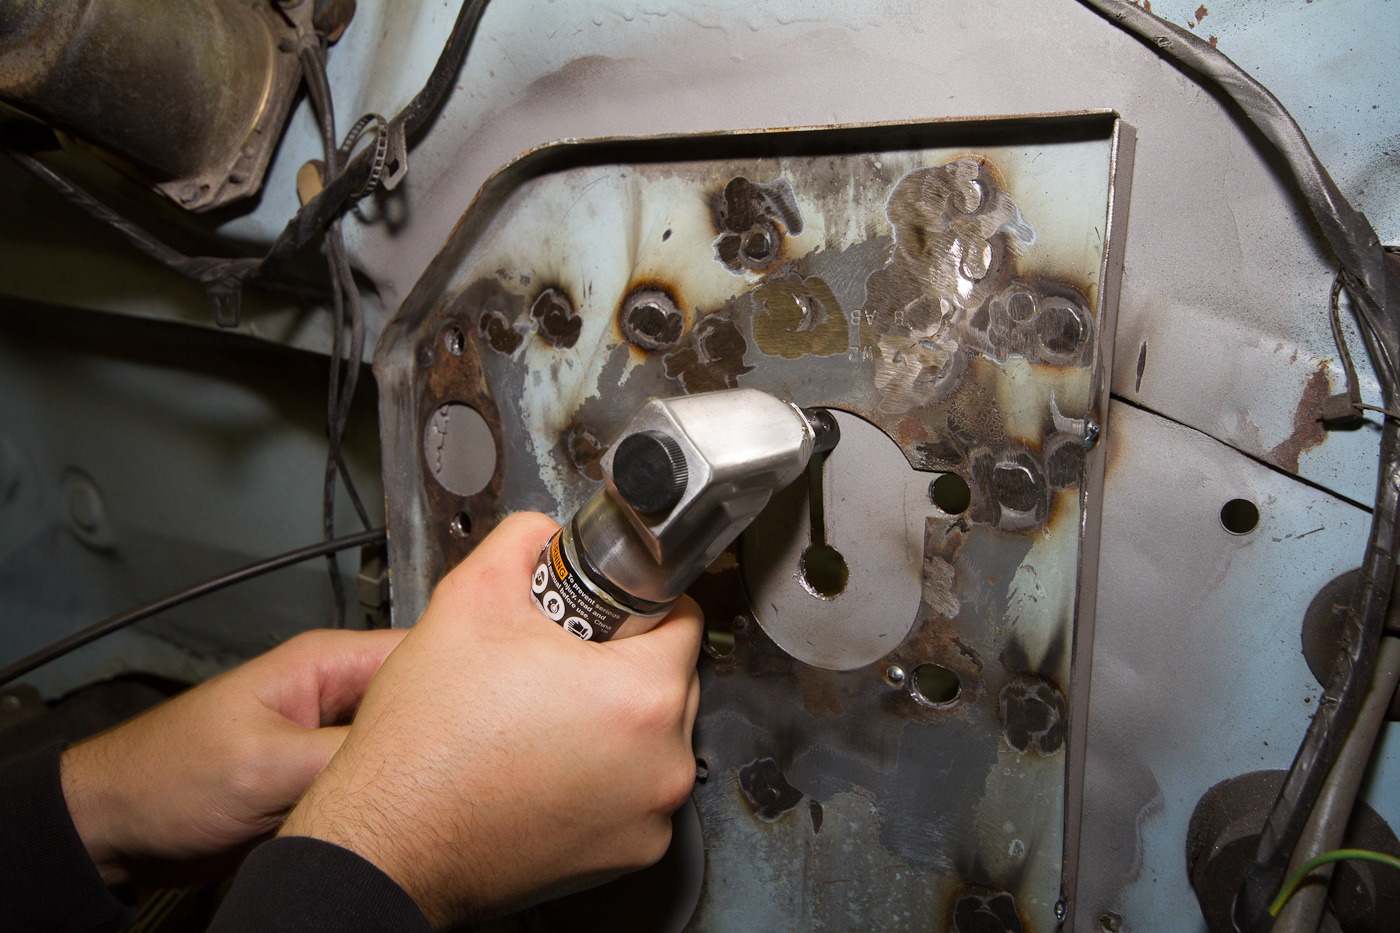
And also trying out the nibbler (which we wound up dismantling, slightly deburring and properly lubricating at the cost of almost 2 hours and multiple beers) on his new firewall piece...

http://www.ronman.org/pics/f150/IMG_03274.jpg

After reaching a stopping point on the brakes, I decided I was sick of my floor jack being a pain in the ass to use and not wanting to work half the time, so I broke it down...

http://www.ronman.org/pics/f150/IMG_03276.jpg

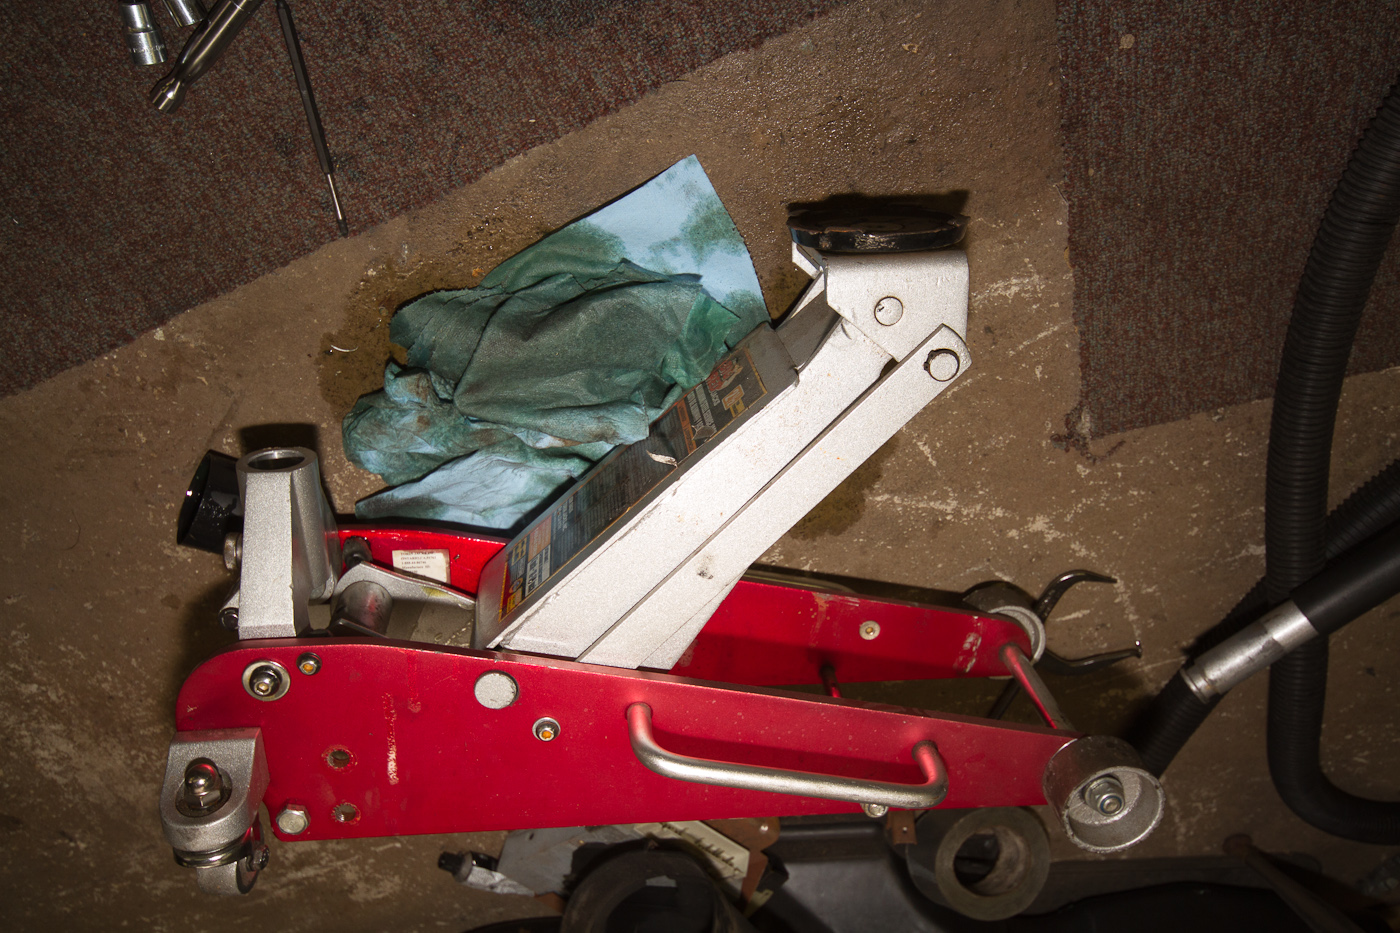
... and tore it apart.

http://www.ronman.org/pics/f150/IMG_03277.jpg
http://www.ronman.org/pics/f150/IMG_03278.jpg

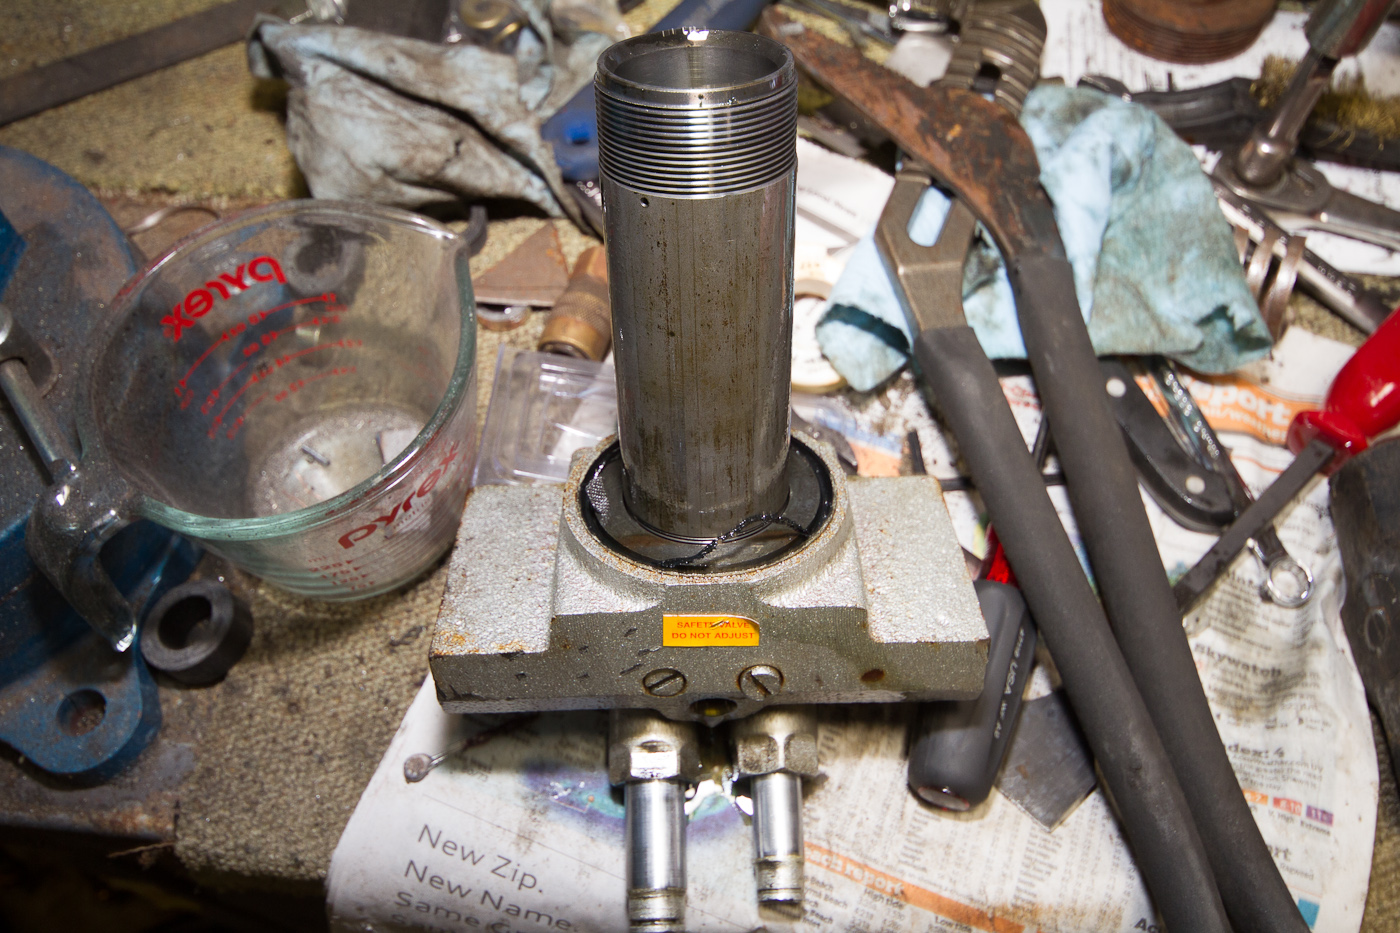
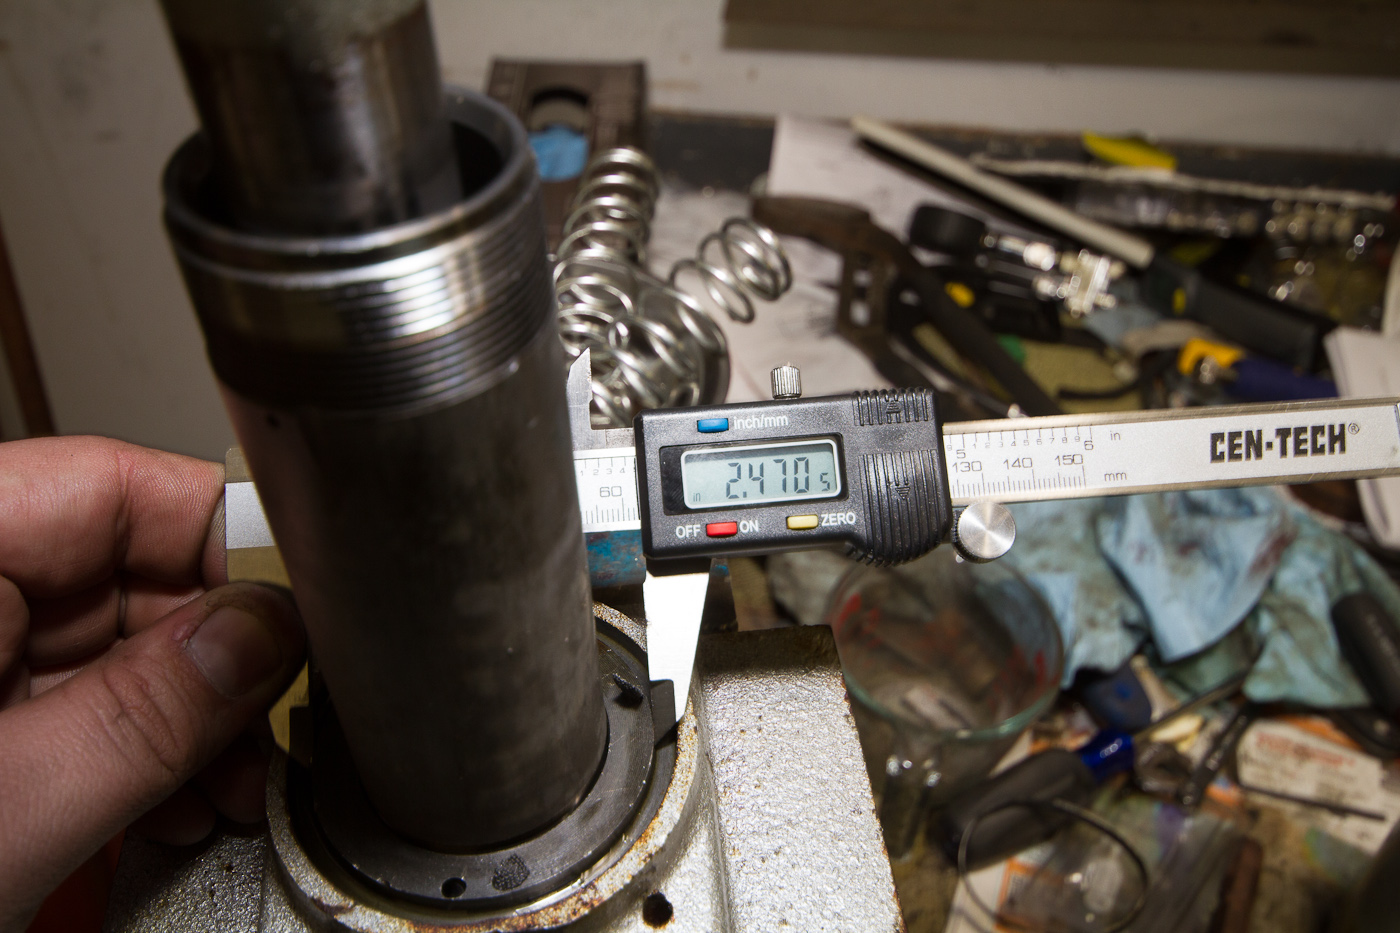
I was able to replace the handle piston seals and the relief valve seal (all of which were leaking) but there are two more I need to source - the main reservoir seal, which is 2.5", and the shaft seal, which is 1". I'm gonna call the manufacturer in the morning and see if they can send me a seal kit. I think the cup seal on the end of the piston is OK, it looks fine, feels OK, and isn't dry or soft or anything nasty.

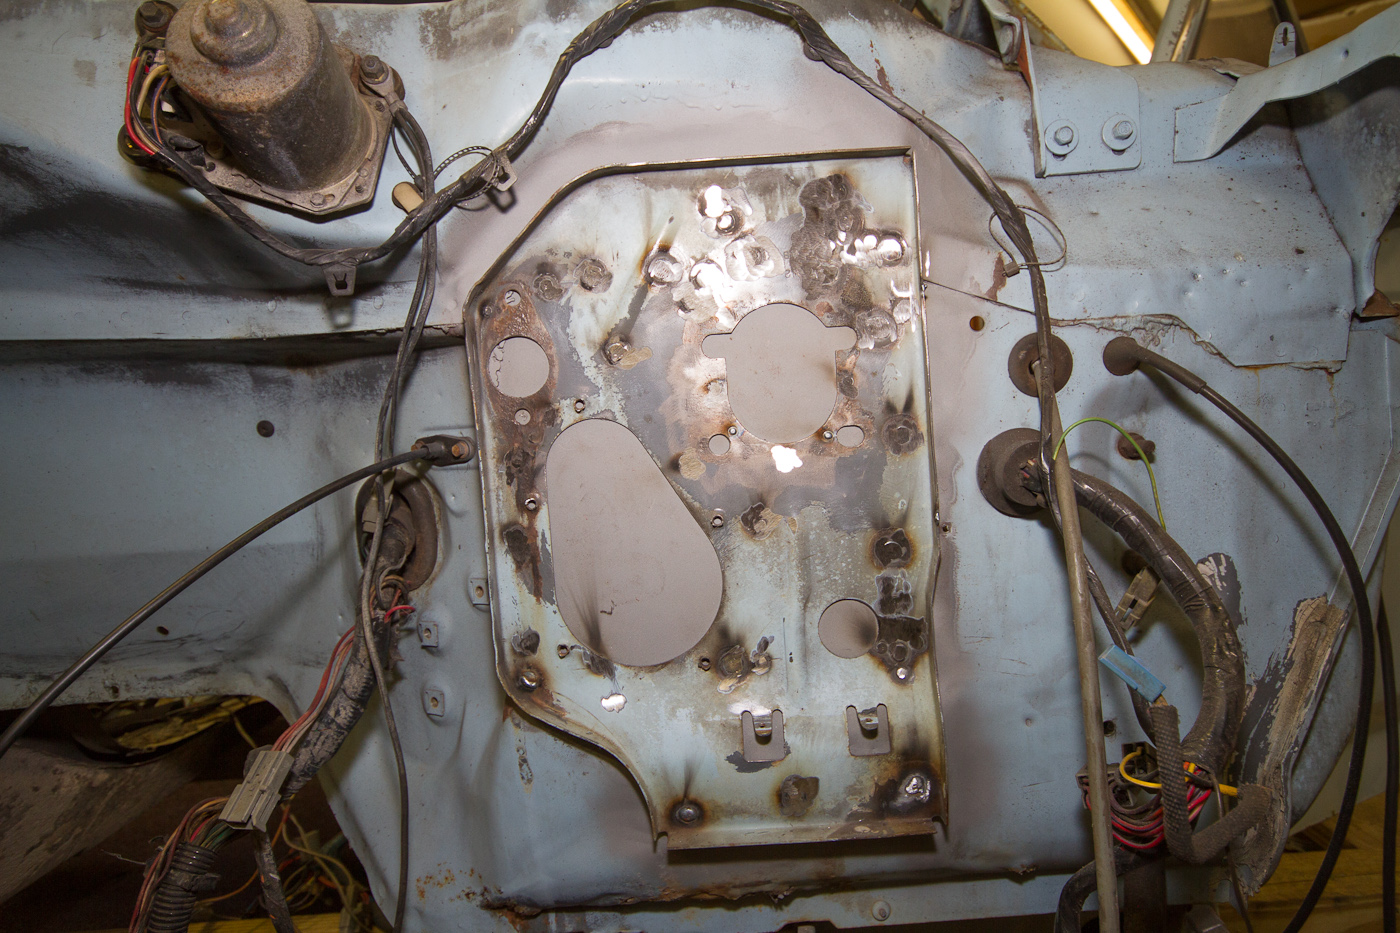
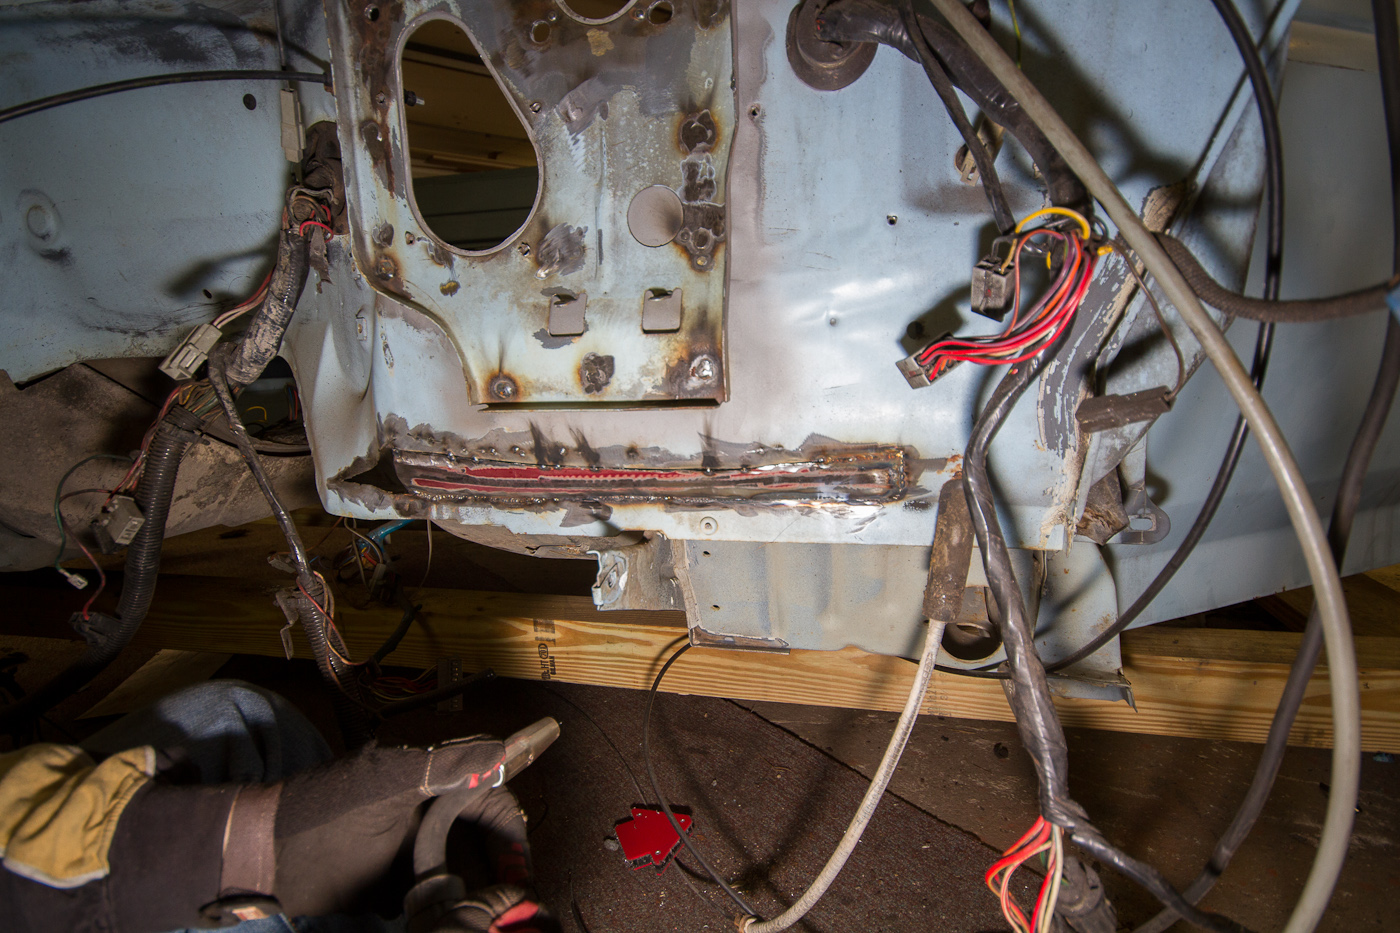
After giving up on that, we welded in the next patch panel, the little guy here near the bottom of the firewall. I also had picked up a set of these little guys (http://www.harborfreight.com/8-piece-bu … 44751.html) at HF at Mike's request, and they definitely came in handy, especially after a little QC with the grinder (removing slag, burrs, and stamping flash) to make them actually fit through the gap that was being welded. If you find yourself welding sheetmetal these are a good investment. This is after tacking the patch in place, but before fully welding the seams. The small missing piece at the end there is cut and formed, but waiting for a new sandblaster so it can be prepped for welding.

http://www.ronman.org/pics/f150/IMG_03279.jpg
http://www.ronman.org/pics/f150/IMG_03280.jpg
http://www.ronman.org/pics/f150/IMG_03281.jpg

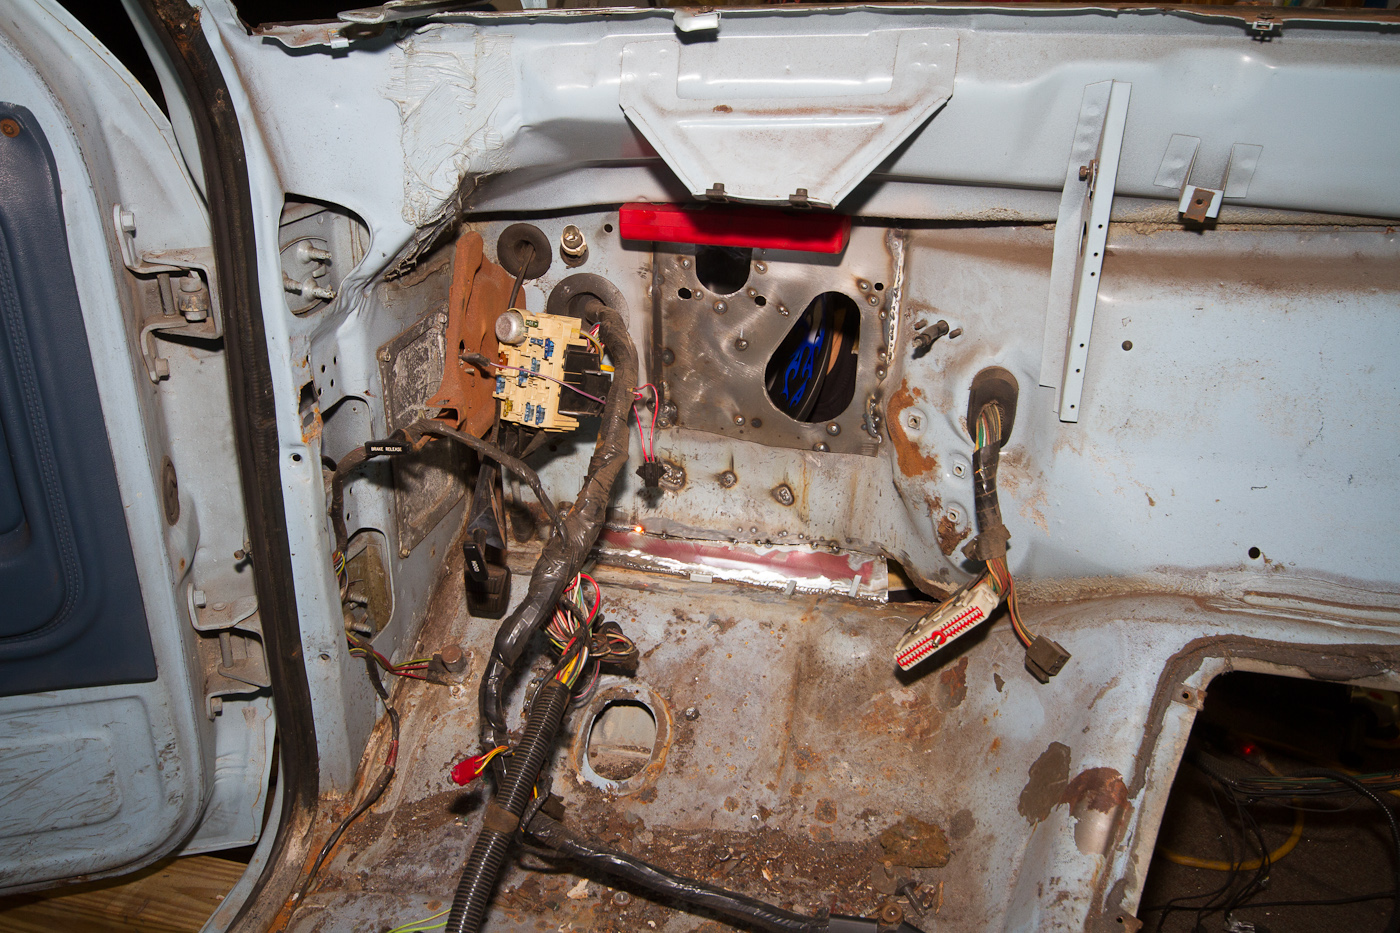
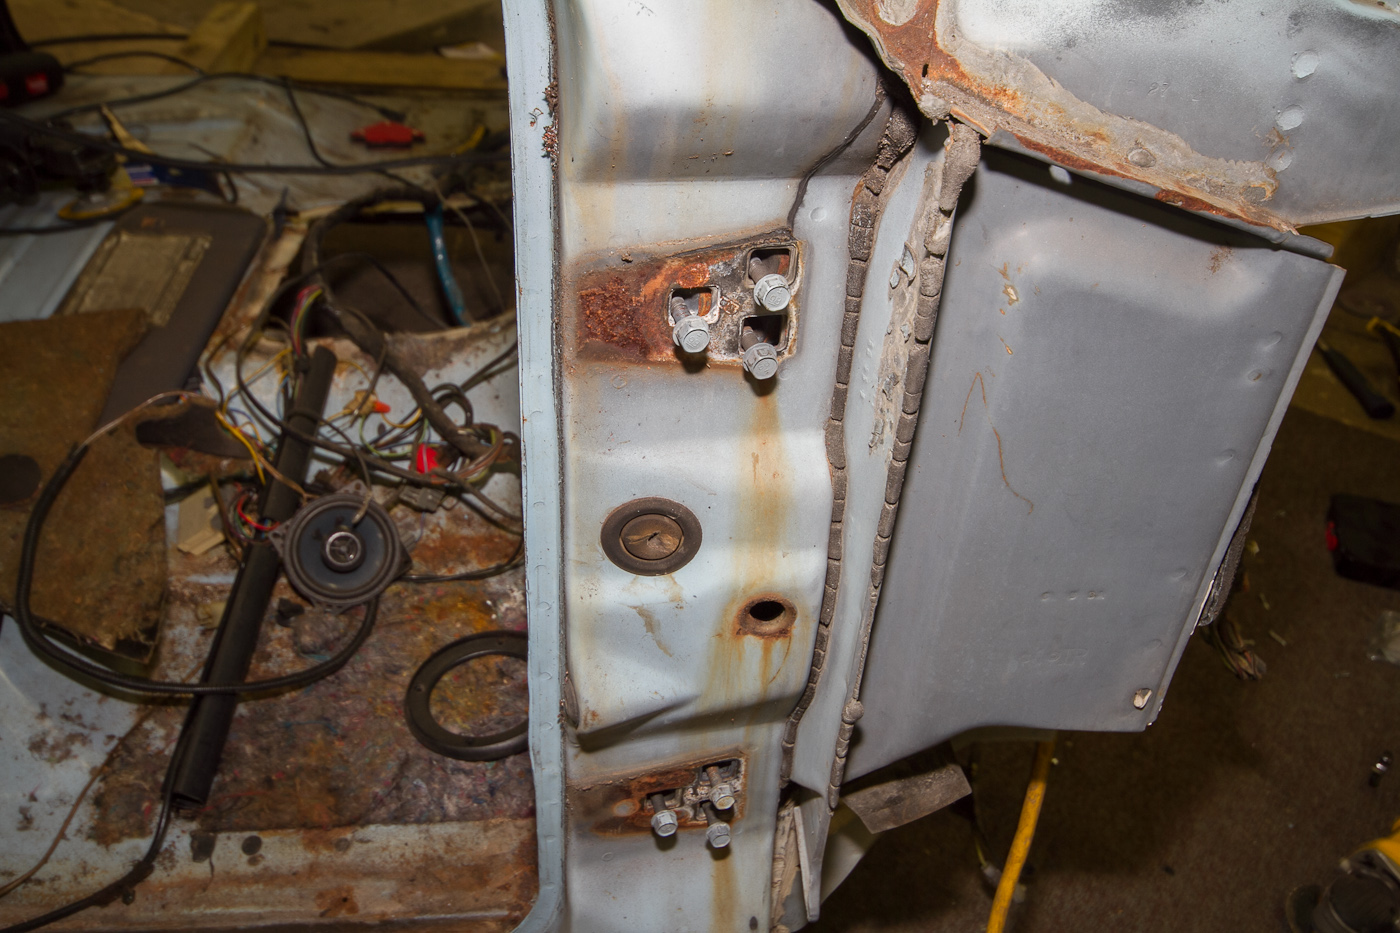
The only patches left to make are two small ones at the bottom of the P/S door, and two more on the floor. Once those are done and ground down, we'll have to roll the cab outside so I can sandblast it in suspect areas and sand the rest to get it ready for primer. It's conceivable that we could have at least part of the body done in epoxy primer by the end of this coming weekend. That would be awfully nice...

Official photographer/Team Police Brutality|Speedycop & the Gang
Lackey-mechanic-whatever/NSF Racing
Sycophant/Judge Phil, Jay Lamm, Kim Harmon
Galaxie Driver/not Parnelli Jones

Re: My F150 project

With the sandblaster replaced this morning, I was able to get back out to the garage and start working on things. First on the list was blasting the small patch panel for the firewall (the hole where the firewall meets the floorpan in the previous pic) so Mike could weld it in. After that, I blasted all my rear brake bits (I hate drum brakes) and painted them. After doing some more blasting while they dried, and blowing all the nasty old fluid out of the lines, I got on to the reassembly. Took me a while because the springs are a pain in the ass, and I got a lovely splinter from the semi-metallic shoe in my finger that I had to dig out with a razor. I hate drum brakes.

http://www.ronman.org/pics/f150/IMG_0375.jpg

I finally got them together, after a lot of cussing (I hate drum brakes) and fighting. It's sure nice being able to work on clean stuff.

http://www.ronman.org/pics/f150/IMG_0378.jpg
http://www.ronman.org/pics/f150/IMG_0382.jpg

Next up was the new brake hose, and of course the old one wanted to fight. I eventually got it, and after cleaning up and painting the end of the new one (it came as bare, unfinished metal with a couple spots of surface rust already on it in the box,) and chasing the threads on the axle vent/retainer bolt, I finished up the rear brakes.

http://www.ronman.org/pics/f150/IMG_0383.jpg

Mike was still grinding his welds, so I figured I should do something else, and wound up pulling the cover off the diff and cleaning it up. Happily the gears look perfect, the fluid was nice and clearish-brown (and stank like proper used gear oil) and the bottom of the pumpkin was free of even small filings. Next time, I'm bringing a couple quarts of Amsoil 75w90 to fill it up and either grabbing a gasket or another tube of black RTV to close it up.

http://www.ronman.org/pics/f150/IMG_0384.jpg

Next, we patched up the remaining little holes on the cab, and started disassembling the doors. I didn't get a picture of the reason why I think we need one, but I'm pretty sure we need a new P/S door. About 1/4 of the bottom, where the skin folds over the inside and is welded, is rusted completely through. The rust is even worse on the inside metal than the outside, and it's a bunch of really complex set of curves in a sort of V arrangement with the gap being where the glass drops down. So, I've gotta start calling around and looking for a door. In other rust news, since the cab is done and we decided we need to start blasting the insides of fenders next, we started looking at the P/S fender and its rusted bottom front (the bit the bumper sort of curves around to meet.) It's another fairly complicated piece, with the smooth curve of the fender as it gradually comes in to meet the wheel vertically combined with the slight inward twist as it meets the bumper, and a stamped-in crease to complicate things even further. That front corner, however, is the only rust on the fender, so I'm hoping I can find serviceable-yet-borked fender in a junkyard that I can hack up cheaply, since I don't want to buy a whole fender outright at junkyard prices when a new Chinese fender is only like $110.

And then we piddled around a little and checked out the body mounts and mocked them up (all the hardware still has to be blasted and painted before it can be properly mocked up, so we used regular old long bolts and washers for now) and cut the end of the old exhaust downpipe off so we could get the clamp. Mike blasted it only to find that we were out of high-temp paint, so it's gotta wait, too.

http://www.ronman.org/pics/f150/IMG_0387.jpg

Oh and we started looking at the exhaust studs to see if we could save them, and uh, yeah, they're toast.

http://www.ronman.org/pics/f150/IMG_0390.jpg

Anybody know where I can find exhaust-grade M12-1.5 studs with a 1/2" top and a 1-1/4" bottom, or should I just go with some grade 8 bolts up from the bottom into the manifold?

Official photographer/Team Police Brutality|Speedycop & the Gang
Lackey-mechanic-whatever/NSF Racing
Sycophant/Judge Phil, Jay Lamm, Kim Harmon
Galaxie Driver/not Parnelli Jones

68 (edited by 400KCummins 2012-12-19 06:58 AM)

Re: My F150 project

Are these the manifold flange studs that attach the exhaust flange to pipe? National Parts Depot and Summit both show they have a replacement kit. Dorman's catalog shows replacements as well but no one is showing those dimensions. Makes me wonder if they were replaced at some point before. Of course this would fix the problem as well: Hedman Street Hedders 89300

Re: My F150 project

Yeah, it's the flange studs. I tried 3/8-16, 7/16-14 and 1/2-13 nuts to no avail before cracking the metric tap and die set open and grabbing the M12-1.5. It fits perfectly... what size does Dorman say it is?

Official photographer/Team Police Brutality|Speedycop & the Gang
Lackey-mechanic-whatever/NSF Racing
Sycophant/Judge Phil, Jay Lamm, Kim Harmon
Galaxie Driver/not Parnelli Jones

70 (edited by 400KCummins 2012-12-20 09:49 AM)

Re: My F150 project

No listings for hardware only for the 4.9 motor. Checked other forums and they found replacements at Fastenal. I checked their website and they do indeed have M12 double end studs in a variety of thred pitch, lengths and grades. Here's the address.

Fastenal 5707 Dot Com Court, Suite 1049 Oviedo, FL 32765 Phone:407-977-1021 Mon - Fri:7-5

Re: My F150 project

There's also one by UCF, which is closer to the house.. .unfortunately I'm off on Mondays and Tuesdays, and next Monday and Tuesday are national holidays. So it'll be a spell before the exhaust gets hung... no biggie. If you wanted to go get me a set of studs I could swing by the house and pick them up tonight. wink

Official photographer/Team Police Brutality|Speedycop & the Gang
Lackey-mechanic-whatever/NSF Racing
Sycophant/Judge Phil, Jay Lamm, Kim Harmon
Galaxie Driver/not Parnelli Jones

72 (edited by 400KCummins 2012-12-20 12:36 PM)

Re: My F150 project

If you drop off the old ones to me tonight I'll stop by there tomorrow and grab the new ones

Re: My F150 project

Damn this is a helluva build thread!  Nice job, ronman!

Tunachuckers: 15 Years of Effluency
'08 - '10: 1966 Volvo 122, "Charlie"
'10 - '18: 1975 Ford LTD Landau --> 2018 - current: Converted into 1950 "Plymford"
'22 - current: 1967 Volvo 122, "Charlie ]["

74 (edited by 400KCummins 2012-12-21 10:34 AM)

Re: My F150 project

Got the bolts grade 10.9 ACE Hardware had them in stock They are zinc plated 50mm long Hope these work as trying to find M12 double ended studs with a 1.50 thread is damn near impossible They had threaded rod but it was $40.

Re: My F150 project

Last night was fairly uneventful, I started out by sealing up the rear end while Mike did a little more grinding and patching. Once we were done with our tasks, though, we pondered a bit and eventually decided that the doors needed to come off, and that with the fenders off it would be very easy to get them lined back up correctly. So, that's what we did.

http://www.ronman.org/pics/f150/IMG_0391.jpg
http://www.ronman.org/pics/f150/IMG_0392.jpg

The metal behind the hinges was a little scaly, but a quick brush with the grinder proved that it was just surface rust, and would come right off. Next, Mike decided he needed to make another patch, and I figured I should pull the wiper motor and transmission, and work on getting rid of more dried-out seam sealer...

Remember above how I mentioned the rust on the P/S door that we felt was too bad to deal with? Here's a pic of it, you be the judge:

http://www.ronman.org/pics/f150/IMG_0398.jpg

Anyway, short night last night, so we shut it down by 10:30 so we could both catch up on some sleep. I believe it was at this point that Mike declared the patching work done... heh.

Official photographer/Team Police Brutality|Speedycop & the Gang
Lackey-mechanic-whatever/NSF Racing
Sycophant/Judge Phil, Jay Lamm, Kim Harmon
Galaxie Driver/not Parnelli Jones