Topic: Fuel Jug Tech
I finally sat down and wrote this up. After 6 races with Lemons I have reached the blow off point of watching new and even some veteran teams struggle at fueling. By struggle I mean, I am cringing praying they do not create a fire in their monkey fumbling a football use of inferior fuel transportation/fill containers.
Fuel Jug Tech
Physics and the law of moving fluids rapidly from one container to another. And doing so safely.
Going over the wall or even fueling at your pit (where allowed) poses many risks. We are talking flammable highly combustible liquid here, that’s why we fuel in full gear, SAFETY 1st!
Thinking about your fuel stops, what is the single worst point problem you can have fueling? Sight, or more importantly loss of sight. Every fueling issue we have experienced has come from a loss of clear vision at the task at hand, moving fluid from one container to another. We are going to make that process very easy to execute even through your fogged visor.
The second is faulty fluid containers or fill spouts, and/or use of funnels where you have an open “pond” of fuel in the open atmosphere. This is my opinion but I like to keep my flammable liquids in sealable containers. So lets evaluate what it takes to get fuel into a car safely, and as a by product somewhat swiftly requires two things. Fuel jugs that are up to the job, and a car tank & vent system that can accept fuel and vent displaced air at a rate comparable to the ingress of fuel.
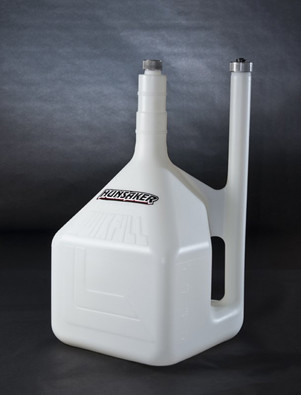
Who has walked in to a Big Box store and purchased a 5-gal fuel jug? How many have actually tried to use that EPA/.GOV approved piece of engineering mastery they call a fill spout? Now do so with a firesuit on and a helmet with the visor down so it gets nice and super foggy. Fumbling around, spilling, spraying getting most (you hope) of the fuel from the can into the car. By the time you get to your 2nd jug you can’t see, you are Helen Keller with 5 gallons of flammable liquid trying to fit it into a racecar. See the problem??? If you’ve raced once you’ve experienced this euphoria of pray and dump, hoping for no fire, or in our world even worse: a racing penalty for dumping fuel everywhere but in the car.
I’m only going to gloss over and barely address the car/vent side. This is obviously going to be specific to your vehicle, so dont hold my feet to the fire on this portion, please evaluate what you have. My rule of thumb for the fuel tank/cell vent is to be within 75% of the size of the fuel jug vent. 1” fuel jug vent, try not to go smaller than .75” on the tank. Or your limiting factor maybe .5” at the tank, so the max sized vent you should run at the can would be 5/8ths. Now follow the FATS rules (Fuel Air Trap System) on routing (google if you do not know). More or less 3-sides and down is acceptable practice. My experience with Lemons on FATS is its not enough, so 3 additional tight loops (coil) to finish off should be more than sufficient. Map out your vent routing, we like to add a plumbing ball-valve for storage so you don’t allow all of your fuel ethanol to evaporate while sitting. Remember the intank check valve is 99% junk and should never be trusted.
While doing your mapping think about what fluid will want to do in any position the car is in. On its side, on its roof, hood, truck, other side, nosed in a ditch or riding a wicked wheelie down the track.
Following this rudimentary diagram, add a coil of 3 loops to the end to really ensure you do not fall under Lemons scrutiny.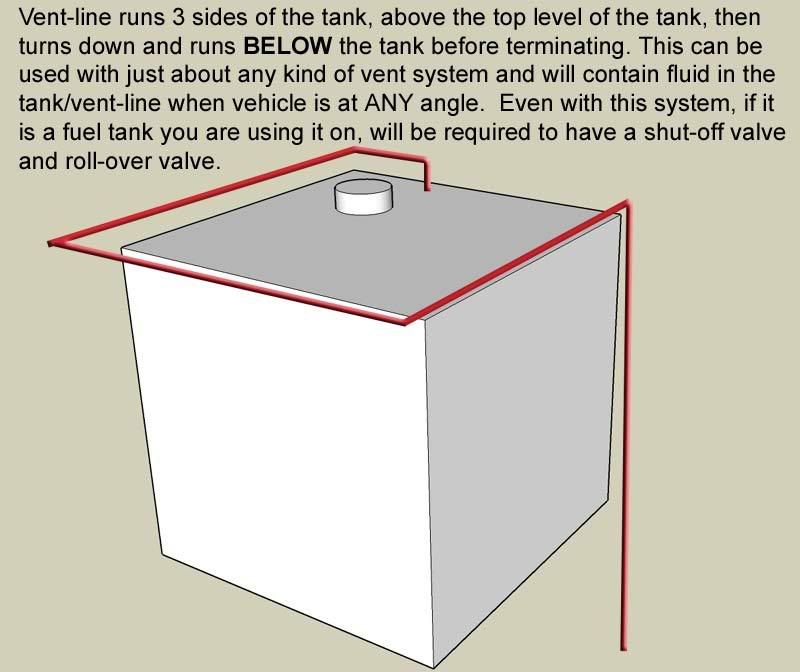
Now the car portion is out of the way we’ll get to the real tech portion I intend to provide. Fuel jugs.
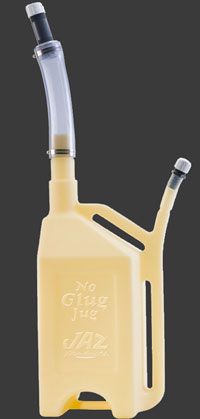
There is lots of confusion, especially on the new guys parts. What is available over the counter are insufficient from a use and safety perspective for our needs. Real jugs that are truly usable in racing are not available over the counter as they are not EPA compliant. Read: fuel jug manufactures sued by people who misused and got burned. See fires don’t only happen on track…. (Google: Blitz USA “Lawsuit Abuse”)
So my new mantra of “Real Gas Cans are BUILT not BOUGHT” I jest I jest, kinda of….
Here is what we use, these have been in service since 2007. They have been used all over the country in multiple genres of motorsports. I’m going to walk step-by-step through a build of 3 more, that will be 1” fill with ¾” vent Part Numbers will be consistent with that size. If you need smaller please modify that portion. 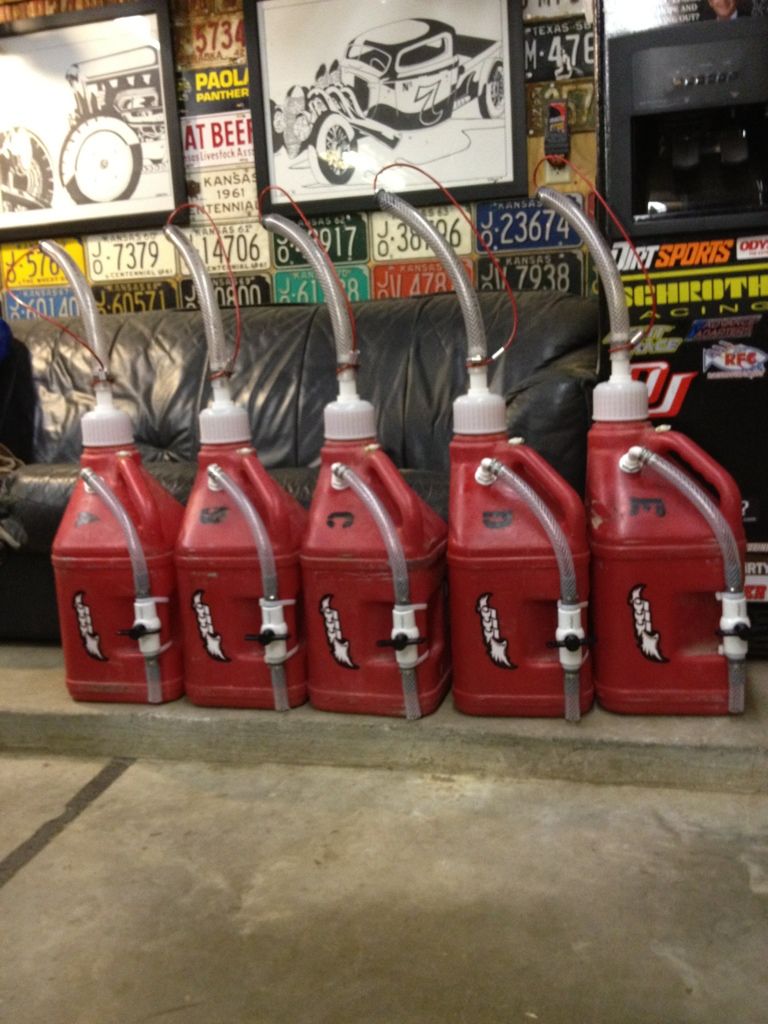
You’ll need to order 3 items before a run to Home Depot or Lowes
#1. Starting with a $19.99 Two Handles 5 Gallon Utility Jug from Speedway Motors, Item # 696500. I use red, but you may be more into Purple or Yellow, whatever floats your boat
http://www.speedwaymotors.com/Two-Handl … ,1112.html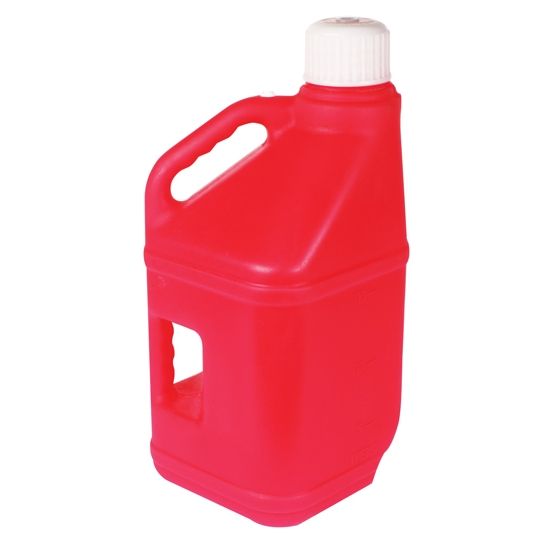
#2 1” Thru Hull Connector, I picked mine up on Amazon for $8.23 + free shipping each made by T-H Marine from CE Showroom. Perko or T-H Marine seems to be the most common brands for these. 
#3 ¾” 90 Degree Thru Hull Fitting, I picked mine up on Amazon for $6.39 + free shipping each made by T-H Marine from Boat-Tec. Perko or T-H Marine seems to be the most common brands for these as well. I’ve now used two different types of these: 3 piece and the two piece in black and in white. Vendors seem to ship whatever…
Here are the 3 piece in Black. 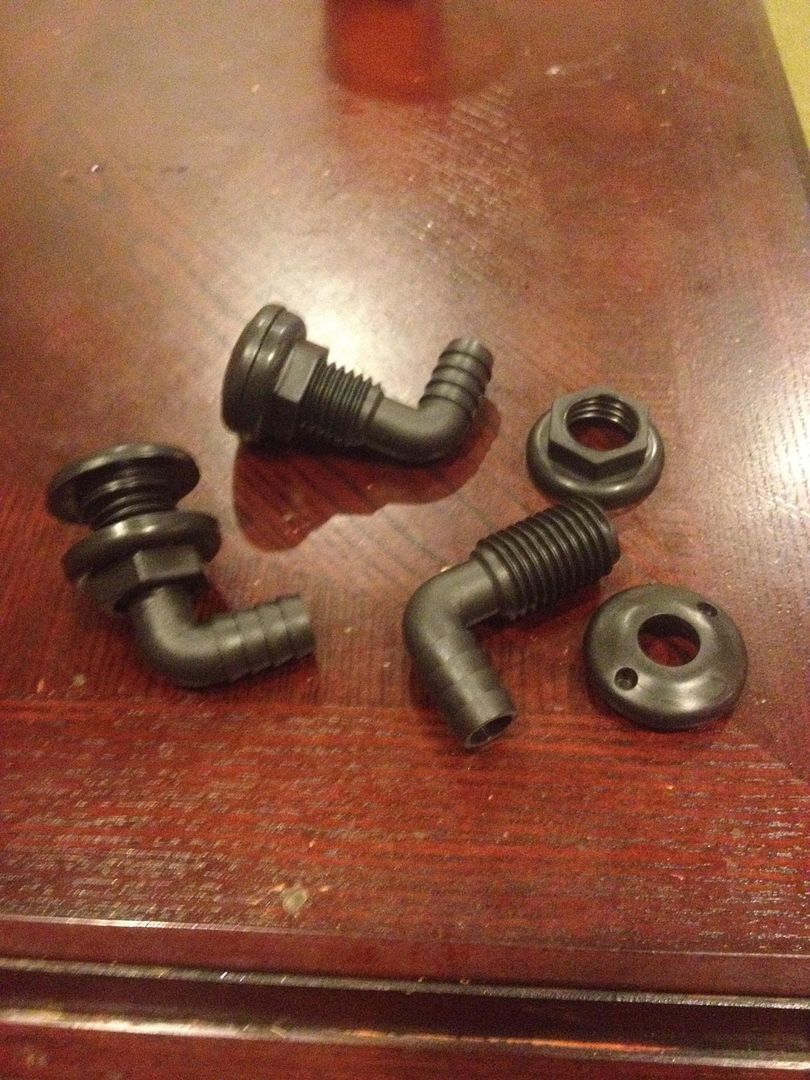
Alright once the Brown truck has dropped these off we need a HD/LOWES run and then its worky work time.
What you’ll need:
#1 Sealer, I use Seal-All only because its Gas & Oil Resistant. In theory this sealer will only be submerged when the jug is inverted. 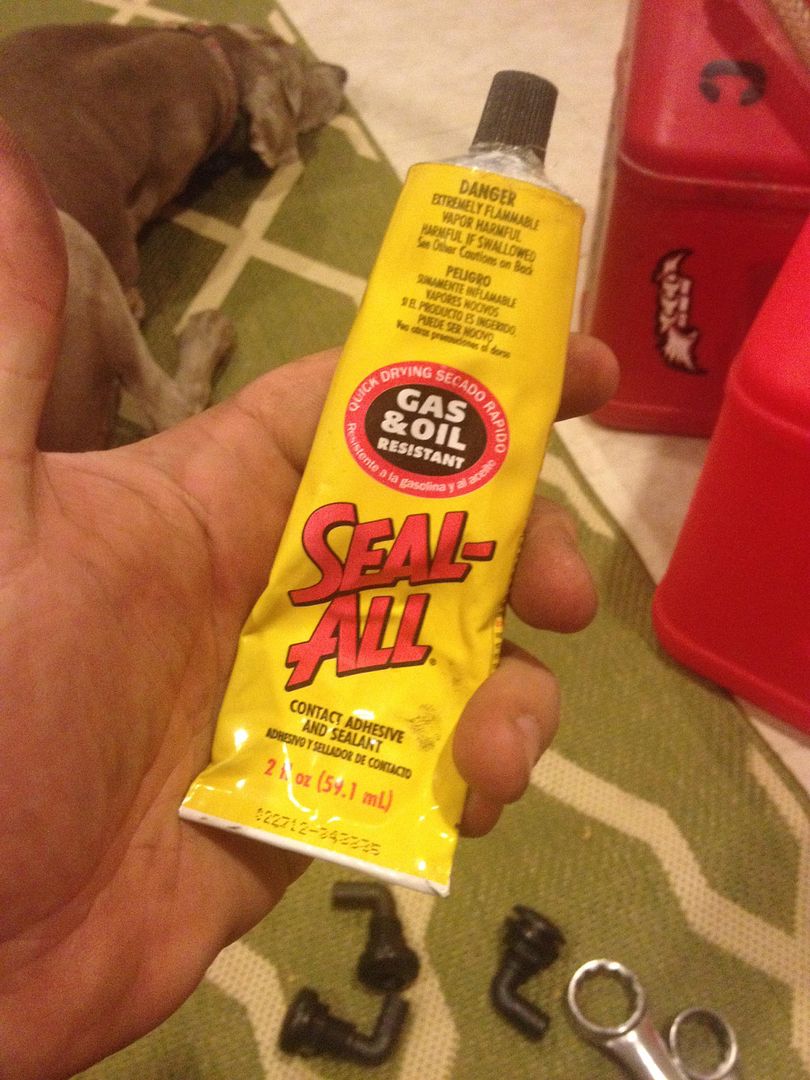
#2, 3, 4 Plugs, Cable and Cable crimps for the pour spout plug. Mine are 1” they are in the grey pipe near the lawn sprinkler stuff at Lowes. Vinyl coated cable from hardware and Cable crimps also in hardware.
Not sure on what size cable I use (1/4-5/16) I dunno, or length I wing that portion (guessing 24”). So improvise. 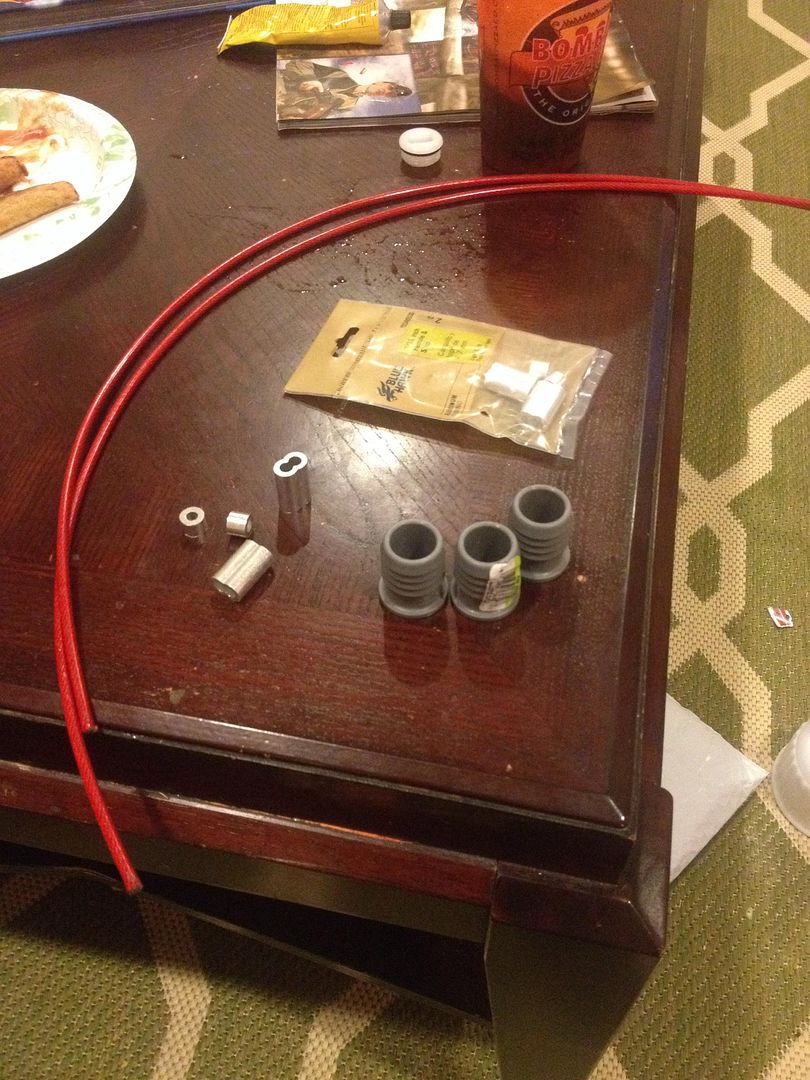
#5, 6
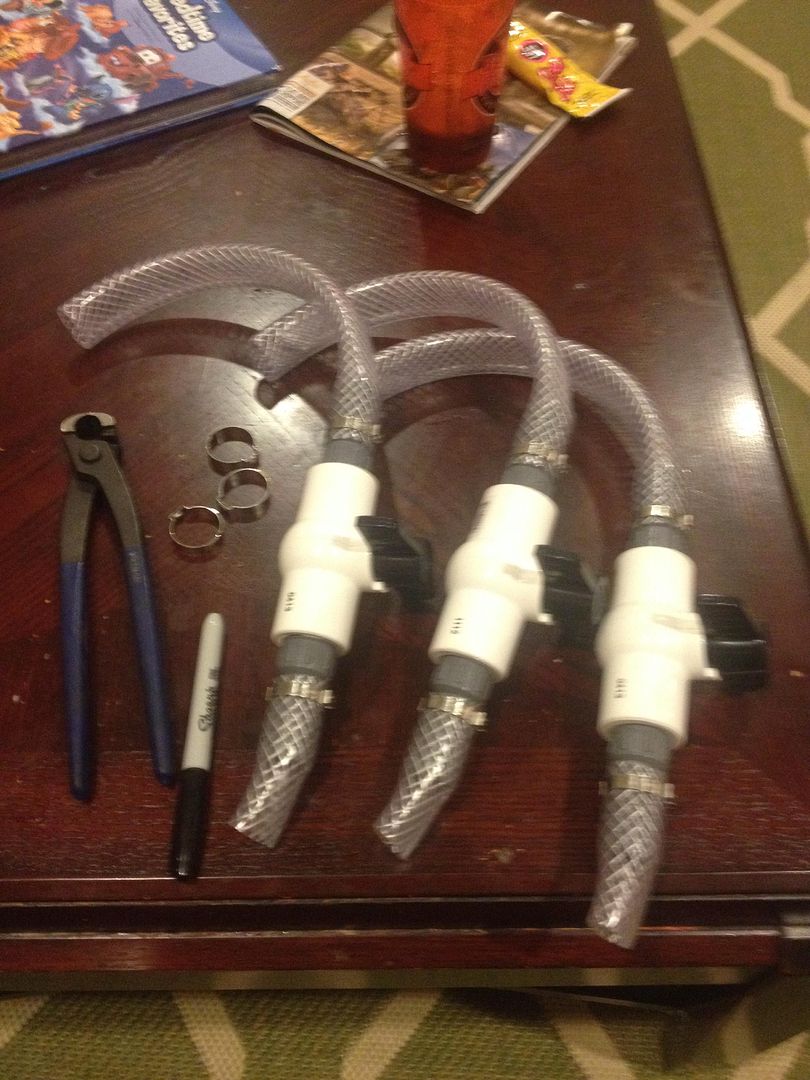
¾” Ball valve from the PVC plumbing section
¾” hose barbs to 3/4” MIP fittings from that same grey pipe section you got the plugs. 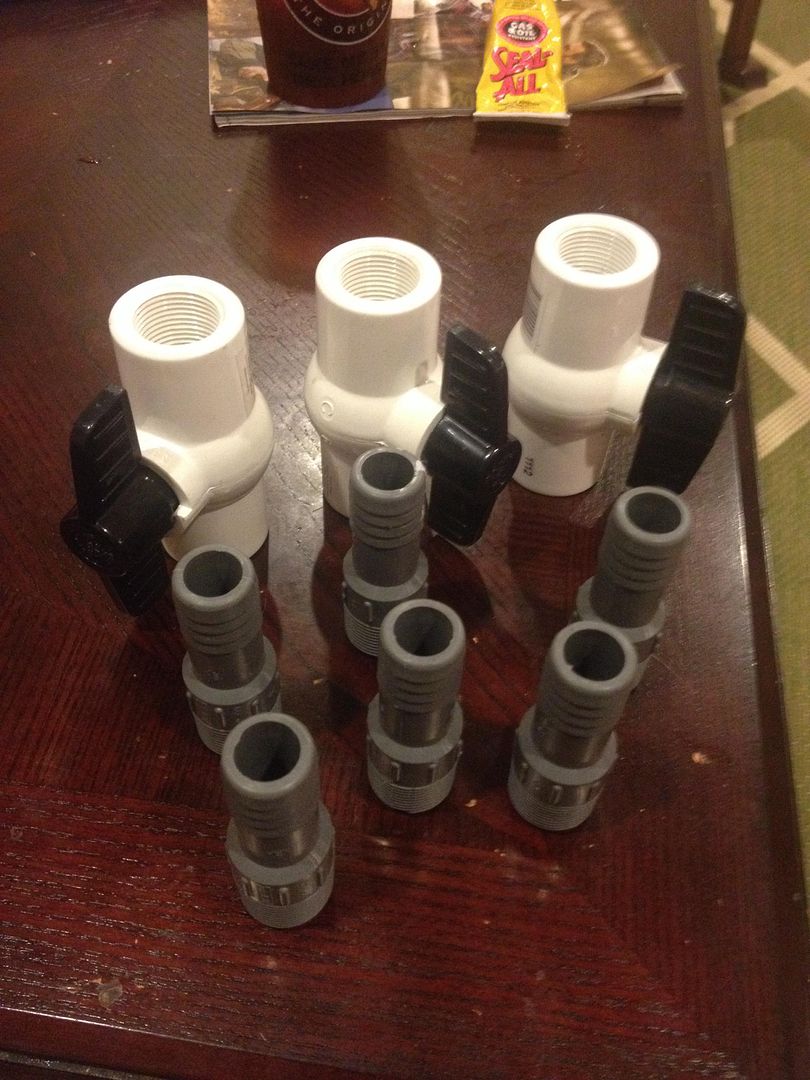
You can do a bit of assembly here and take what’s above and put it together to make these.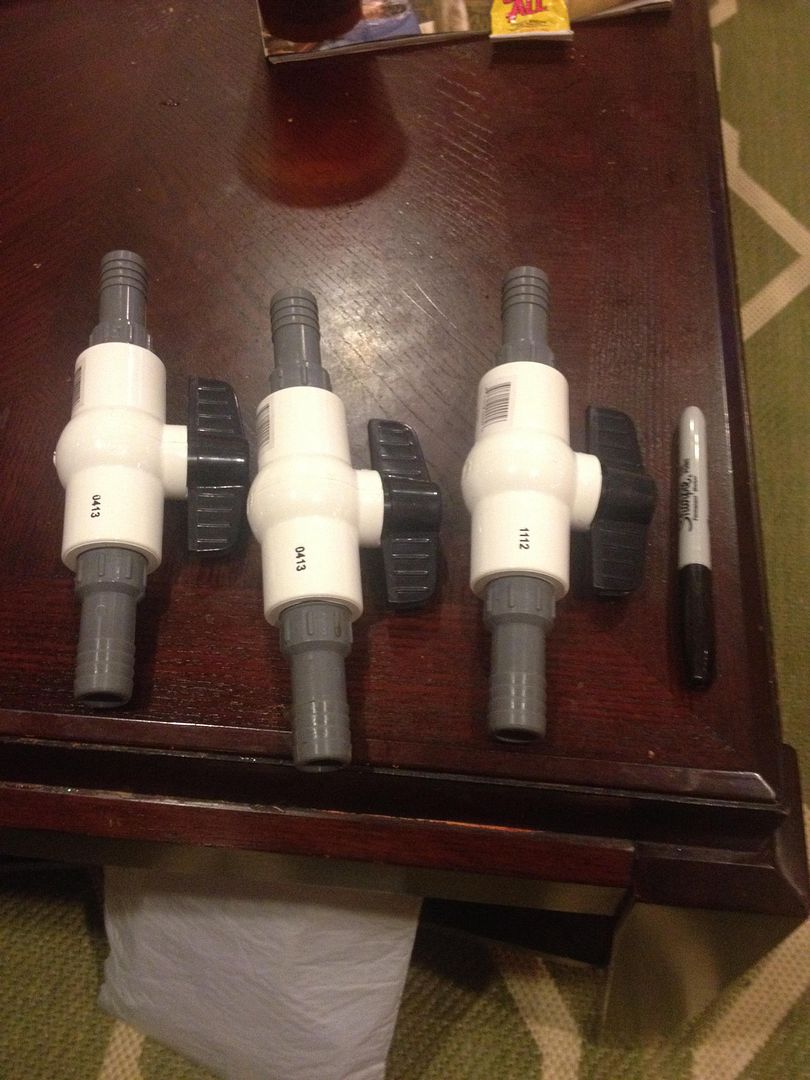
#6, 7
¾” ID Braided Vinyl tubing (Vent line) I use about 13” per jug, but this may vary based on your bulkhead placement and ballvalve assembly length
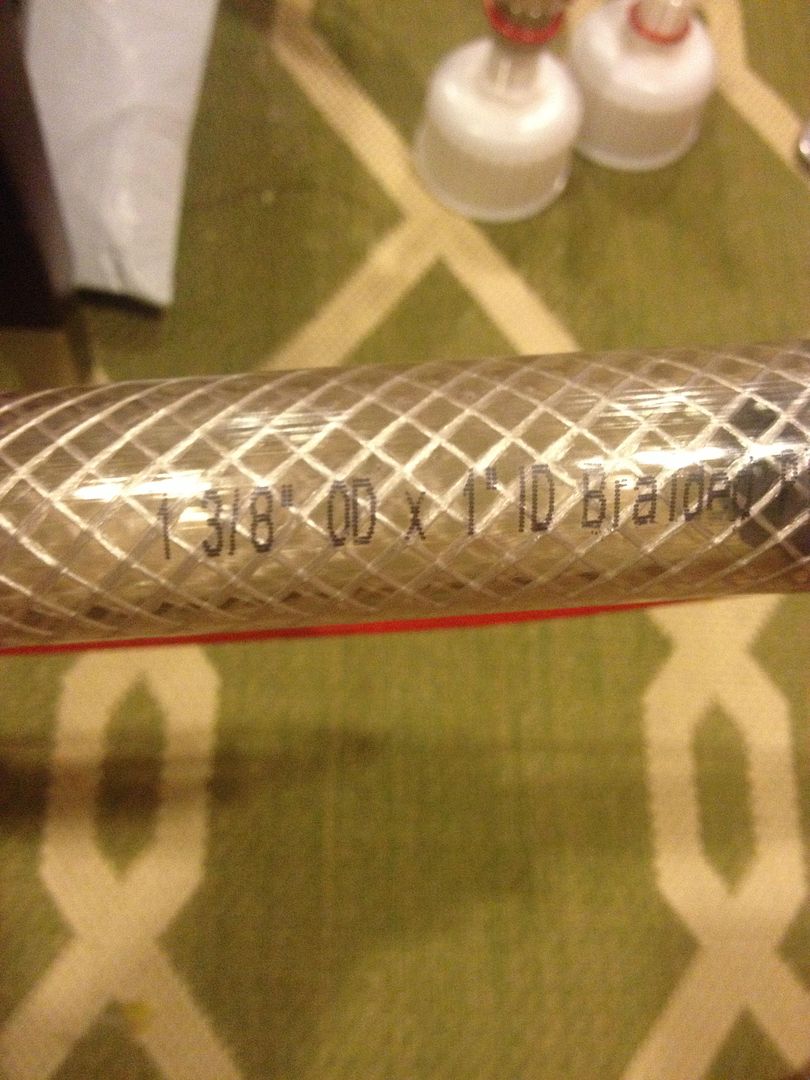
1” ID Braided Vinyl tubing (Fill line) Depends on your car and preference, mine are 18”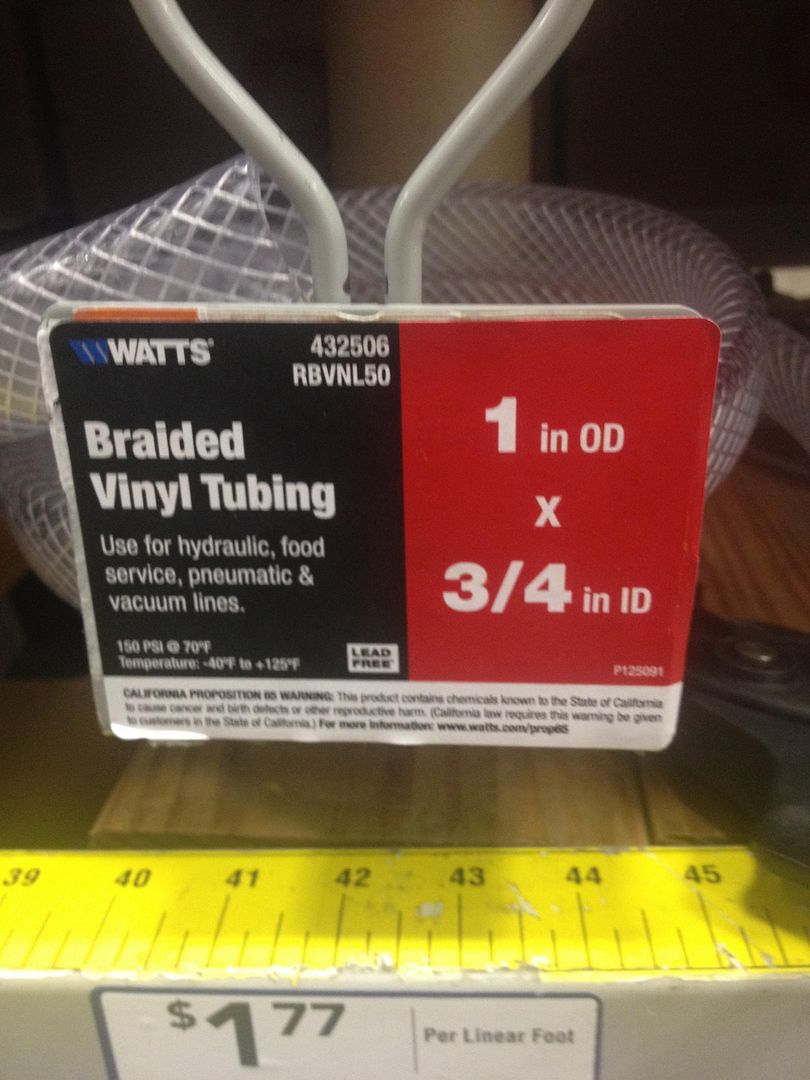
#7,8
Hose clamps for 1” OD hose or Crimp Clamps for 1” OD Hose (I use 4 per jug)
Hose clamp for 1.25” OD Hose
The crimp clamps I use, just limits the chance of cutting a finger or glove on a hose clamp. Complete personal preference. 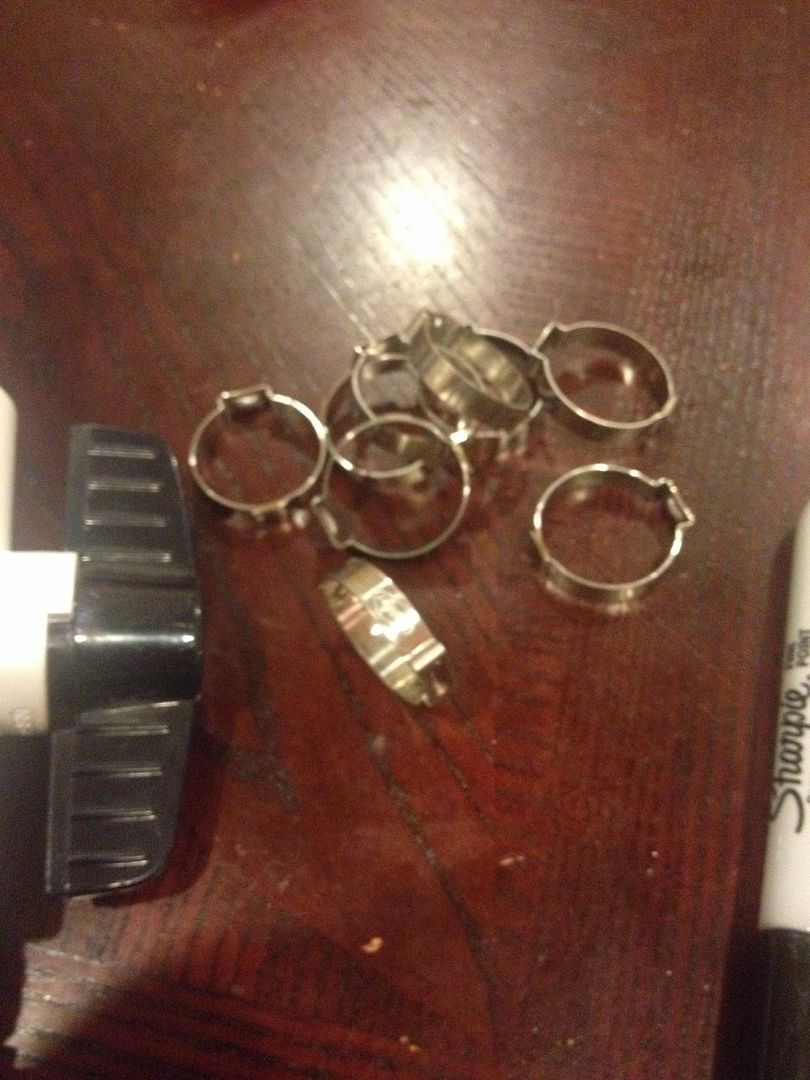
Ok so lets really get to work and make the right and look like the left. I made myself a large Pendleton and Coke and watched some football. 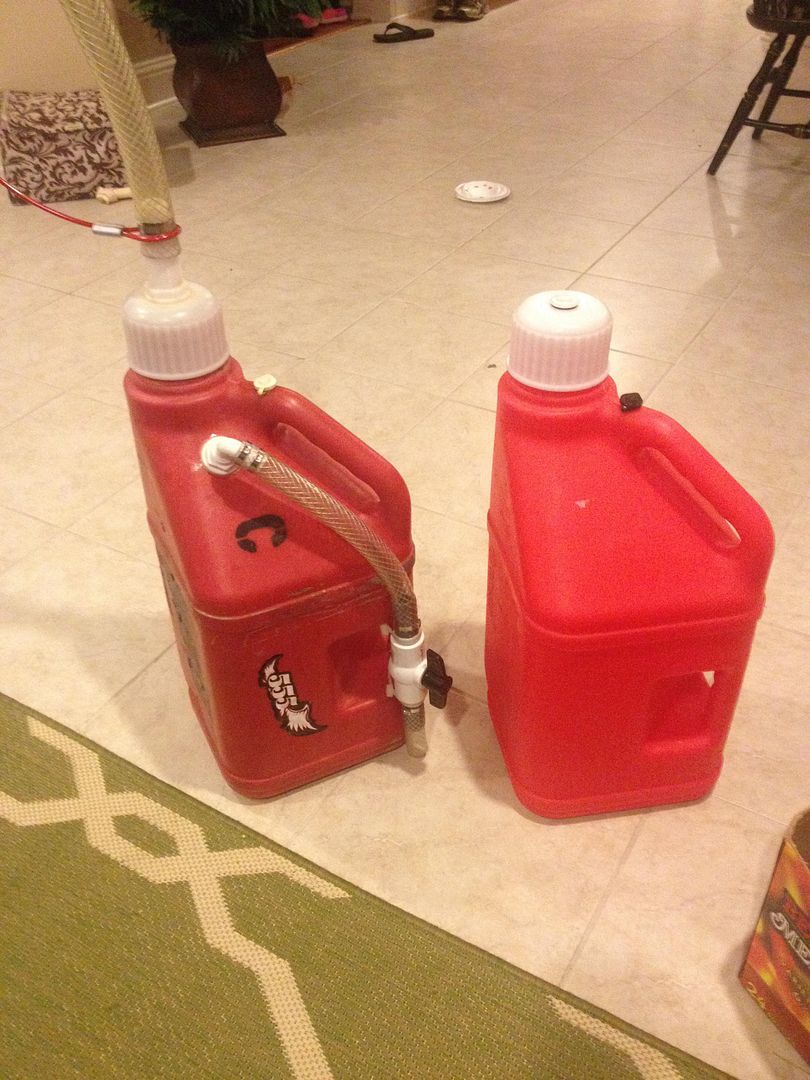
Remove the cap from the jugs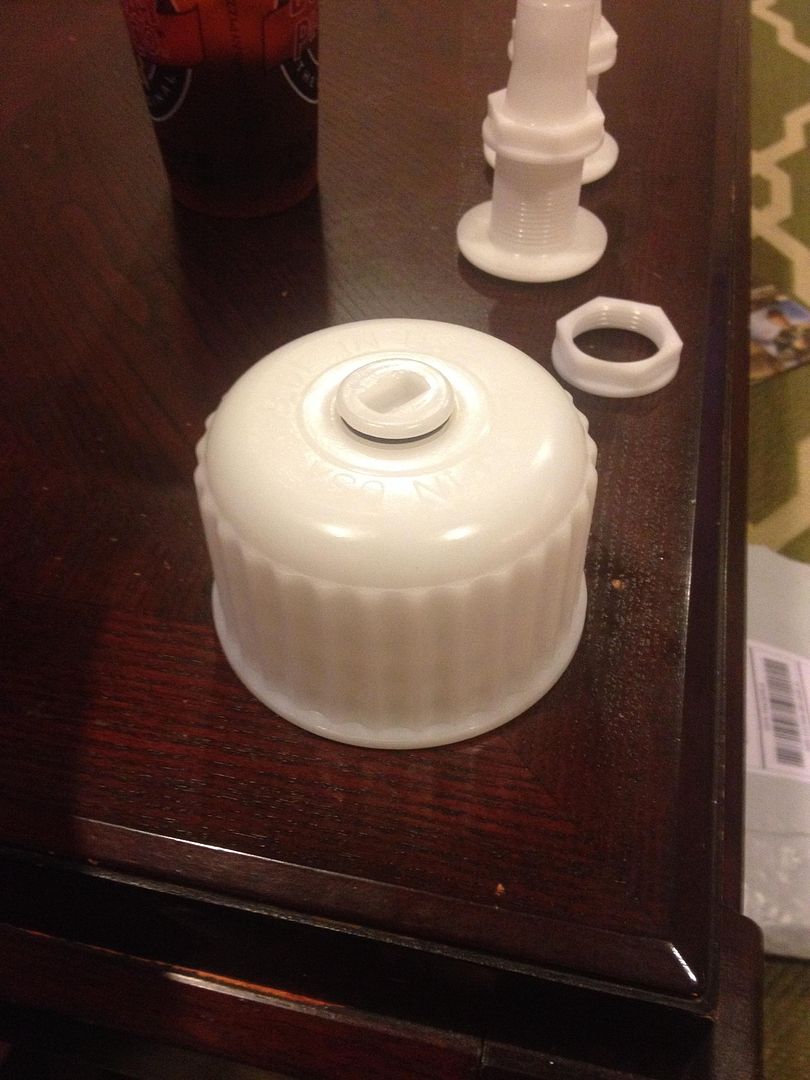
Now remove the center “bung”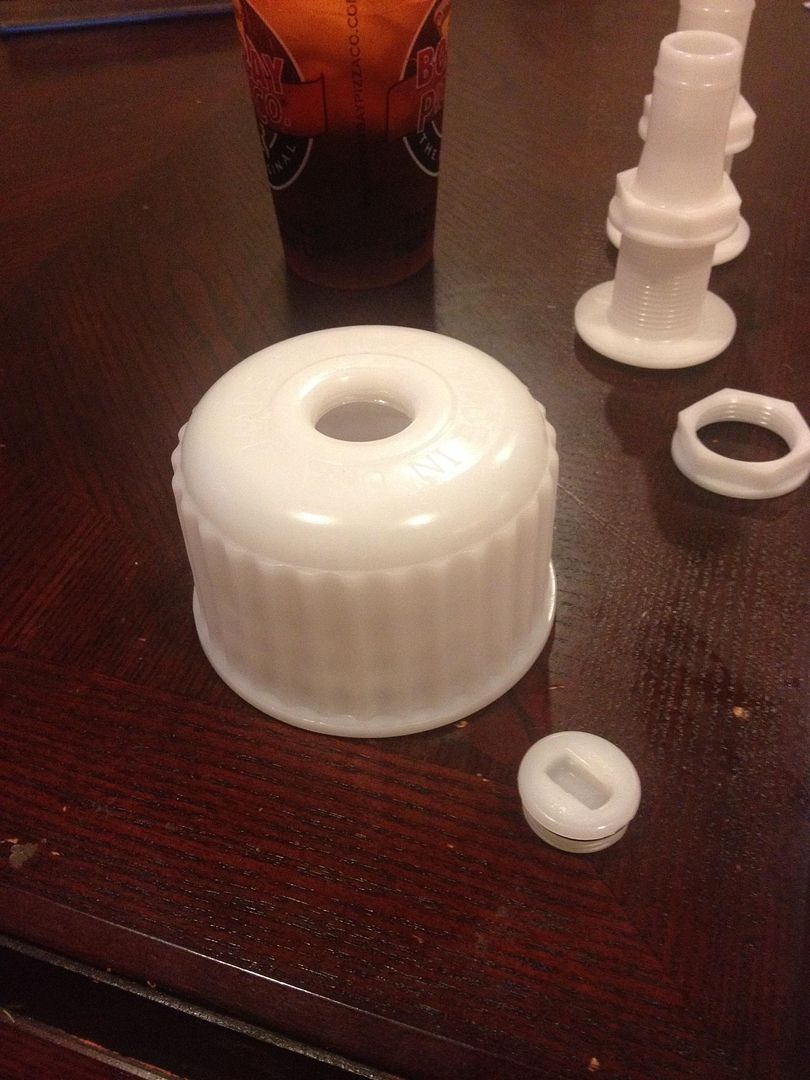
Now its time to drill out the cap to accept the 1” Thru Hull Connector. I use a StepBit from Harbor Freight and go to 1 3/8” Largest size
http://www.harborfreight.com/2-piece-ti … 96275.html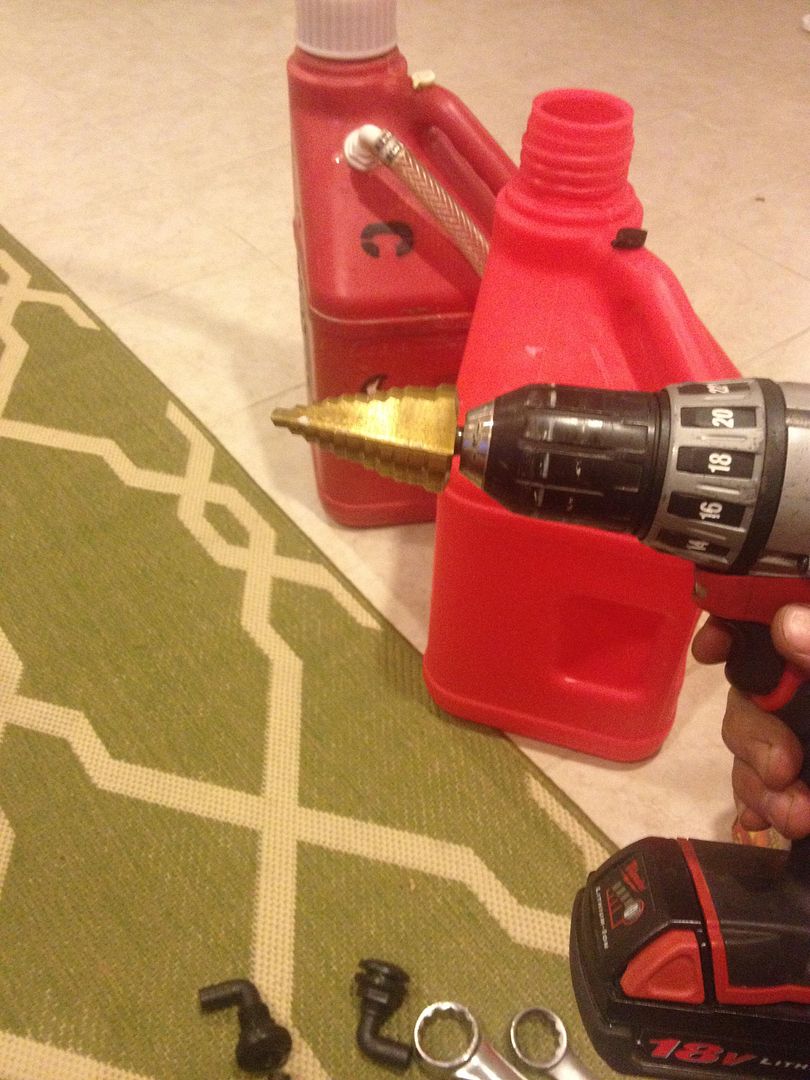
Comparison 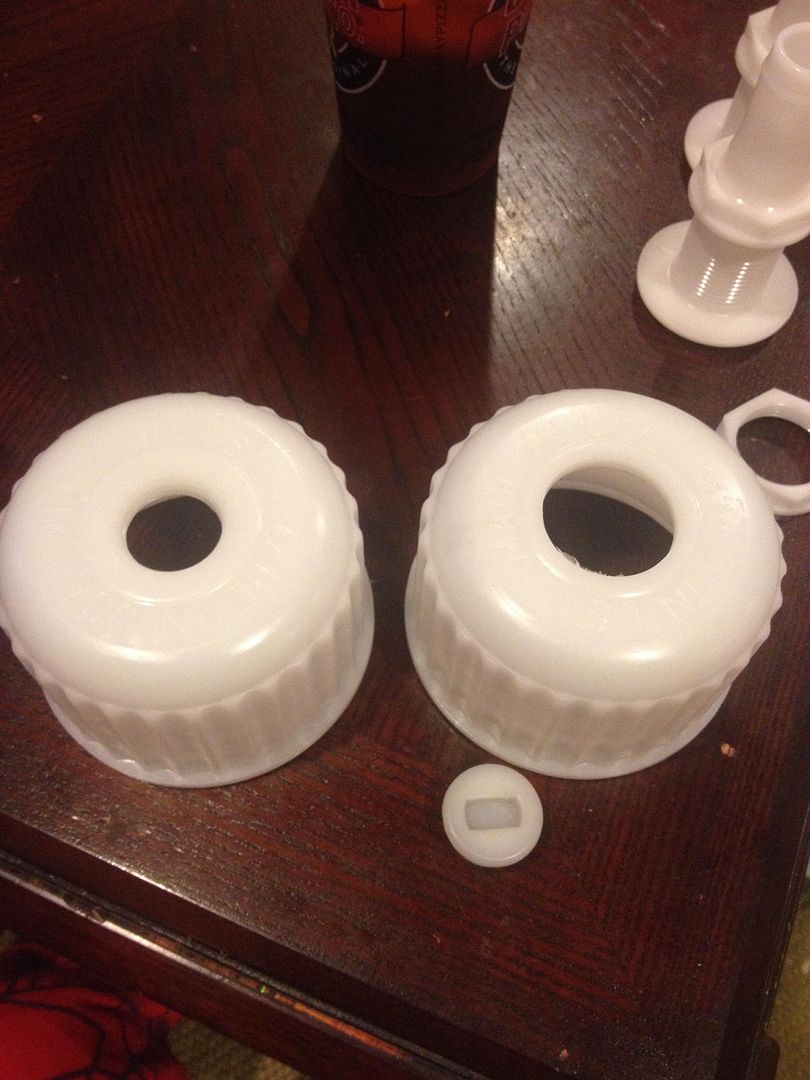
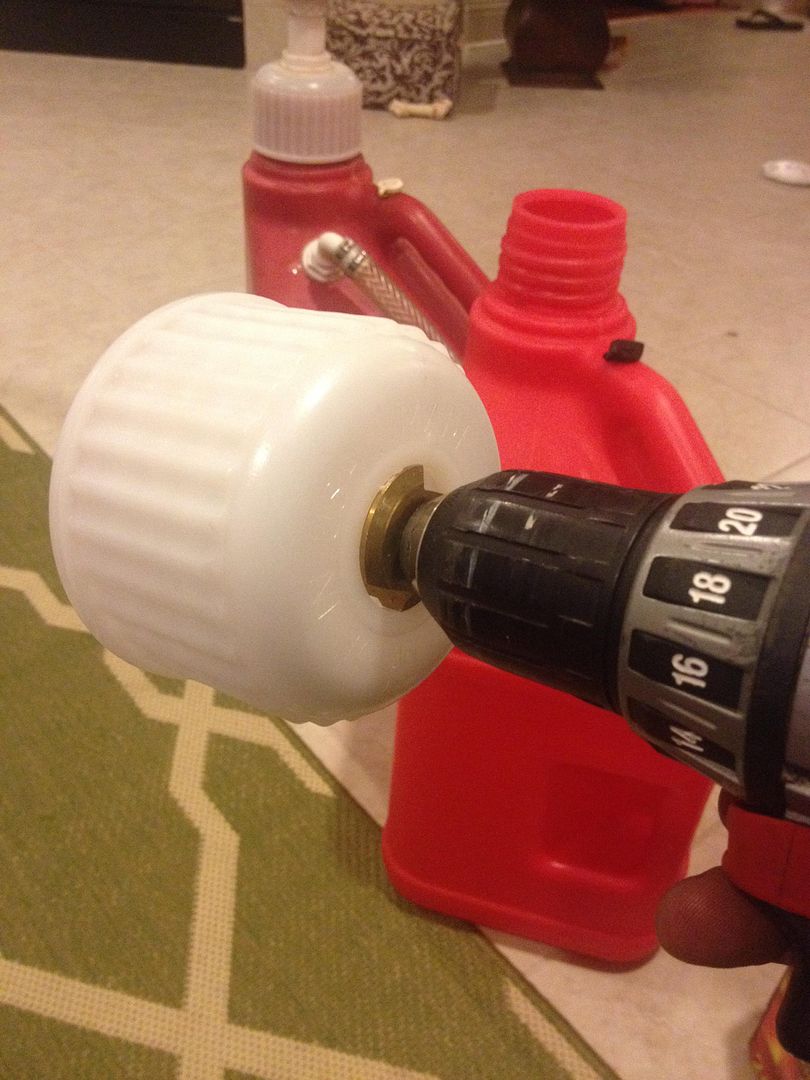
Now its time to marry the 1” Thru Hull with the cap. Get your sealer ready. As well as a 1 ½” open end wrench. 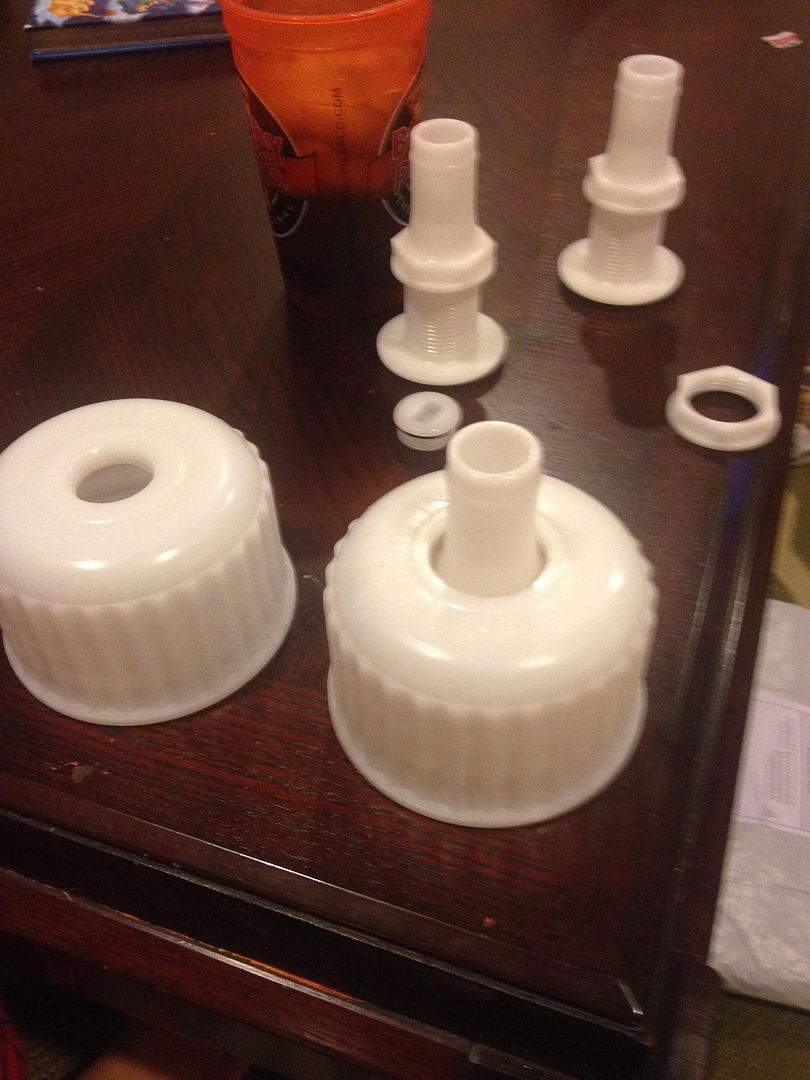
I sparingly apply Seal-All around the fitting and then pull it through the cap. Rotating to ensure I get good sealer coverage before putting the nut on. 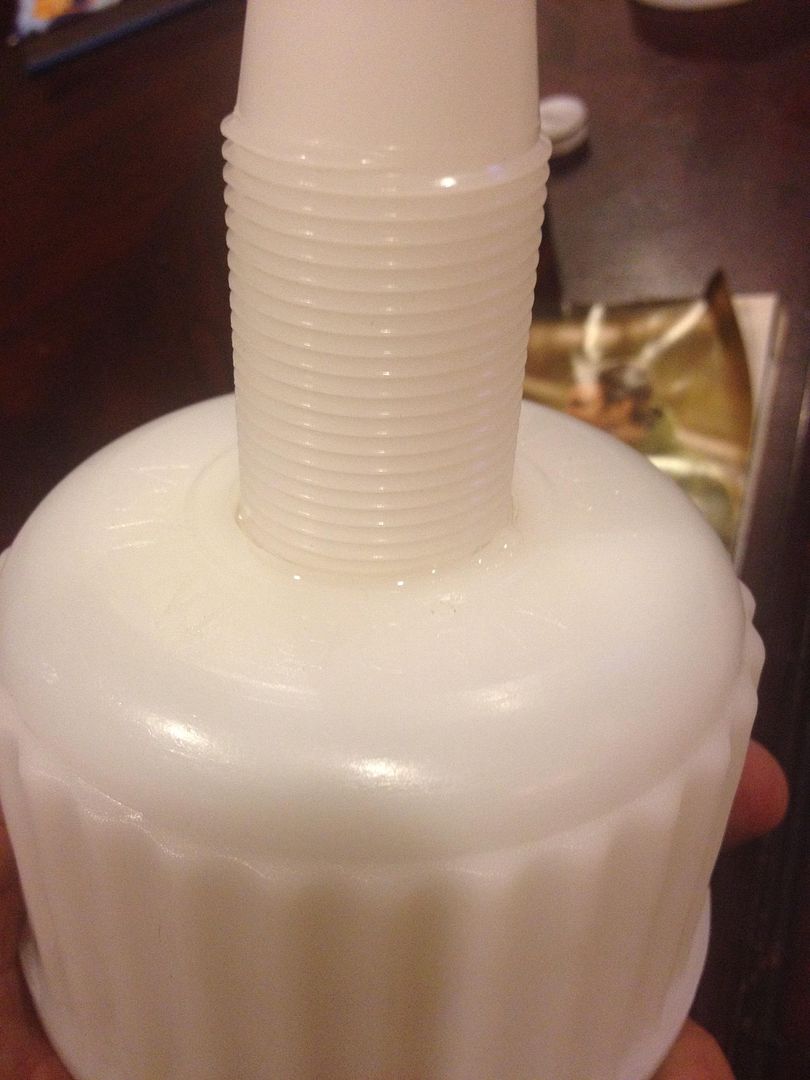
Screw on nut and tighten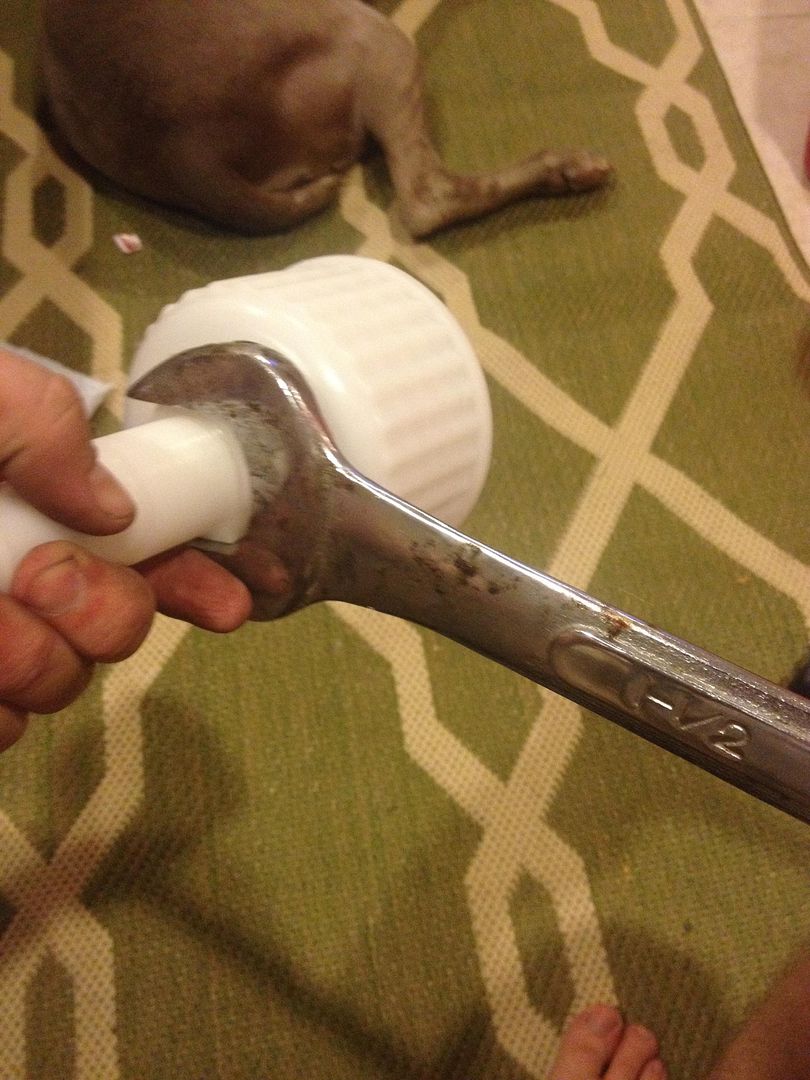
A few minutes later and I have all 3 done. 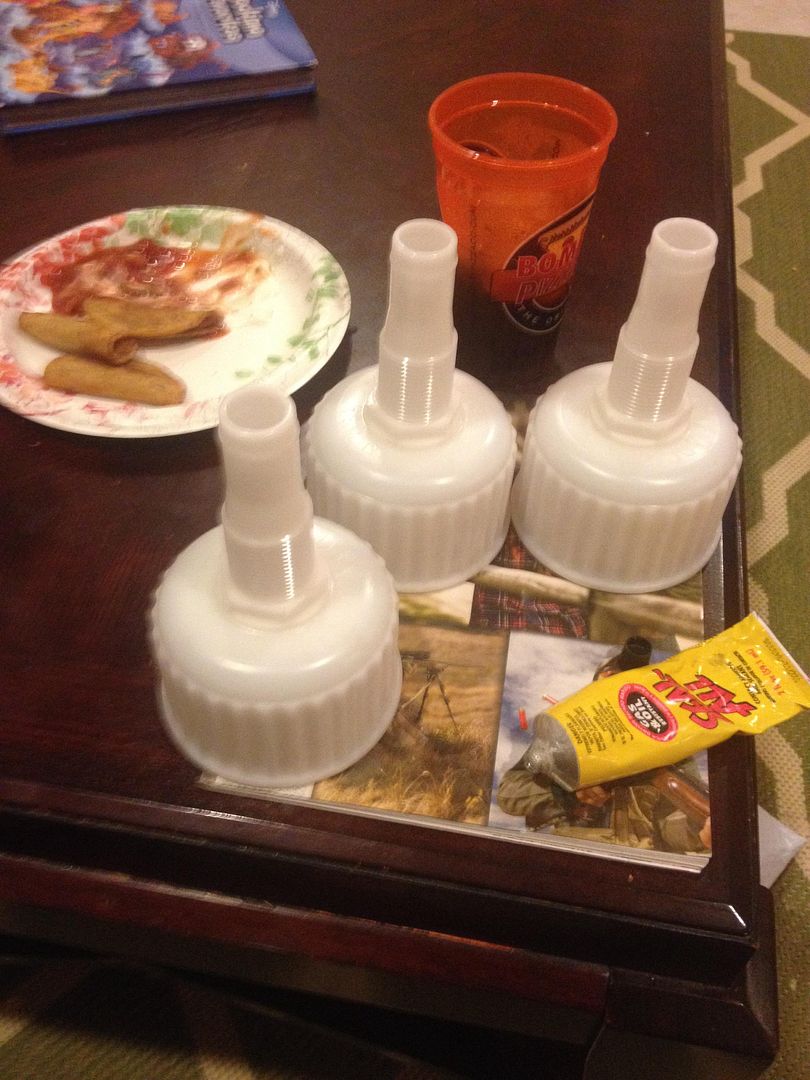
Now its time for the fill hose plugs. To ensure no spillage/leakage/evaporation.
Remember this pic from above?
We will be making this.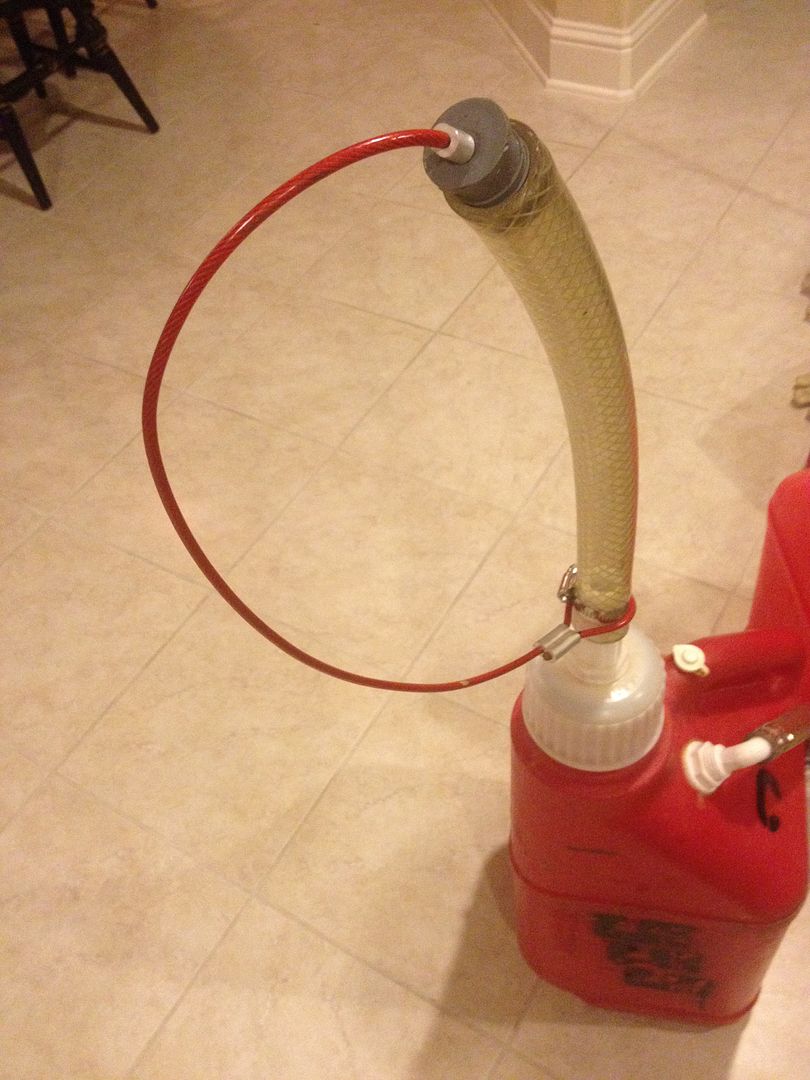
First order of business is drilling the plug cap to push the size of cable through that you purchased. 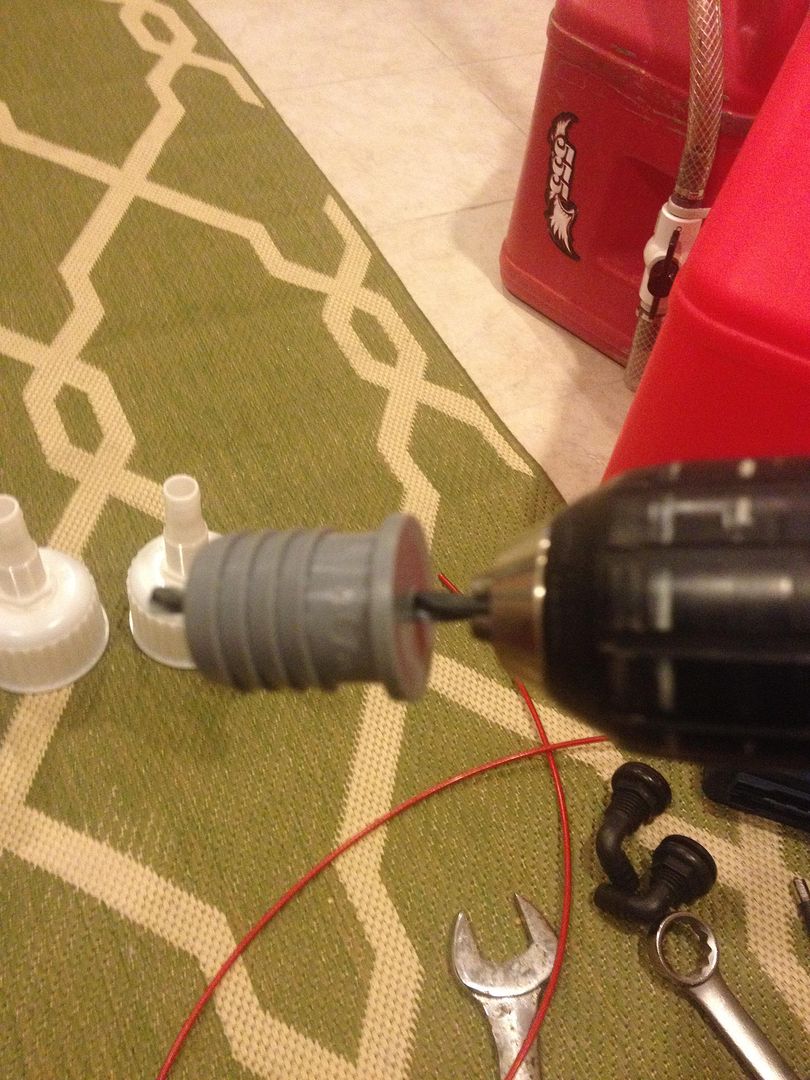
Next up is crimping a the plug into place on the cable. I put one on the very end, and hammer the crimp. Then slide the plug up tight, followed by the second crimp. Pays to have an edge you can set the cap on to hammer this crimp. In this picture the bottom one is done, the top two are ready to be slid up and hammered closed. 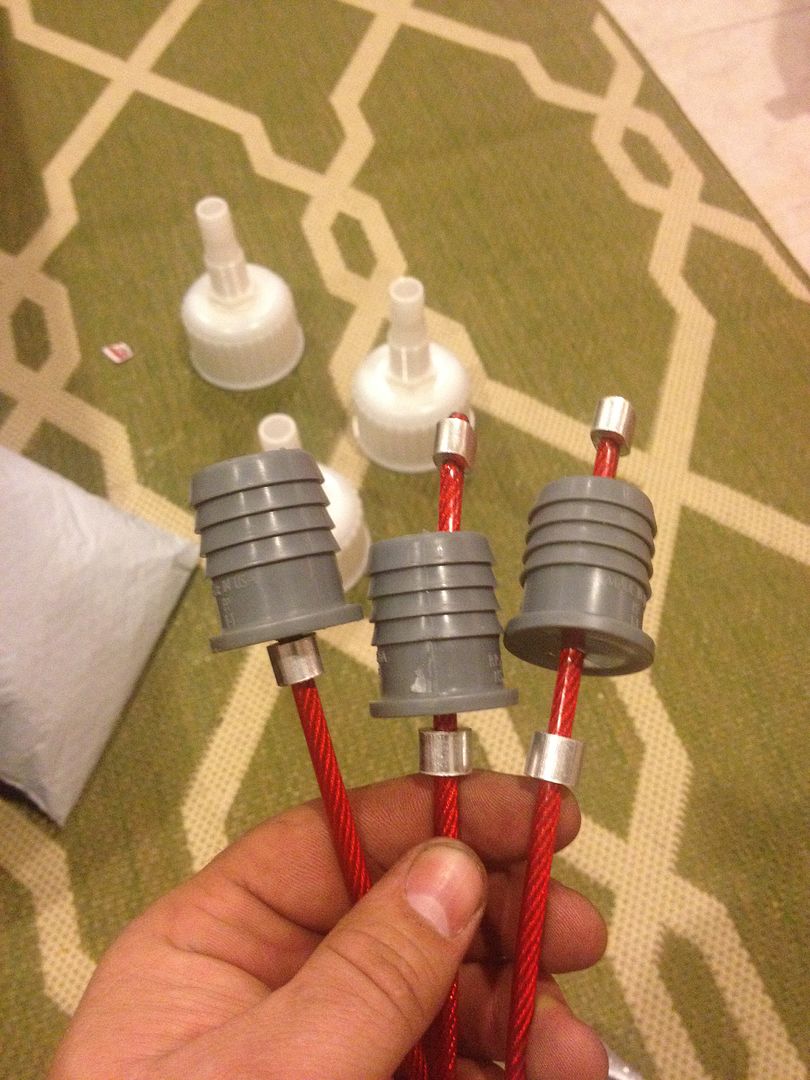
Now for the other end, make a loop around the filler hose, adjust for fitament and hammer the crimp. I try to make this tight enough it will not slip over a hose clamp.
]
Finished product. 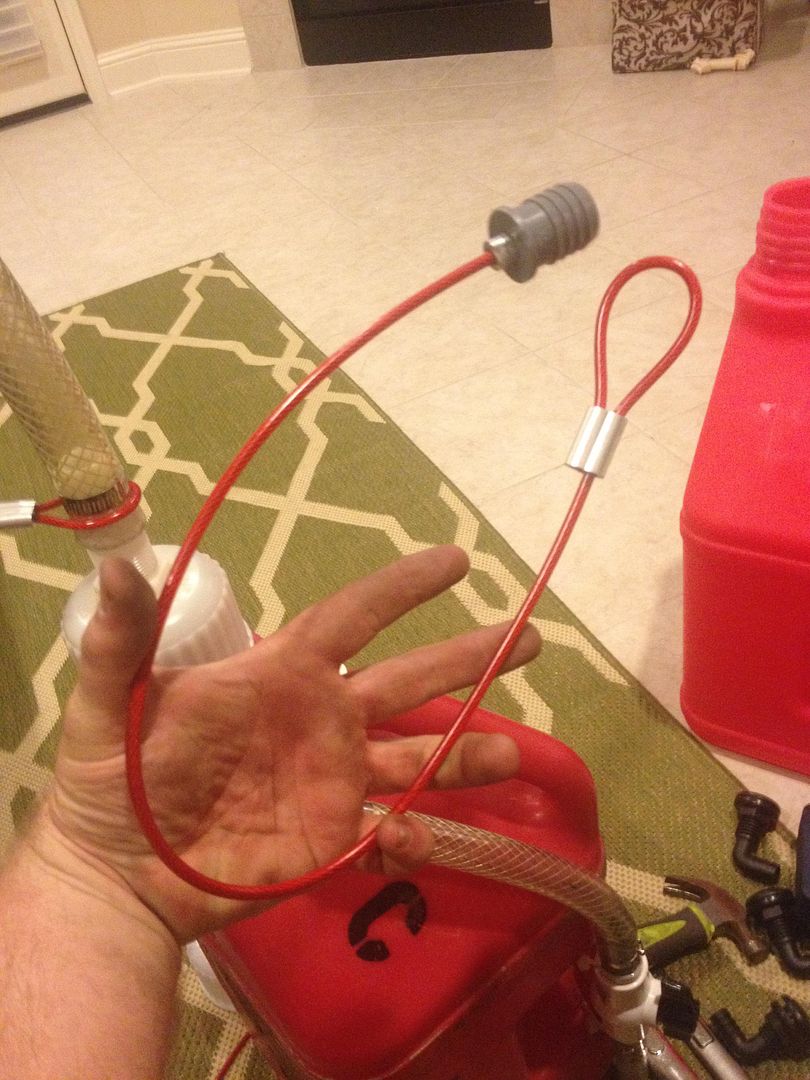
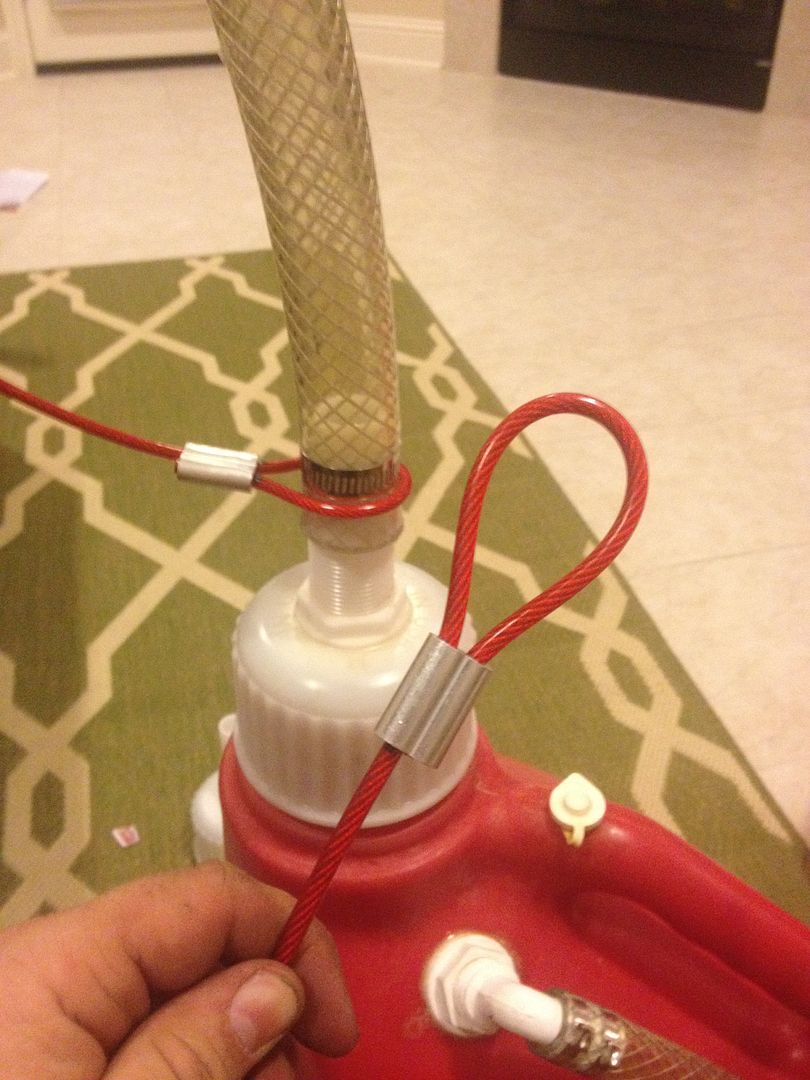
Now its time to finish the fill caps. Grab your caps with 1” Thru-Hulls installed, your cables with plugs you just made and your lengths of 1” ID fill hose and hose clamps.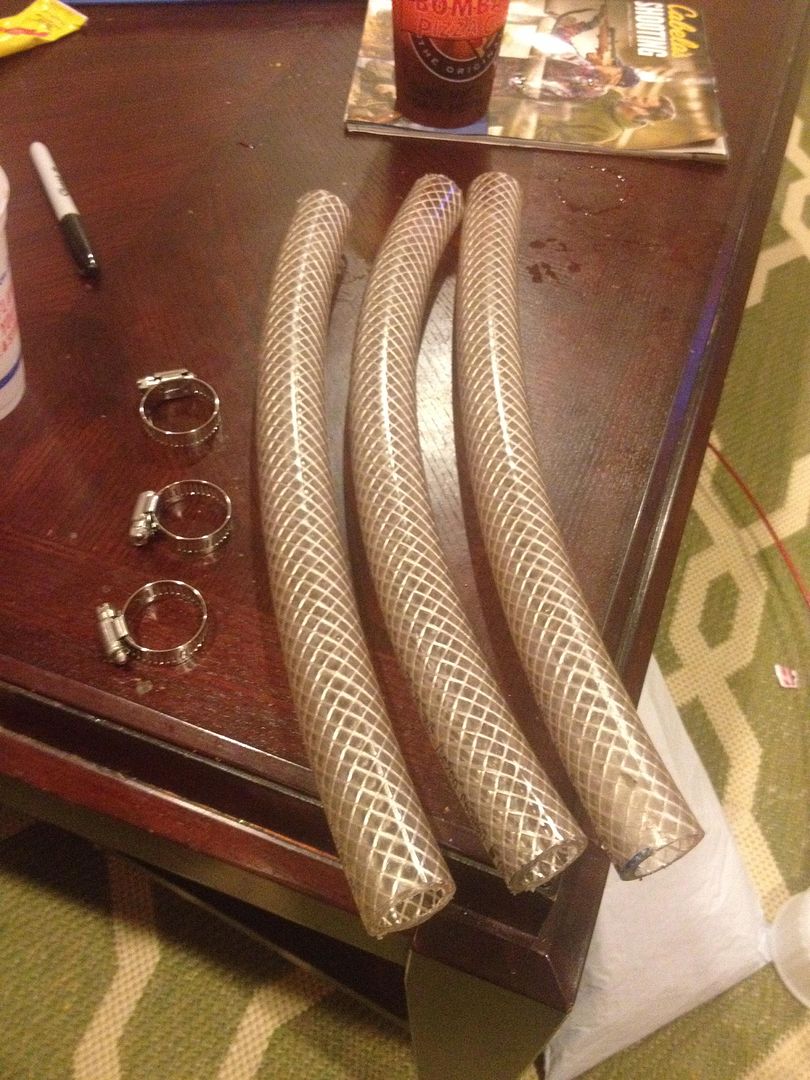
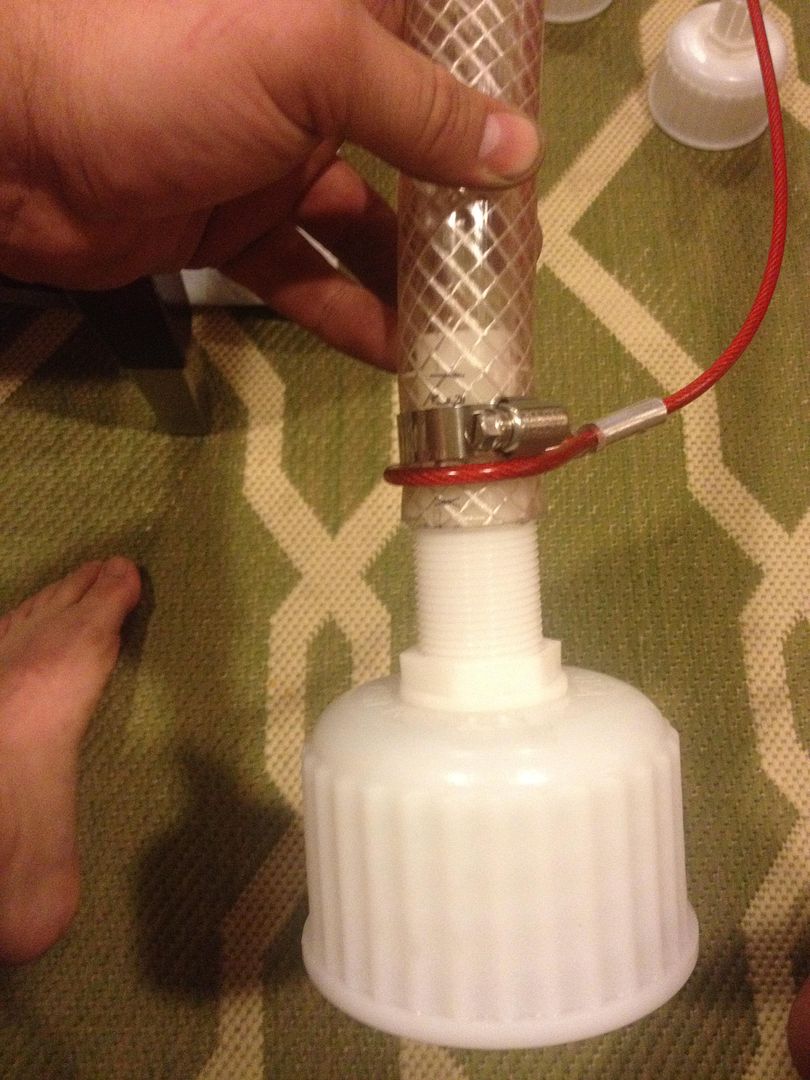
And there you have it. Fill side of jugs are done. 
Time to add the jug vent, and ball valve. This portion, this is what will allow you to open the ball valve while filling and allow the jug to replace fuel with atmosphere. 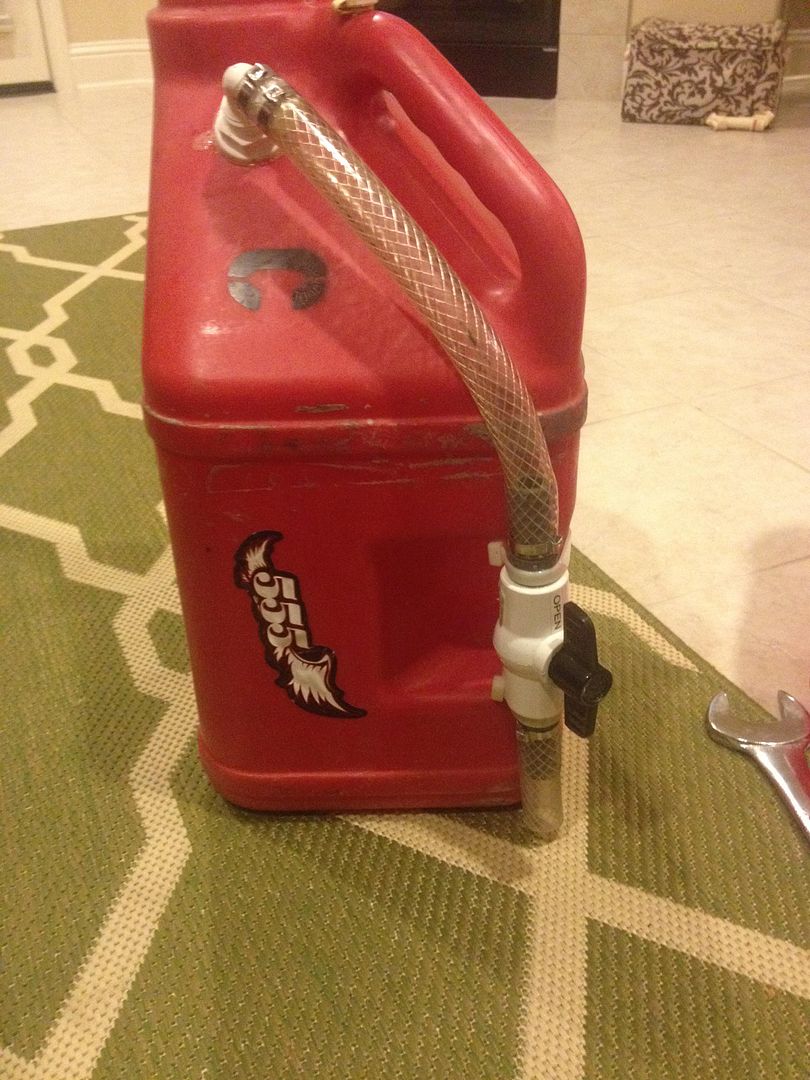
Lets start with the ¾” 90 Degree Thru Hull Fitting. If you have the 2 piece skip this step. If the 3 piece. I prefer to Seals all the back nut into place. Because once installed it will be inside the jug and there will be no way to tighten it should it loosen. 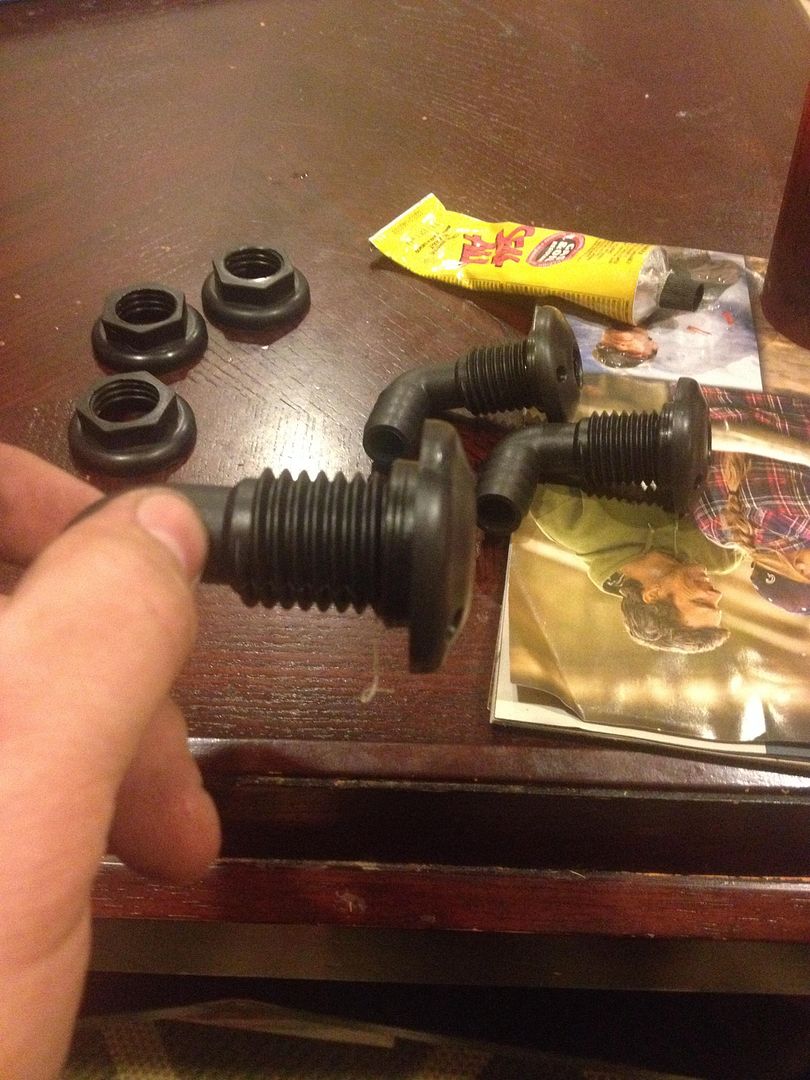
Now lets put a hole in our perfectly good jug and make it useable. For righties I like the valve the left side of the handle so that puts the vent hole on the left. 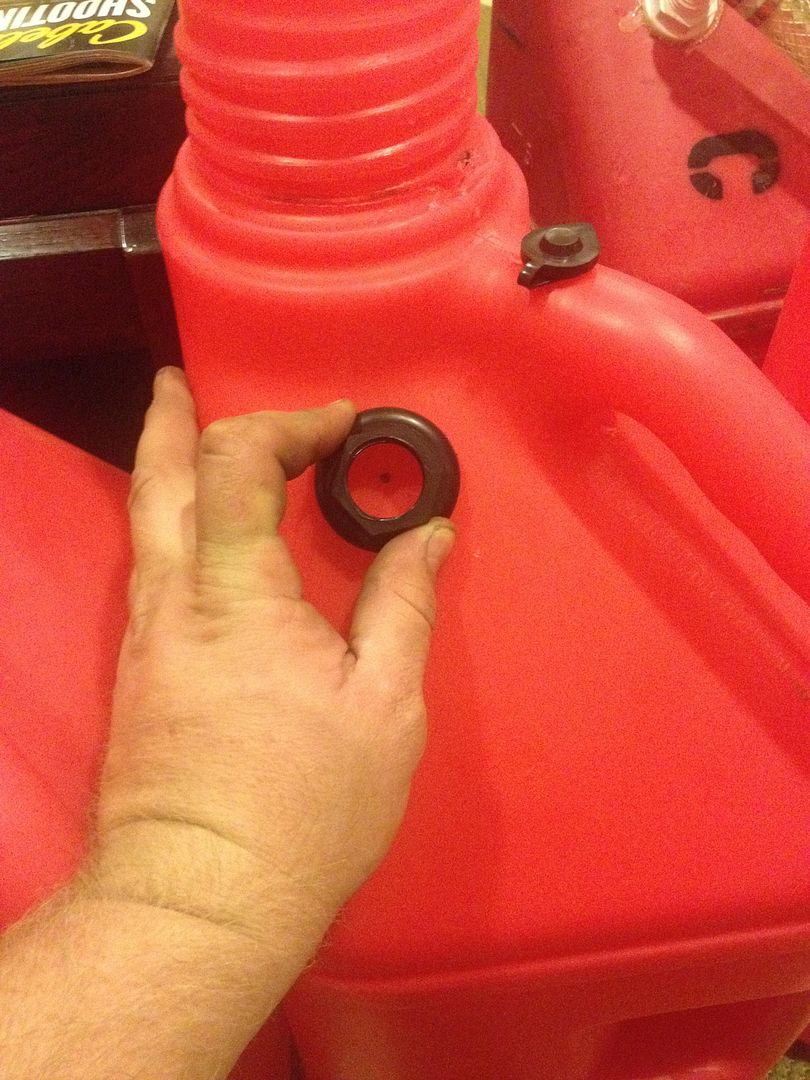
This is the fun part. I stick the fitting on a long screwdriver and try to fish it out the hole from the inside and grab it when it peeks through. On the 3-piece fittings you have to give it a good pop to get it over the elbow. 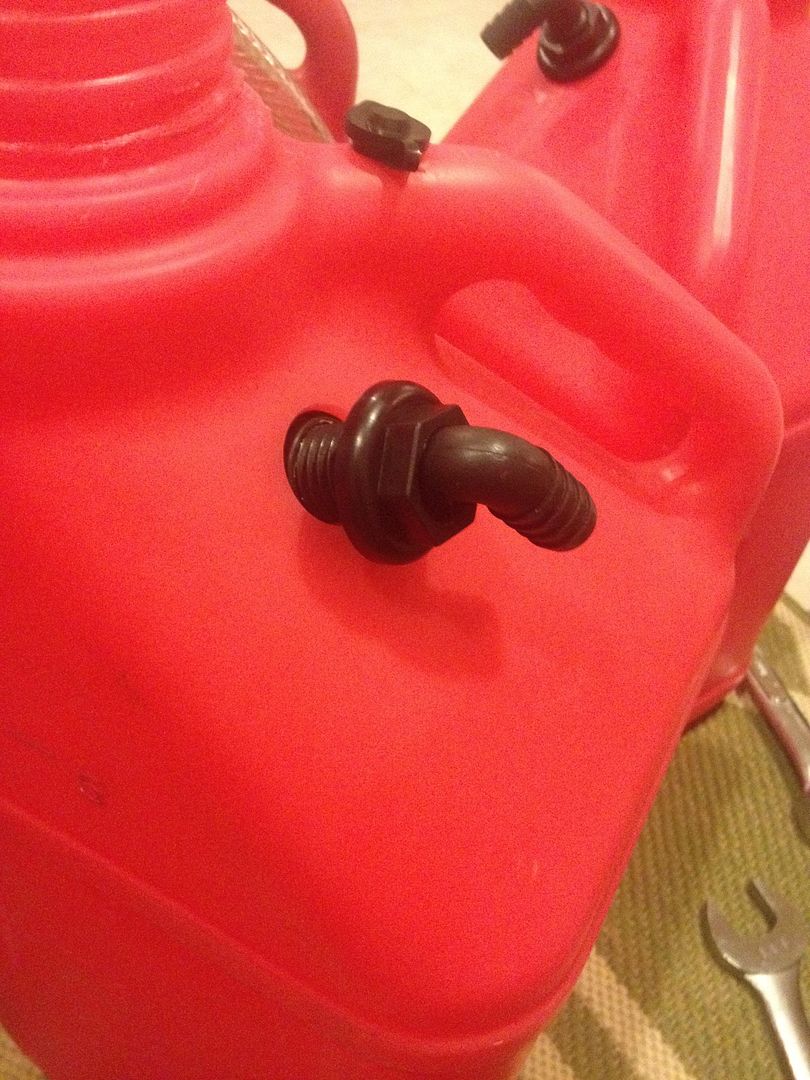
Time for SEALS-ALL and the wrench. My placement is parallel with the handle. 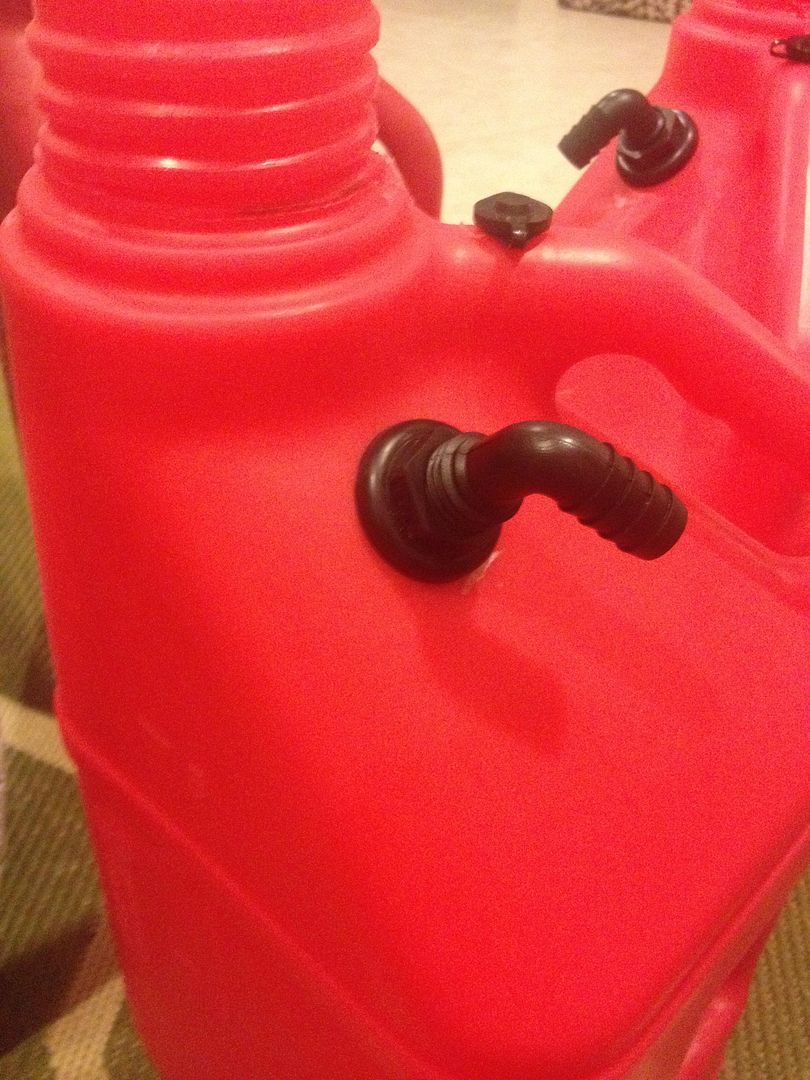
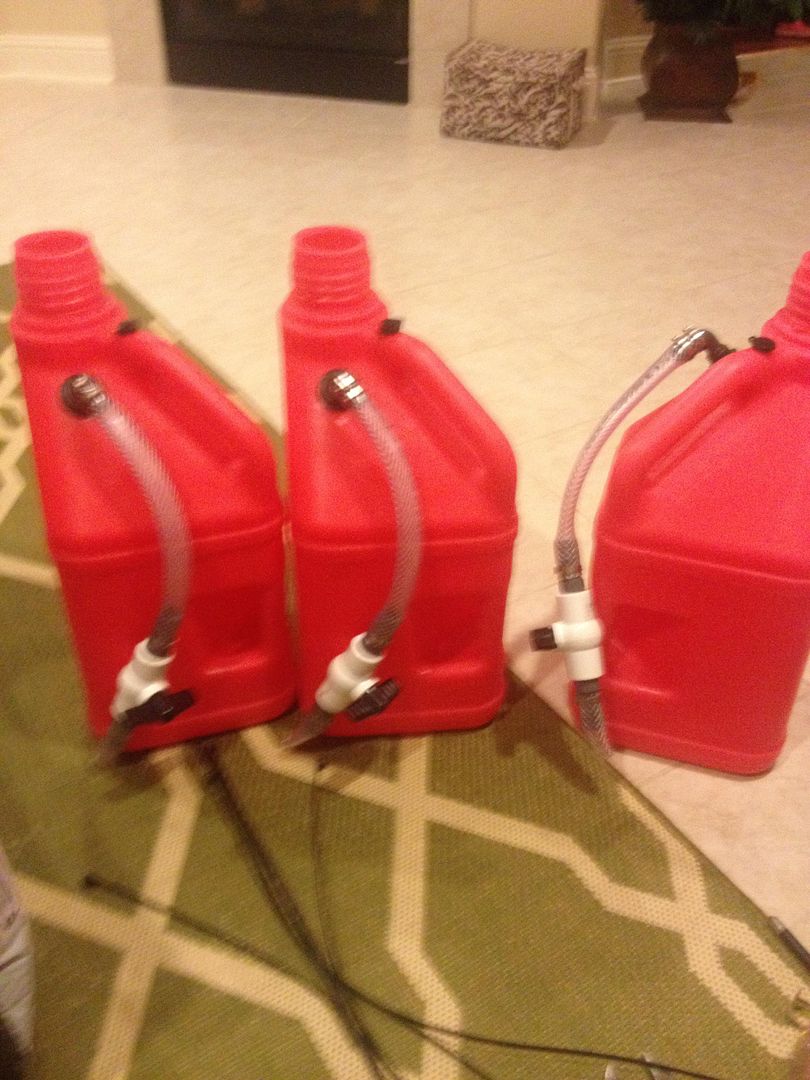
Now lets go back to the Ball valves we made earlier. They will end up installed with the valve roughly at the same height as the lower handle and Ziptied to lower handle. So measure your ¾” ID hose accordingly. Here are what mine look like during and ready for install. 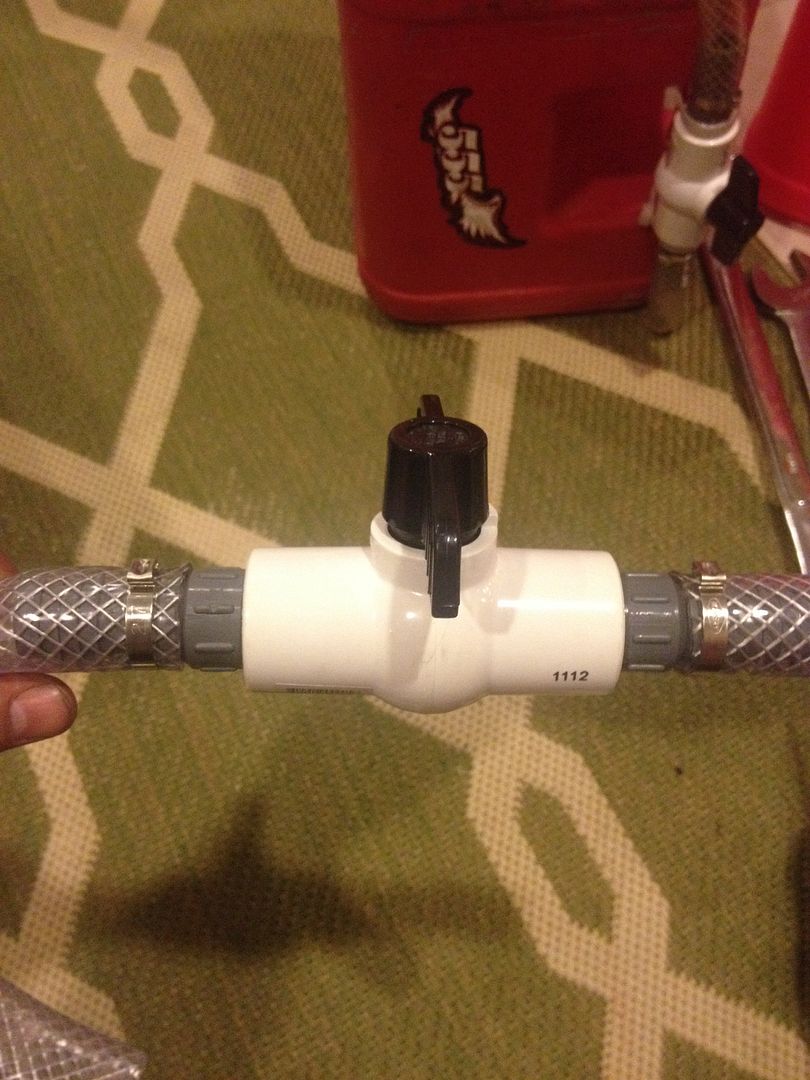
Now its time to marry the vent assembly to the Thru-Hull elbow for the vent. 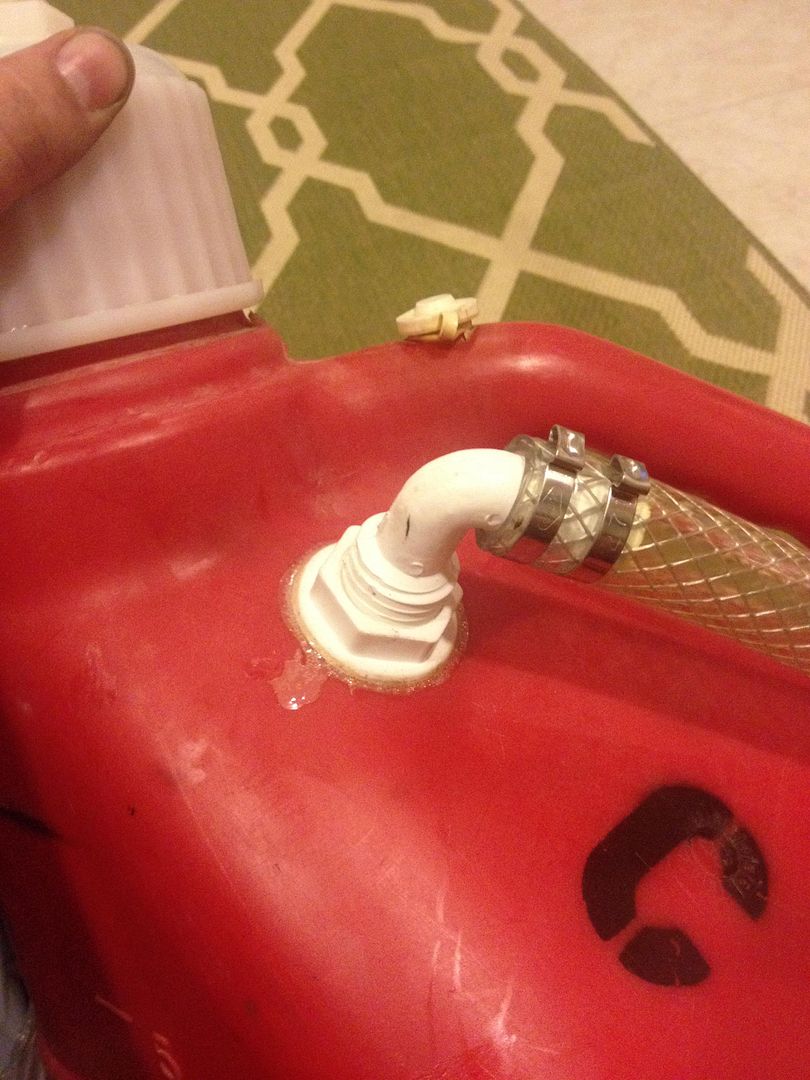
ALMOST DONE!!!!!
Time to bust out some big daddy zip ties. I run two on each ball valve around the lower handle top and bottom.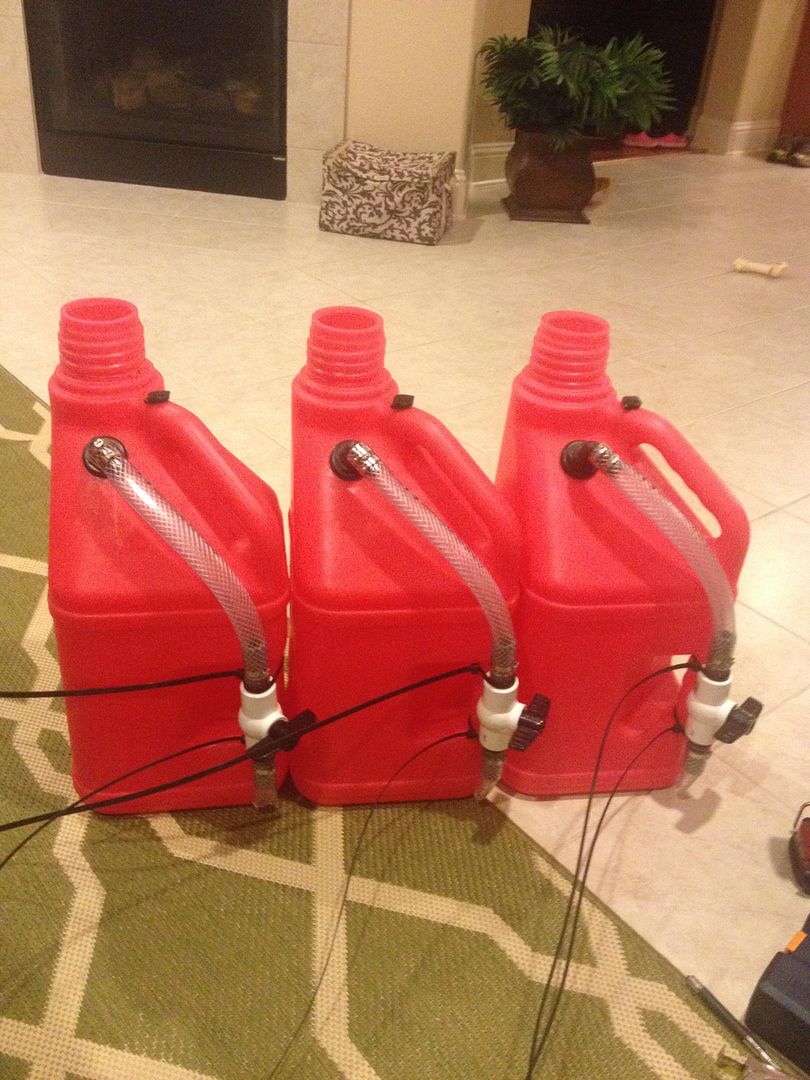
Trim the Zip ties and install the caps you are ready to rock. 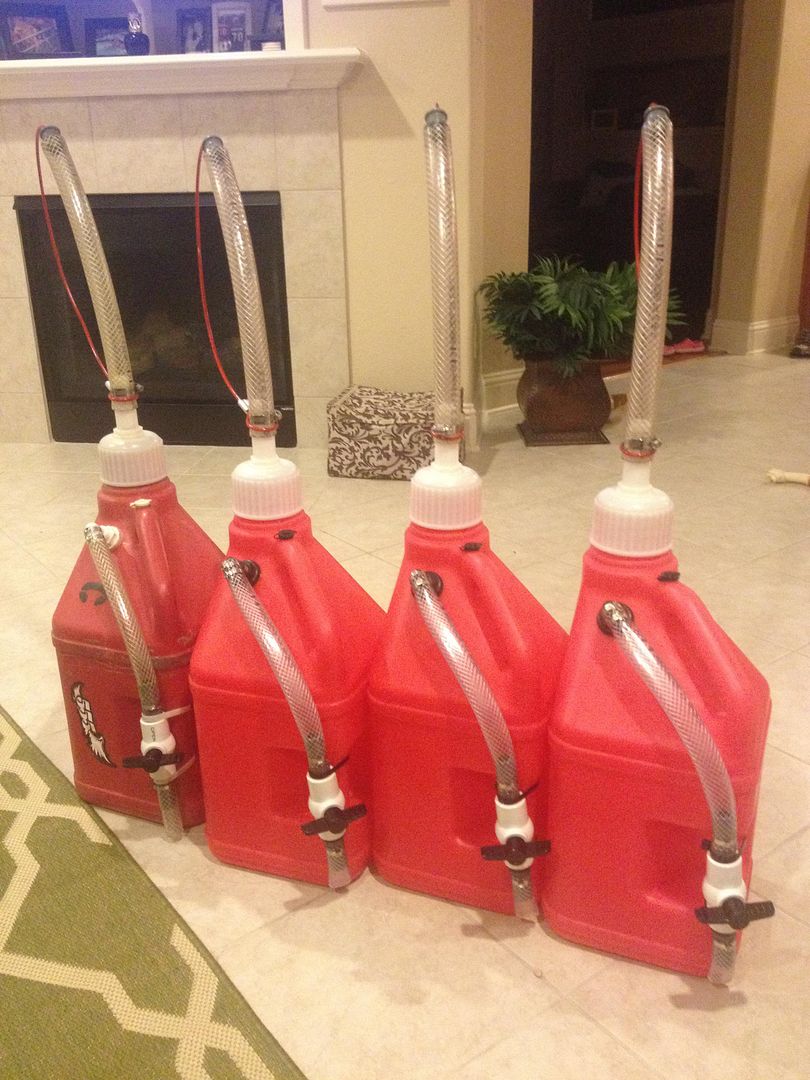
#20 Border Patrol Cherokee "BPC"
#22 Pink in the Middle Comanche "Double D"
#24 Green Door Handle Scrapping Corolla